Table of Contents
This guide explains how to blur Images in Word, with clear steps, practical tips, and important checks before you begin.

Here TipsMake. com share to you how to blur images in Word, invite you to follow.
Method 1: Blur images in Word
Step 1 : Insert the image into Word.
First you choose Insert -> Picture .
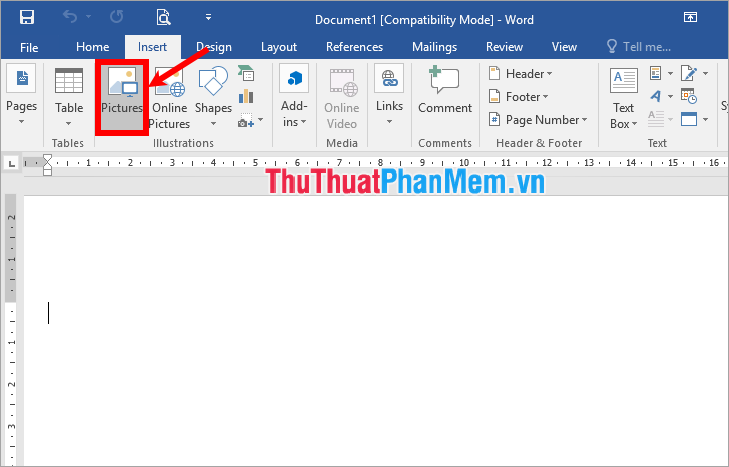
The Insert Picture window appears, select the images you want to insert into Word and select Insert .

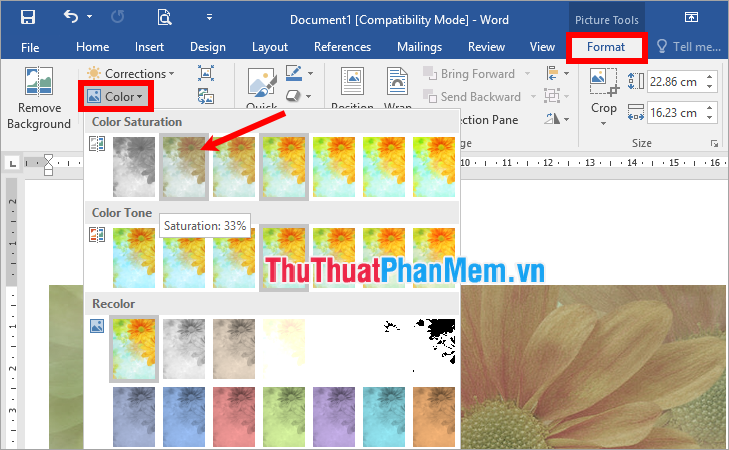
Step 2 : After inserting the image to change the opacity of the image you select the image and select Format -> Color -> select the blur you want.
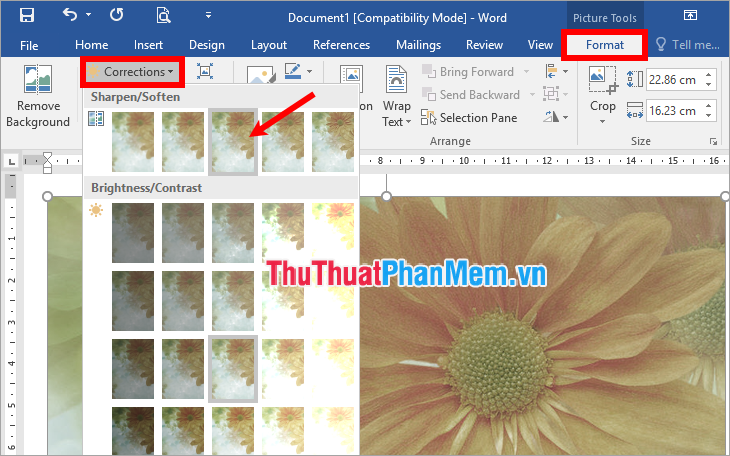
Step 3 : To change the brightness of the image you select Format -> Corrections -> choose the brightness you want.
Method 2: Insert watermarks in Word
Step 1 : Choose Design -> Watermark -> Custom Watermark.
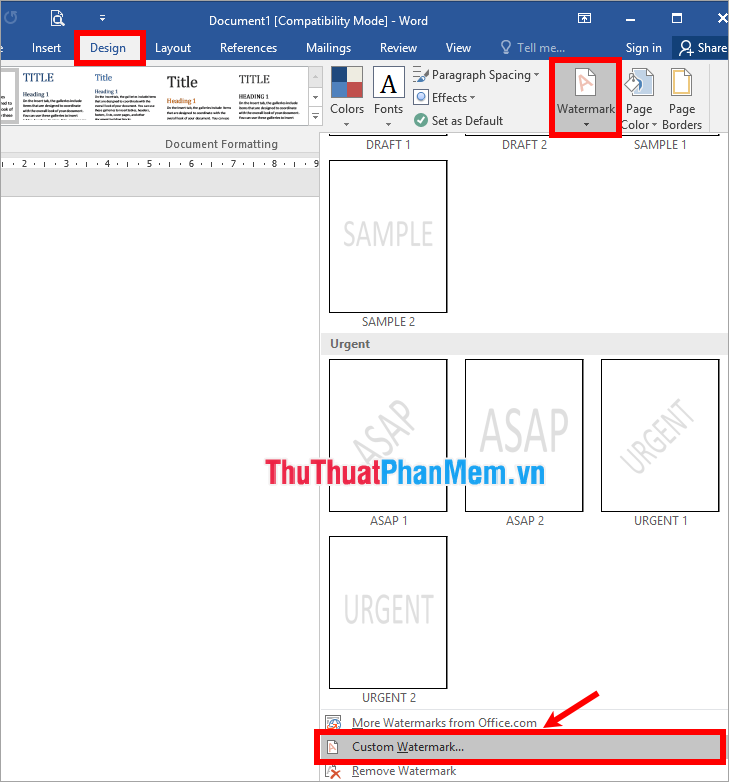
Step 2 : The Printed Watermark window appears, select Picture watermark and select Select Picture.

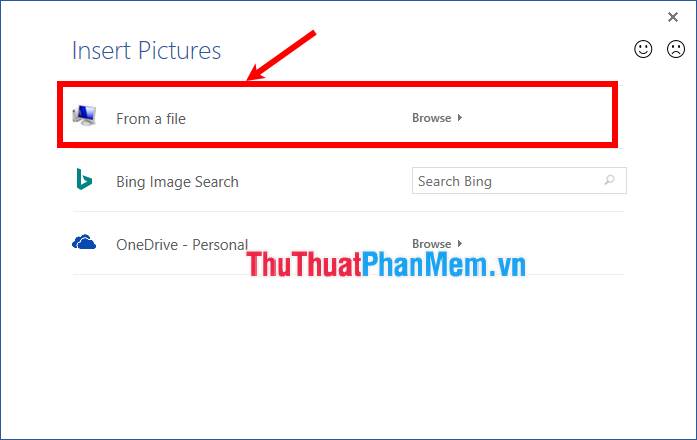
Step 3 : In the Insert Pictures section, you can add images on your computer ( From a file ) or you can search for images on the web via Bing tool ( Bing Image Search ) or images stored on OneDrive. For example, if you want to add images on your computer, select From a file .
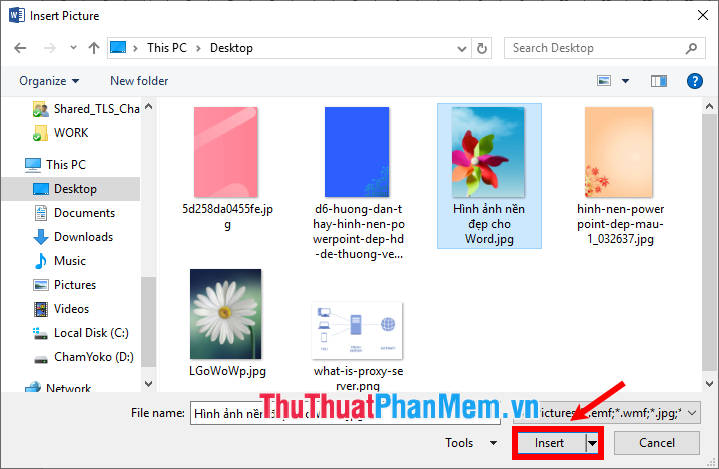
The Select Picture window appears, select the images you want to add to Word and select Insert .
Step 4 : Next to select the width of the image you choose in the Scale , tick the Washout check box to blur the image and click OK to add the watermark.

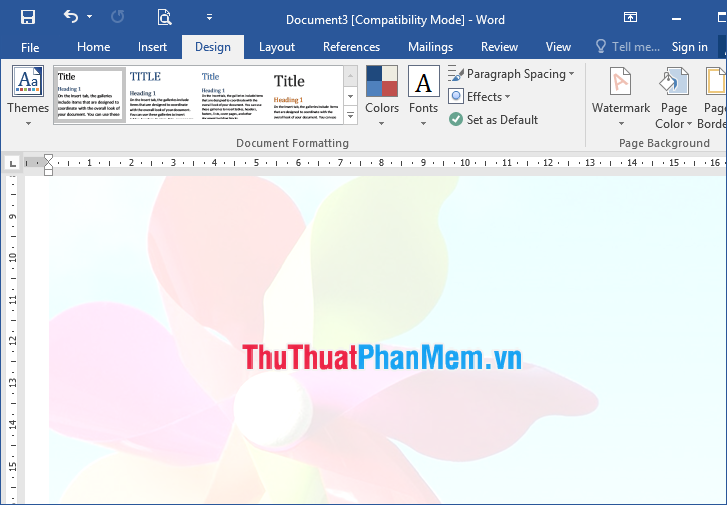
So you have added blur in Word.
 ;
;
Above TipsMake. com showed you how to blur images in Word. Hopefully through this article, you will be able to quickly blur images in Word. Good luck!
FAQ
What should I know about Blur Images in Word?
Focus on the key features, requirements, limitations, and practical use cases explained in this guide.
How do I get the best results with Blur Images in Word?
Follow the recommended steps, use current software or information, confirm compatibility, and review settings before major changes.
Are there any risks or limitations?
Potential limitations depend on compatibility, data quality, cost, privacy, support, and how the product or method is used.
Related Articles
 How to Blur Images Online5 minutes read
 How to Blur Photos in Paint4 minutes read
 Use the Blur Feature in Photoshop13 minutes read
 How to Blur Photos in Corel3 minutes read
 Insert Images into Word 2016 and Align Images in Word 20166 minutes read
 Macromedia Flash - the Blur Effect Changes Between Two Images: Step4 minutes read
Reader Comments 0
Sign in with email or Google to join the discussion.