Table of Contents
Explore excel selection pane: a great tool you shouldn't miss, including the key concepts, practical examples, important considerations, and useful guidance.
Instructions on how to open the Excel Selection Pane
Simply click on the Find & Select tool and then select Selection Pane below to open the Excel sidebar.
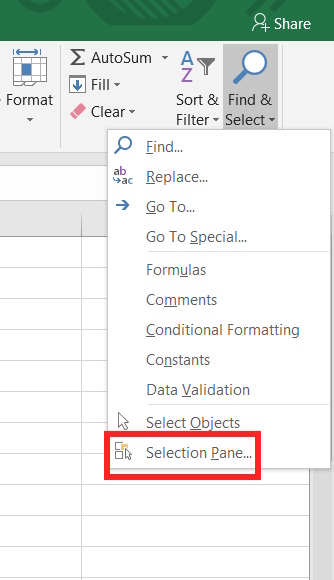
Immediately afterwards, on the right side, you will see the Selection Pane with all the objects in the data table.
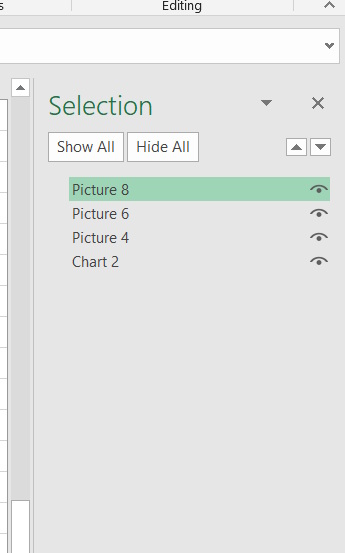
Manage layers and stacking order in the Selection Pane
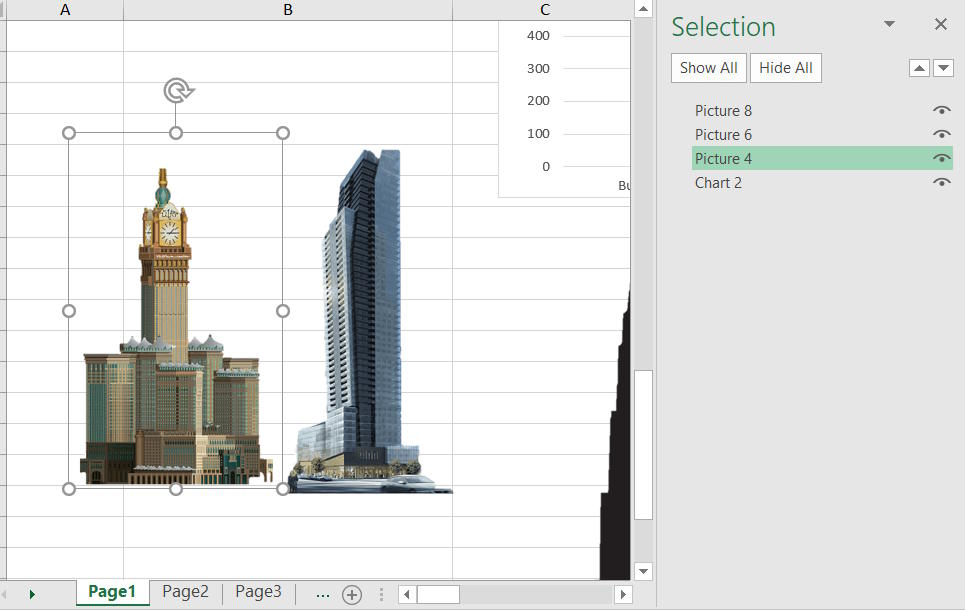
Currently, the selected object is displayed in the Selection Pane
When you click on an object in the Selection Pane, a border around that object will appear in Excel.
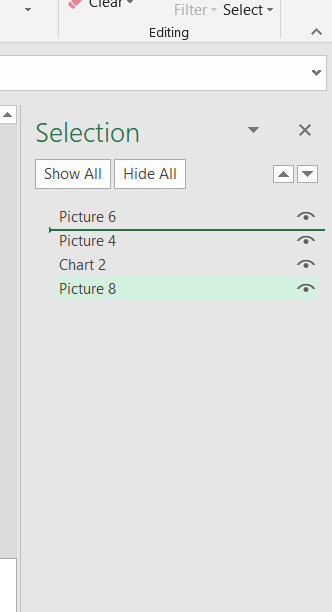
How to rearrange the layers
The order of names in the Selection Pane matches the order of items on the grid; the item at the top of the list is the first item in the spreadsheet, and the item at the bottom of the list is after all other items.
To rearrange them, simply click and drag the item name up or down in the list.
Hide objects in the Selection Pane
Turn individual display modes on/off
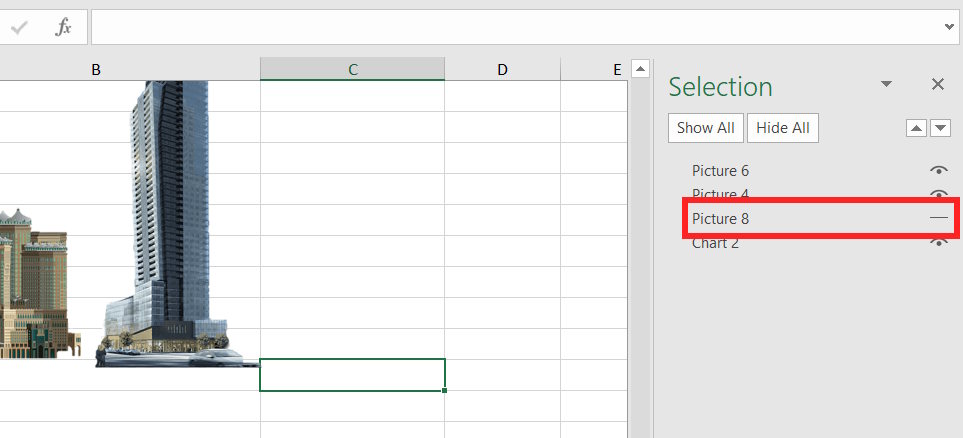
Each object in the Selection Pane has an eye icon . When you click this eye icon, the object will be hidden in the Excel grid. Click it again to show the object in Excel.
Hide all objects at once
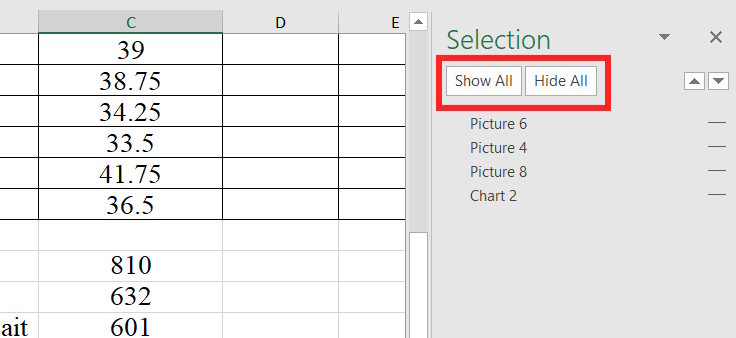
Right in the Selection Pane, you'll find the Hide All and Show All options to hide or show all objects, and show all objects again.
If you're entering large amounts of data and your spreadsheet is cluttered with icons, text boxes, and images, pressing Hide All will quickly hide all objects in Excel.
Rename and group objects in the Selection Pane
Rename an object in the Selection Pane
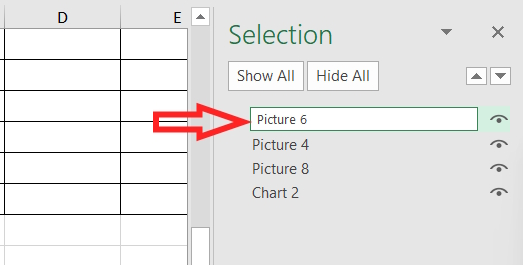
Simply double-click on the object you want to rename and then enter the new name for the object.
Group objects in the Selection Pane
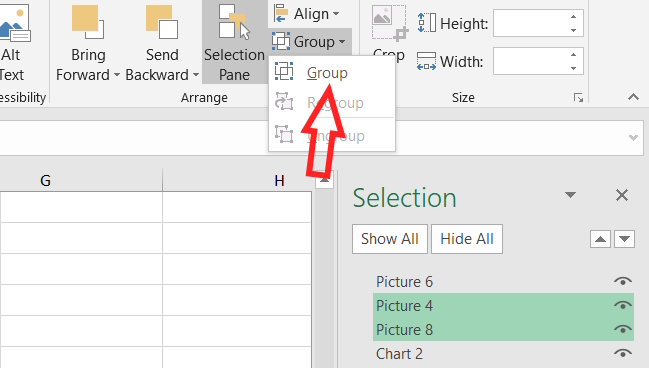
In addition to grouping objects directly in the Excel grid, you can also group them from the Selection Pane. Hold down the Ctrl key and click on the objects you want to group. Then, in the Shape Format or Picture Format tab, click Group or press Ctrl+G.
Then we just enter a name for this group of objects to manage them, and that's it.
Final Thoughts
Understanding excel selection pane makes it easier to evaluate the information and apply the most relevant recommendations. Focus on the key points above and verify details that may change over time.
FAQ
What is excel selection pane?
Explore excel selection pane: a great tool you shouldn't miss, including the key concepts, practical examples, important considerations, and useful guidance.
What key points does this article cover?
The article focuses on Instructions on how to open the Excel Selection Pane, Manage layers and stacking order in the Selection Pane, Currently, the selected object is displayed in the Selection Pane, with practical explanations and examples.
How can you use this information in practice?
Use the explanations to compare options, verify important details, and make a more informed decision. Apply the recommendations that best match your goals and situation.
Related Articles
 How to Insert and Customize Selection Buttons in Excel7 minutes read
 Use the Pane Relief Plugin to Get a Dual Pane Layout in Obsidian: How-To Guide6 minutes read
 How to Customize the to-Do Pane in Outlook: Customize to Do Pane6 minutes read
 Microsoft Excel Test P114 minutes read
 How to Display the File Pane Preview Pane on Windows 103 minutes read
 How to Print a Selection in Microsoft Excel5 minutes read
Reader Comments 0
Sign in with email or Google to join the discussion.