Insert images into Word 2016 and align images in Word 2016
Adding images to Word 2016 is a way to make your document more attractive, easily highlighting important information with photos and adding emphasis to existing text.
Table of Contents
Adding images to Word 2016 is a way to make your document more attractive, easily highlighting important information, and adding emphasis to existing text. Inserting images into Word is not difficult, but with the interesting tips we provide below, you will get documents with a nice, professional and professional image.
Insert images into Word 2016
If you have images stored on your computer, follow these steps to insert images into Word 2016:
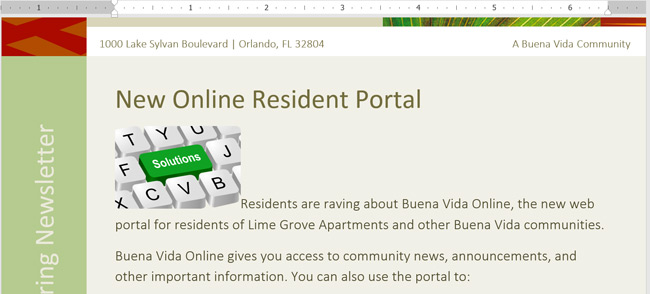
This is the image we use in this example:

Step 1: Place the mouse pointer at the position where you want the image to appear

Step 2: Select Insert on the Ribbon tab and select Pictures

Step 3: Browse to the location where the image file you want to insert, select the image and click Insert

Step 4: The image will appear in the document

To resize the image, click and drag one of the dots in the corner, then the image will resize and still retain the aspect ratio. If you want to drag it horizontally or vertically, you can use the round dots on the side, but then the image will be distorted, so consider.

Insert images into Word 2016 online
If there is no image available on your device, you can search for images on the web and insert them into Word 2016. The app provides users with 2 options to find images online.
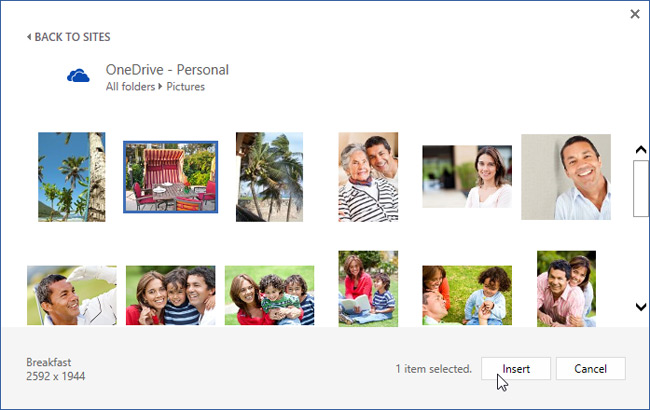
- OneDrive: If an image is available on this hosting service, you can select and insert it into the file. Can link Microsoft account with other accounts like Facebook Flickr.
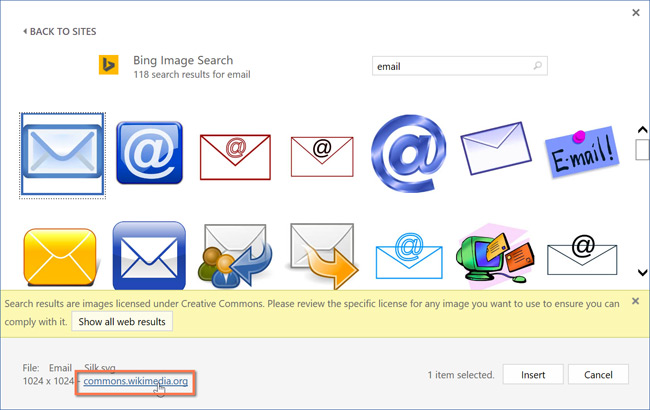
- Bing Image Search: You can use Bing to search for images on the Internet. By default, Bing will only display Creative Commons-licensed images, which you can use for your projects. However, you should click on the link to the image of the website to see if it is restricted.
To insert an online image into Word 2016, follow these steps:
Step 1: Place the cursor where you want the image to appear
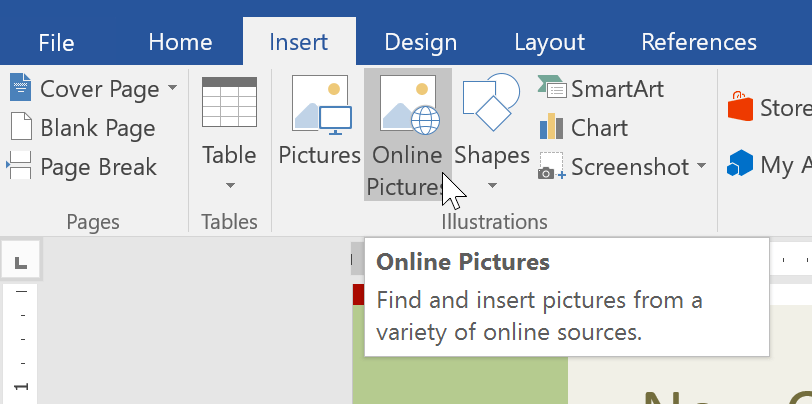
Step 2: Select the Insert tab> Online Pictures
Step 3: The Insert Pictures dialog box appears
Step 4: Select Bing Image Search or OneDrive to insert photos. If selecting Bing Image Search will look like the following
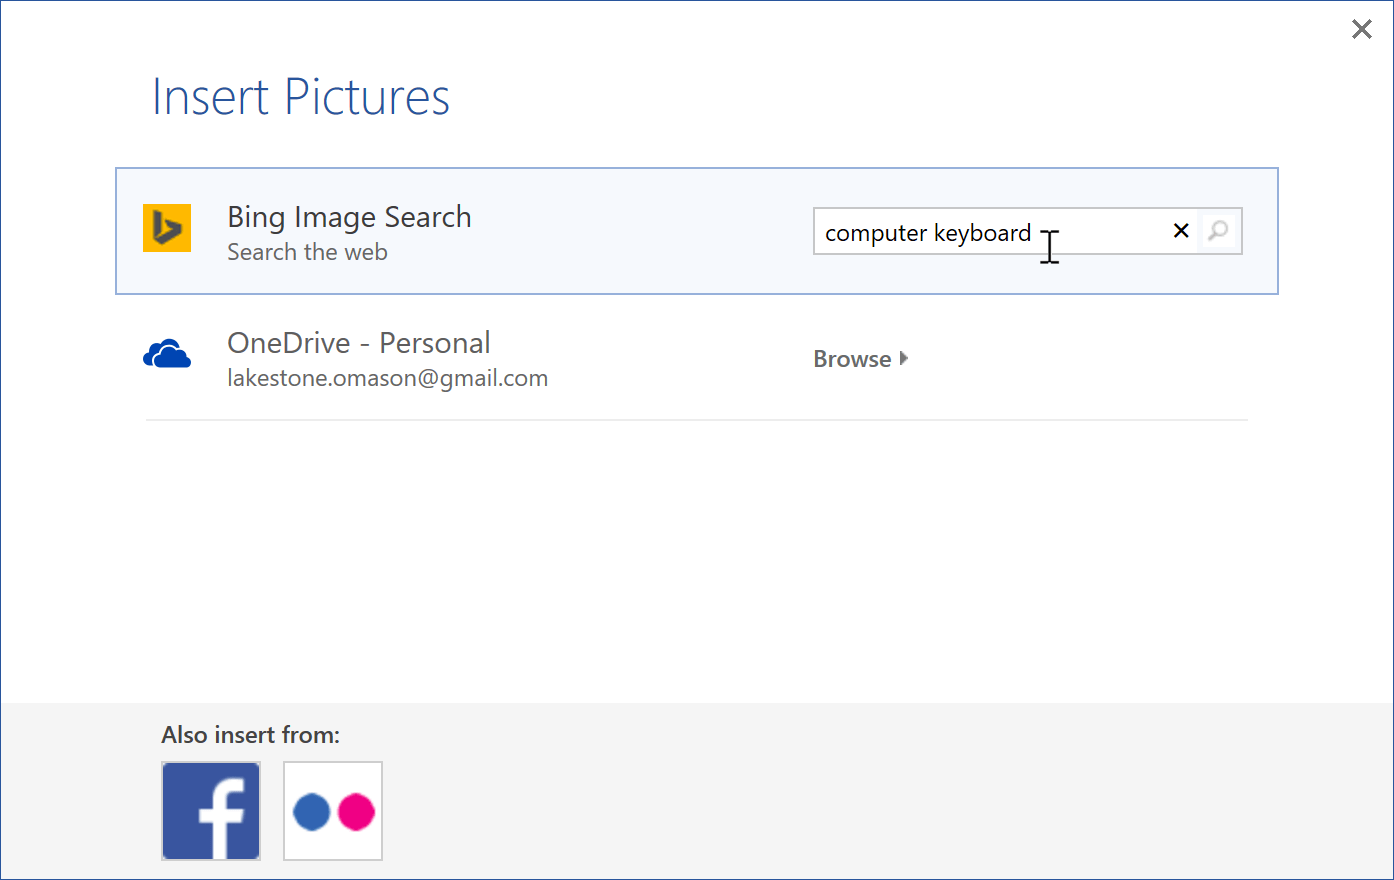
Step 5: Enter a keyword, press Enter, the result will be displayed
Step 6: Select the image you want to insert> Insert

Step 7: The image will appear in Word 2016
How to change the image display style in Word 2016
When inserting an image into Word 2016, you will find that it is difficult to move it to the desired location. This happens because the installation of Test Warapping for the image is set to In Line with Text. You need to change Text Wrapping settings if you want to move the image freely, or want the text to wrap around the image more naturally.
To change the image display style in Word 2016 and how the text appears around the image, follow these steps:
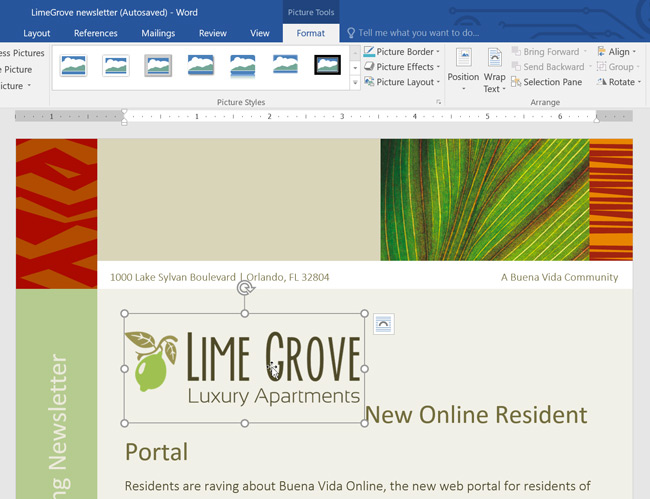
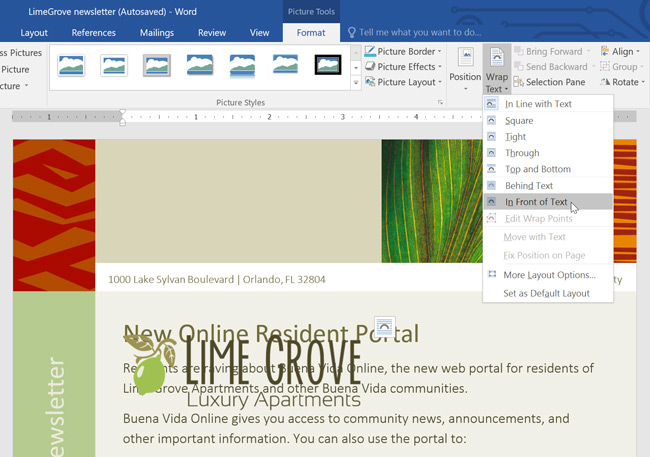
Step 1: Select the image to change the display, click the Format tab on the Ribbon
Step 2: Click on the Wrap Text in the Arrange group, select the type of image display you want. In this example, we choose In Front of Text to be able to move the image freely without affecting the text in the document. Alternatively, you can select More Layout Options to further customize the layout.
Step 3: Text will wrap around the image. You can move the image if you want. Just click on the image and drag it to the desired location. When moving it, the guide will appear to help you align the image on the page.
If the above instructions do not appear, click on the Page Layout tab> Align> Use Alignment Guides from the drop-down menu.

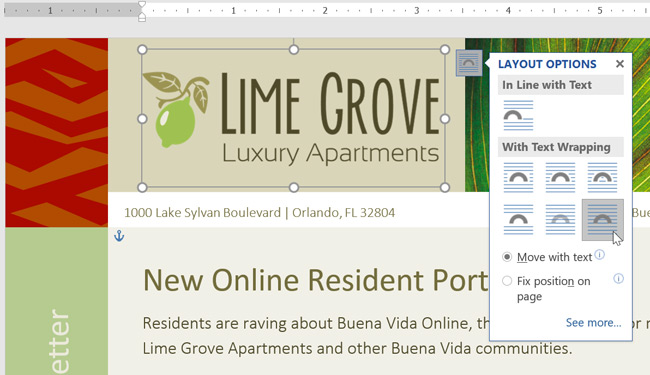
You can also access Text Wrapping options by selecting the image and clicking the Layout Options button when it appears.

Using pre-set image display styles: Word 2016 comes with Text Wrapping styles to help you quickly move images to special locations on the page. The text will automatically wrap around images and other objects and still be easy to read.

Please follow the forum: Word on Network Administrator to update the latest tutorials for Word versions.
Word 2016 Complete Guide (Part 15): Page Numbering Word 2016 Complete Tutorial (Part 17): Photo EditingWas this article helpful?
Your feedback helps us improve.
Related Articles
 How to insert pictures into Word, Excel and align images3 minutes read
 Word 2013 Complete Guide (Part 15): Insert Images and Text Wrapping functions7 minutes read
 Word 2013 Complete Guide (Part 16): Image format8 minutes read
 Insert images into text content9 minutes read
 Word 2013 Complete Guide (Part 17): Drawings and how to create effects for drawings10 minutes read
 How to insert pictures into Word, edit size and format8 minutes read
Reader Comments 0
Sign in with email or Google to join the discussion.