Table of Contents
This guide explains how to blur Images Online, with clear steps, practical tips, and important checks before you begin.
1. Open a photo with Photopea
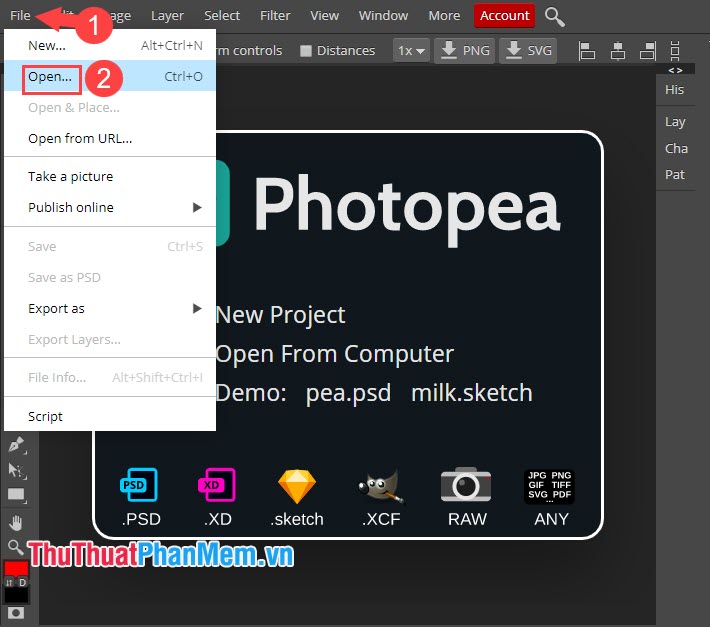
Step 1: You access Photopea at the following address https://www. photopea. com/
Then, click File (1) => Open (2) to open the image from the computer.
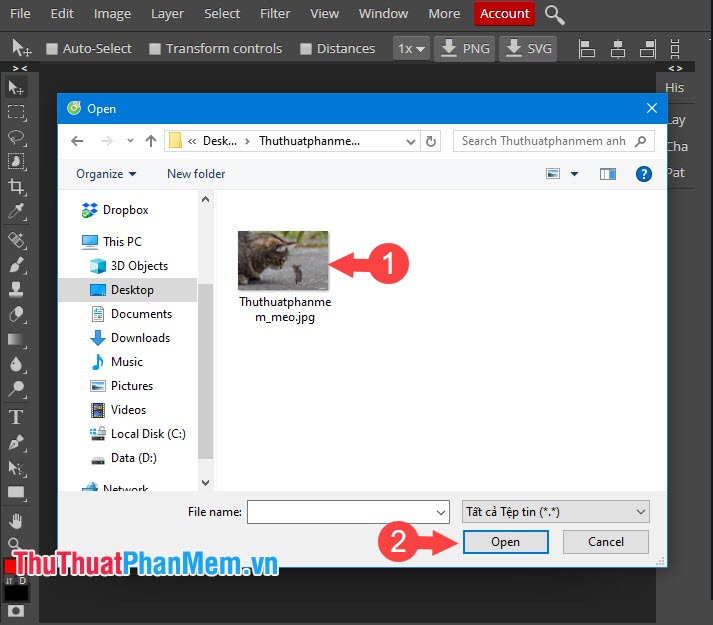
Next, select the image to be blurred (1) and click Open (2) to open it.
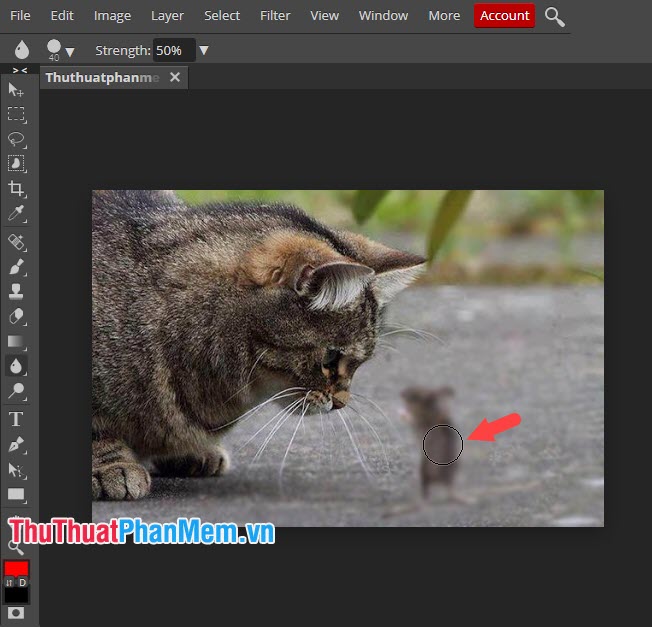
Step 2: Click the Blur tool (1) => Blur Tool (2) to open the image blurring tool.

Next, right-click on the screen to display the settings panel. Note that you should drag the size item (Size) in accordance with the image area to be blurred. If the blur area is large, drag the Size slider to the right and vice versa, drag the Size slider to the left if the blur area is small.
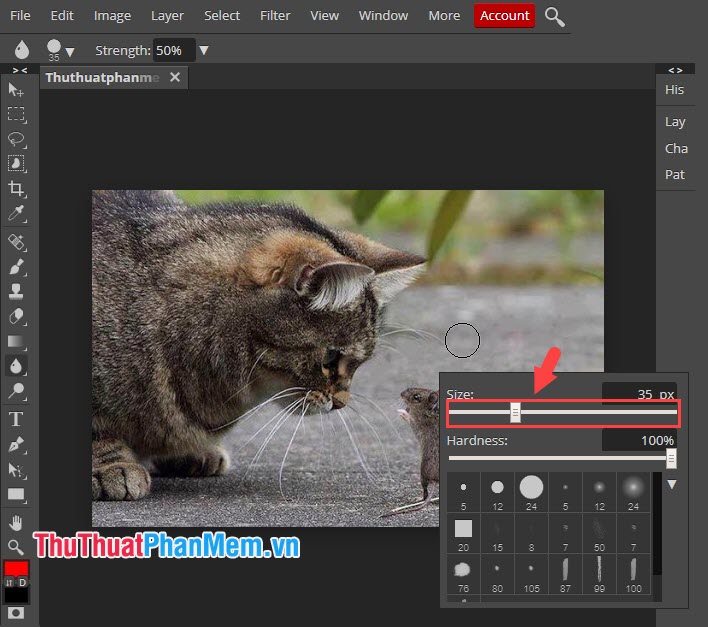
Step 3: Click on the object to be blurred to blur the object. To blur a wide area of image, hold the left mouse button and mouse over the image area to quickly blur.
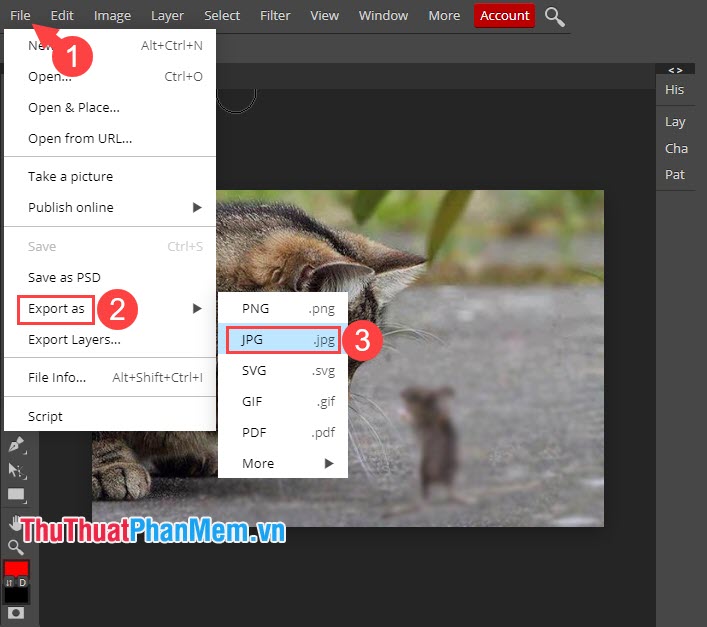
Step 4: After blurring, we save the image. Click File (1) => Export as (2) => JPG (3) to save the image as a standard format.
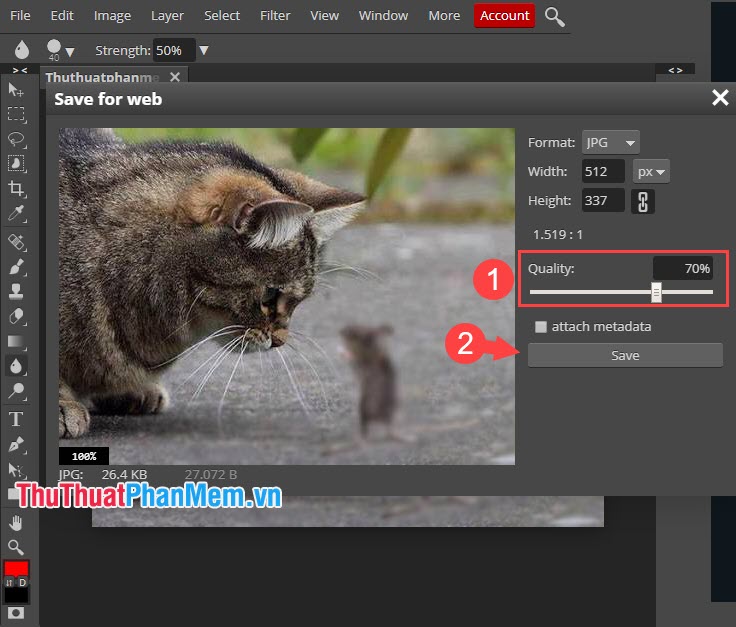
Next, you choose the quality for photos in section Quality (1) => Save (2) .
2. Blur photos with Facepixelizer
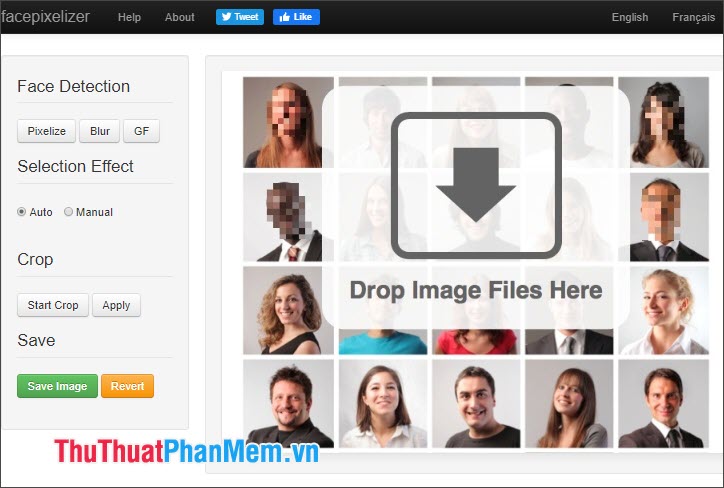
Step 1: Visit the following website https://www. facepixelizer. com/#
Next, you drag and drop the image from your computer to the Drop Image Files Here area to upload photos.
Step 2: Click on Manual (1) => Blur (2) => select the amount of blur Size (3) .
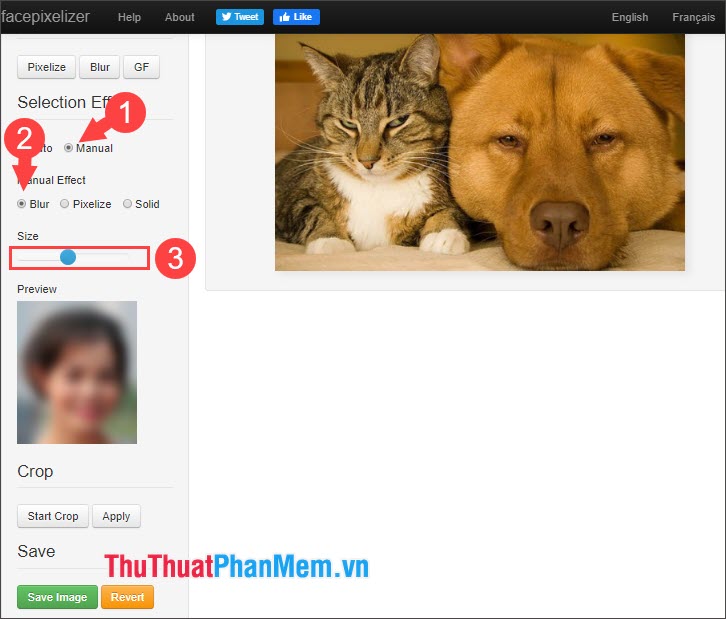
To blur the image area, click and hold the left mouse button. Then you localize the image to be blurred as shown below.
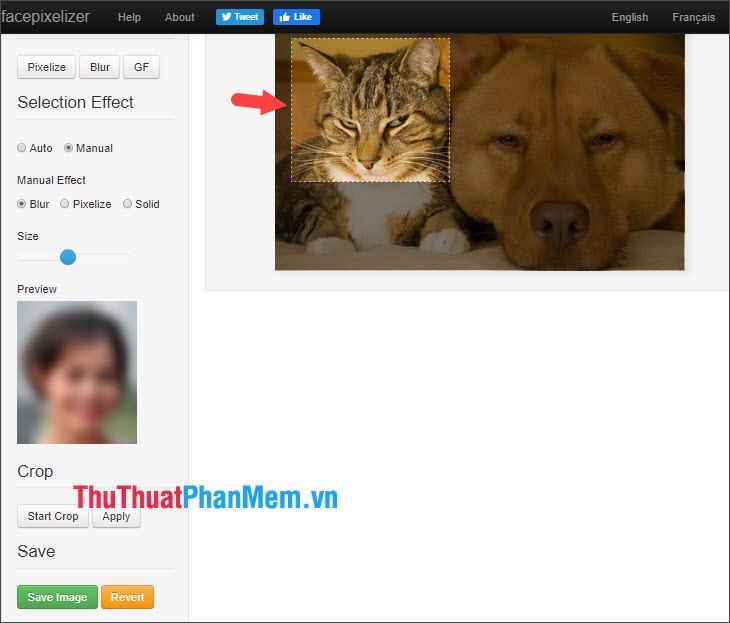
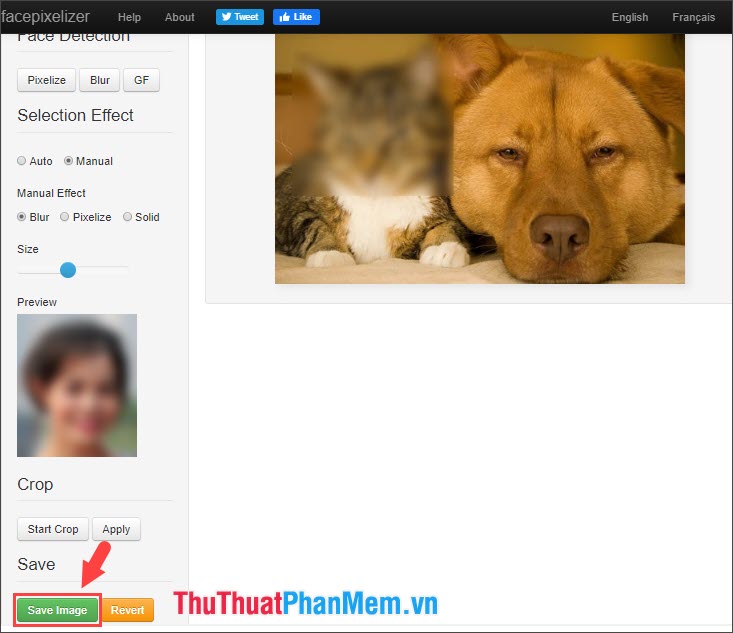
Step 3: After successful image blur, we save by clicking on Save . If your image is not completed, please click on Revert to try again.
3. Blur photos with Pixlr Editor
Step 1: You access the following link https://pixlr. com/editor/
Next, go to the File menu (1) => Open image (2) to open the image file to be edited from the computer.
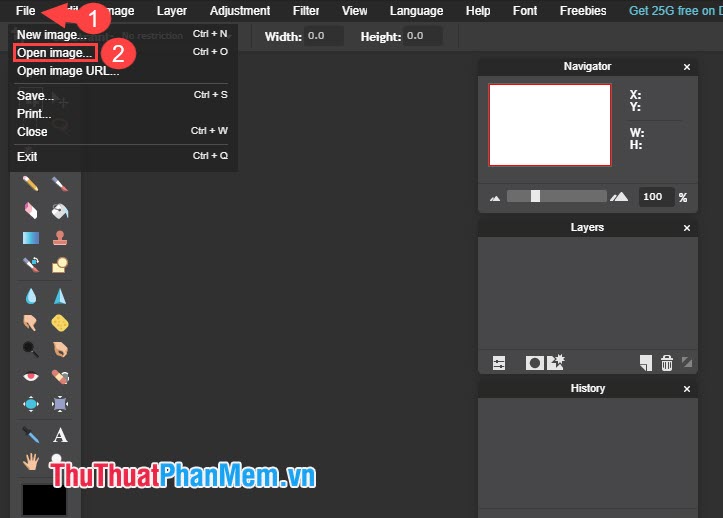
You choose the image to edit (1) and click Open (2) to upload.
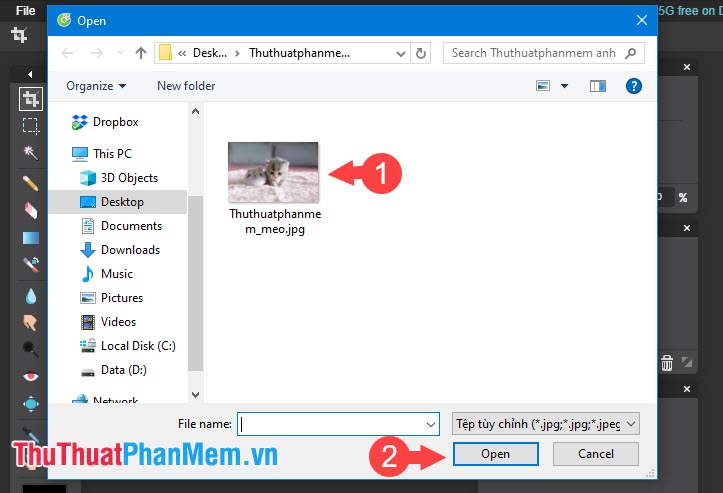
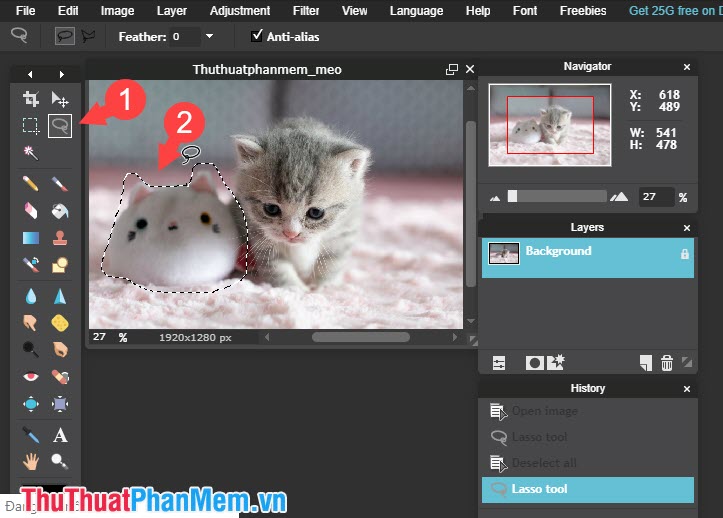
Step 2: Click on the Lasso Tool (1) and circle the image (2) .
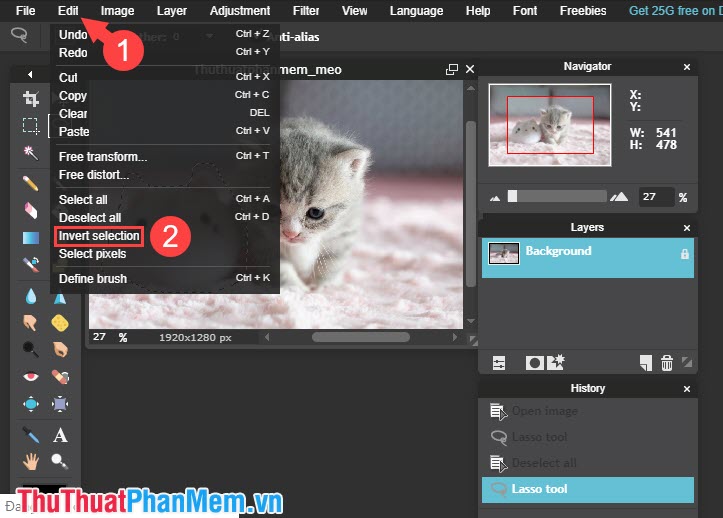
Step 3: In the article I will retain the image in the area and blur the entire background so we will go to Edit (1) => Invert selection (2) to invert the selection.
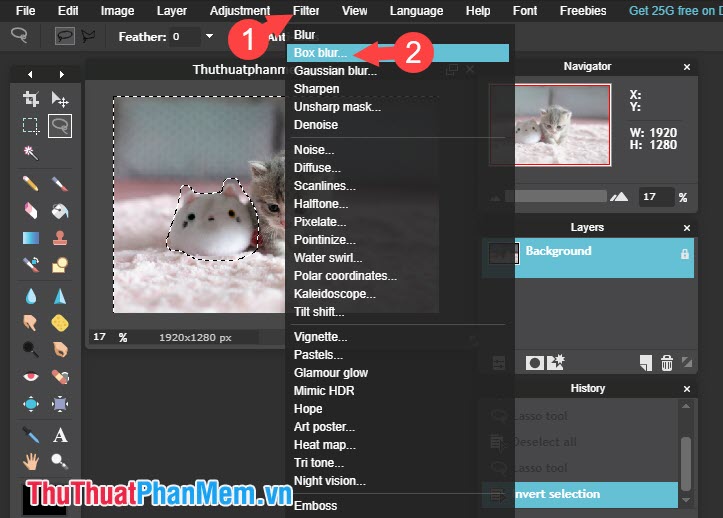
Step 4: After inverting the selection, we blur by going to menu Filter (1) => Box blur. (2) .
Step 5: Select the amount of blur by dragging the Amount slider (1) to the left or right. Then click OK (2) to apply.

Step 6: Press Ctrl + D to deselect and we will have the complete image.
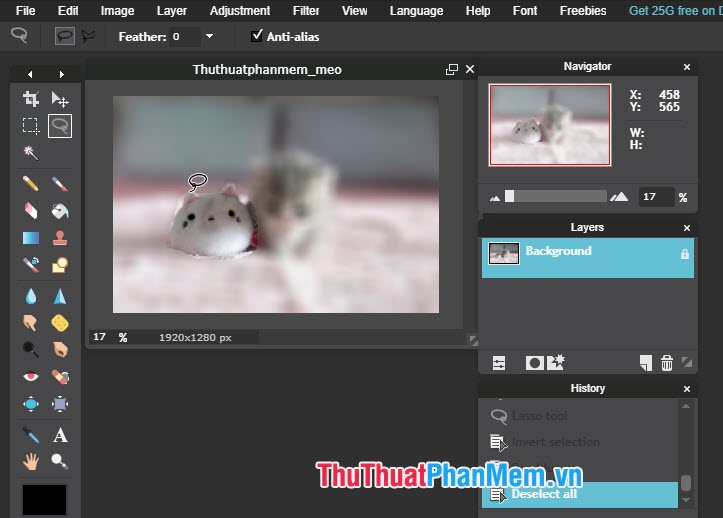
Step 7: You press Ctrl + S to save. In the dialog box Save, you name the image in Name (1) , select the image format in the Format (2) and select the image quality in the Quality (3) . After completing the setup, click OK (4) to download the image to your computer.

With the online image blur tools in the article, readers can easily create photos that look more beautiful and artistic without installing specialized photo editing software on the machine. Good luck!
FAQ
What should I know about Blur Images Online?
Focus on the key features, requirements, limitations, and practical use cases explained in this guide.
How do I get the best results with Blur Images Online?
Follow the recommended steps, use current software or information, confirm compatibility, and review settings before major changes.
Are there any risks or limitations?
Potential limitations depend on compatibility, data quality, cost, privacy, support, and how the product or method is used.
Related Articles
 How to Blur an Image Online with Photoshop Online3 minutes read
 How to Blur Images Online with Pixlr E and Fotor Tools5 minutes read
 How to Blur Images in Word3 minutes read
 How to Blur Photos with Image Blur4 minutes read
 Instructions for Blurring Photos on Canva Are Very Simple4 minutes read
 How to Blur Photos in Paint4 minutes read
Reader Comments 0
Sign in with email or Google to join the discussion.