How to Paste an Image into a Selection in Photoshop
This tutorial will show you how to copy an image and paste it into a selection in another image using the Paste Into command in Adobe Photoshop.
This tutorial will show you how to copy an image and paste it into a selection in another image using the Paste Into command in Adobe Photoshop. It will also show you how to fix any perspective issues between the two images using Photoshop's Free Transform command.
Step 1: Select the area to paste the image into
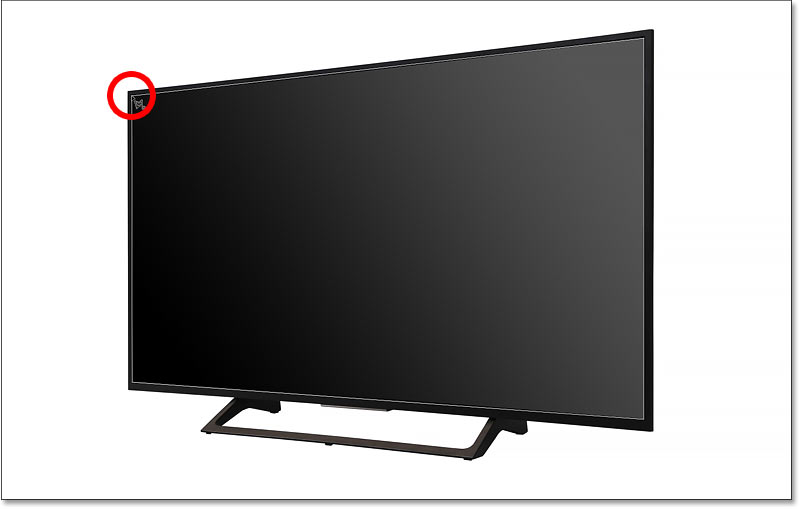
For example, we will select an area inside the TV so that we can paste the second image onto it. Since the screen is just a polygon with straight edges, we can select it using Photoshop's Polygonal Lasso Tool.
On the toolbar, click and hold the standard Lasso Tool to reveal the other tools hidden behind it. Then, select the Polygonal Lasso Tool from the menu.

How to draw a selection using the Polygonal Lasso Tool
To use the Polygonal Lasso Tool, you simply click around the area you want to select to add points. Photoshop will then connect the points with a straight line. So the idea is to click at the points where the line should change direction. In this example image, that would be the 4 corners of the screen.
Click the upper left corner of the screen to add a starting point for the selection. Then, moving clockwise, click the upper right corner to add a second point. Add a third point in the lower right corner, and then add a fourth point in the lower left corner.
Don't click and drag with the Polygonal Lasso Tool. Just click to add a point and then release the mouse button. And if you accidentally click the wrong point, press Backspace on a PC or Delete on a Mac to undo the last point.

To complete the selection, click the starting point again. In the example case, it is in the upper left corner.
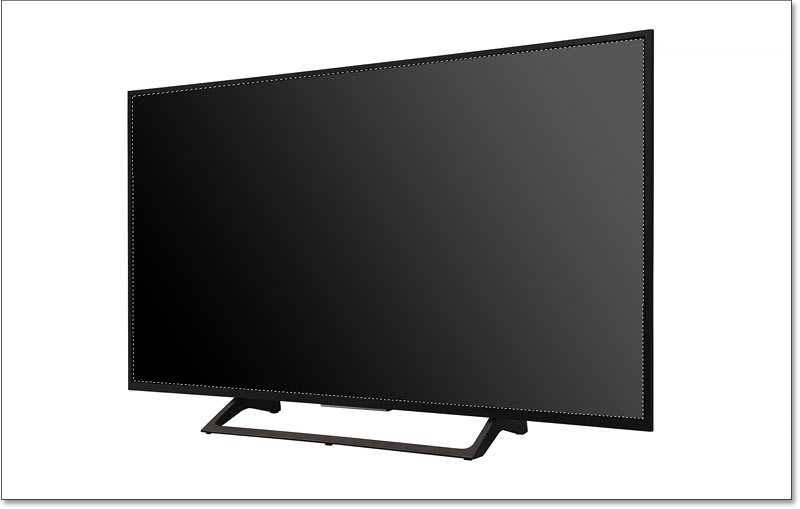
The selection border appears and is ready for the image to be pasted inside.
Step 2: Open the image to paste into the selection
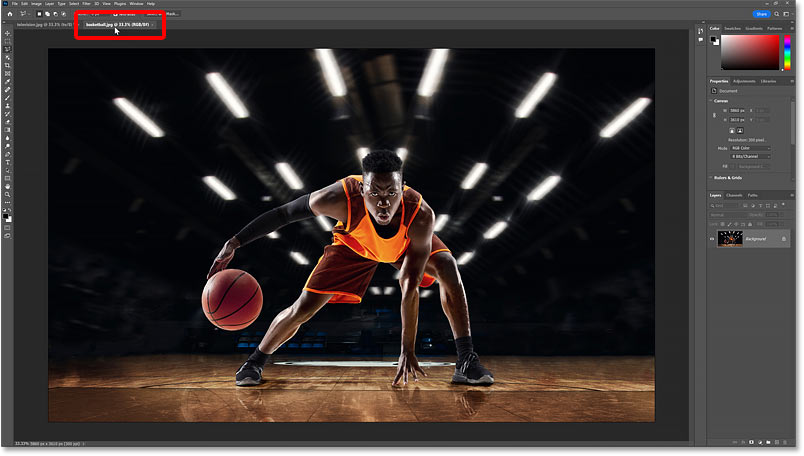
Once the selection is made, open the image you want to paste in. Switch to the second image by clicking the Document tab at the top.
Step 3: Select and copy the image
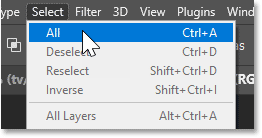
Select the image by going to the Select menu in the menu bar and choosing All . A selection border will appear around the image.
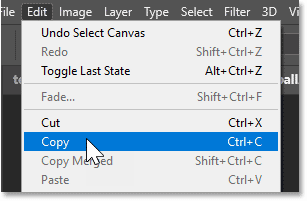
Then, copy the image by going to the Edit menu and selecting Copy .
Step 4: Convert to original image
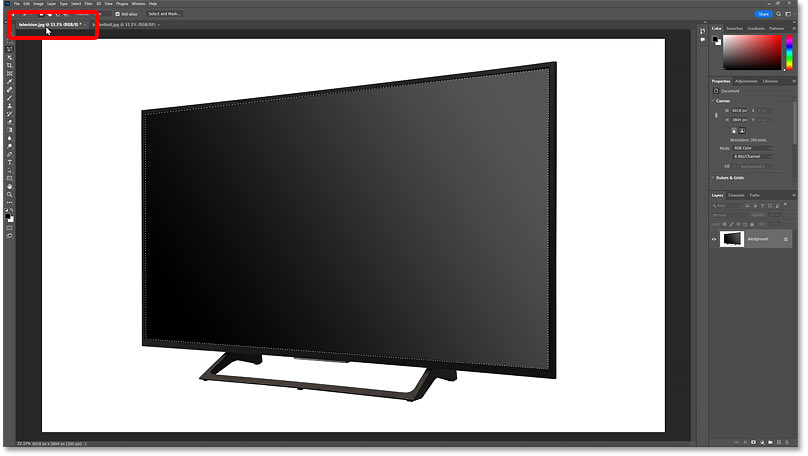
Switch back to your first image (the one with the selection) by clicking on that image's tab.
Step 5: Paste the image into the selection
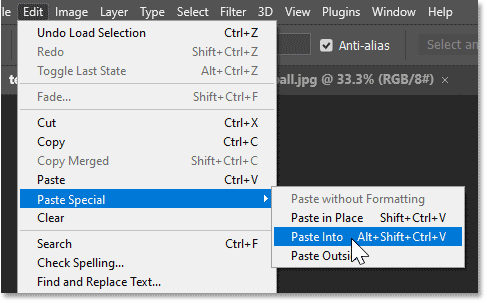
Then, to paste the copied image into the selection, go to the Edit menu , select Paste Special then Paste Into .
The image appears within the selection. There is still some work to be done. The subject is off-center and the perspective is incorrect. So we will fix both of these problems next.

Photoshop converts selection to layer mask
Notice that after pasting the image into the selection, the selection border disappears. This is because Photoshop has converted the selection into a layer mask.
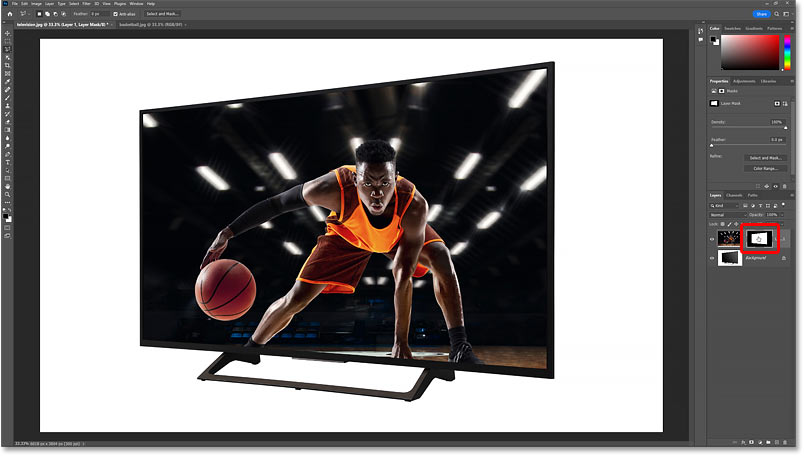
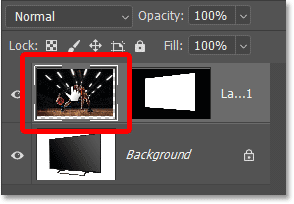
In the Layers panel , we see the mask in the layer mask thumbnail. The white part of the mask is the area we have selected and is where the image on the layer is visible. And the black part is the area outside the selection and is where the image is hidden.
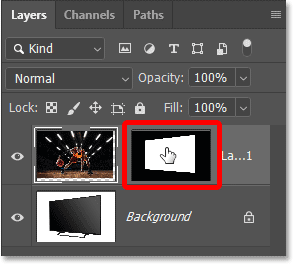
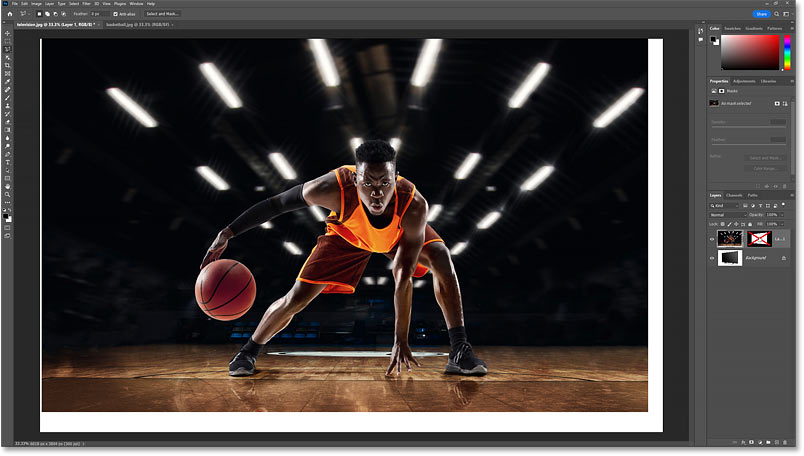
If you hold down the Shift key on your keyboard and click on the layer mask thumbnail, you will temporarily turn off the mask.
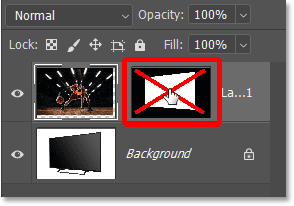
When the mask is off, the entire image is visible.
Click the layer mask thumbnail again to turn the mask back on and show only the image in the area you selected.
Step 6: Resize the image within the selected area
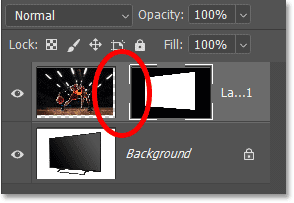
Also, notice in the Layers panel that the area between the image thumbnail and the mask thumbnail is blank, meaning no link icon is visible.
Normally, an image and its layer mask are linked, meaning that one cannot be resized without resizing the other. But when pasting an image into a selection, the image and mask are not linked, so we can resize the image without affecting the mask.
Make sure the image is active, not the layer mask, by clicking on the image thumbnail.
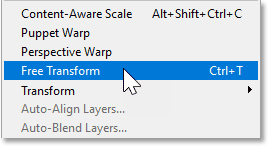
Then go to the Edit menu and select Free Transform .
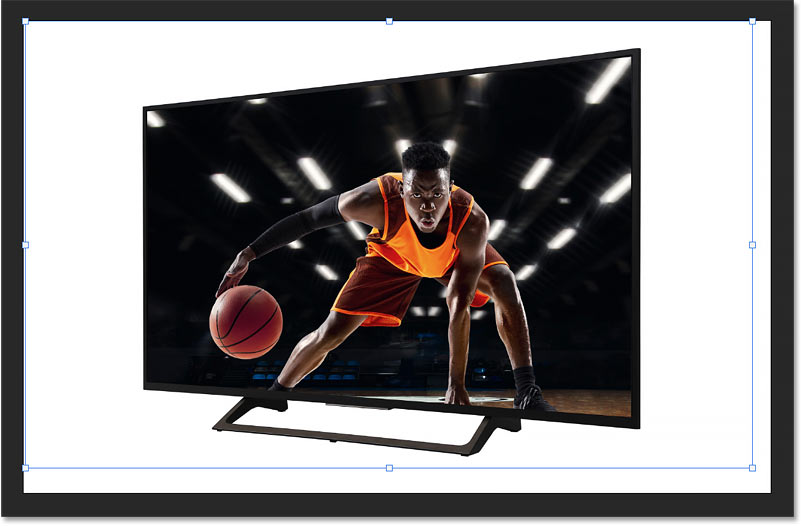
The Free Transform box and handles appear around the actual size of the image, including areas hidden by the layer mask.
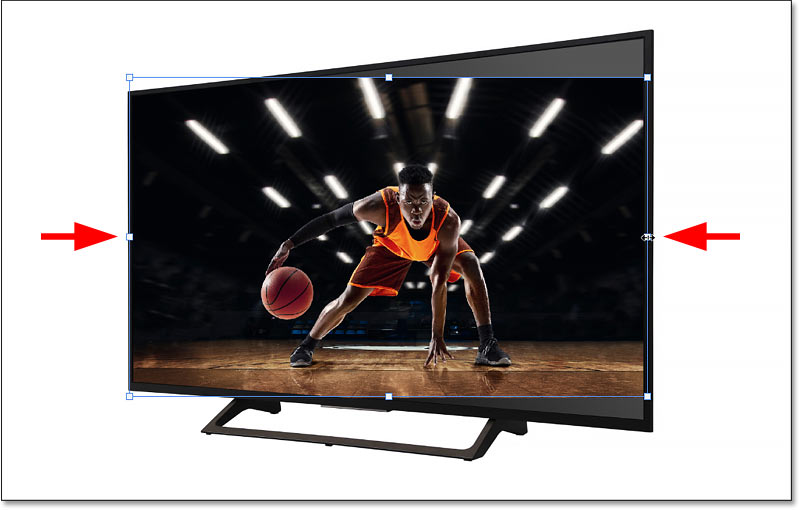
To resize the image, click and drag the handles. In a moment, we'll show you how to fix any perspective issues with your image. But for now, we'll focus on the width by dragging the side handles inward toward the edges of the TV.
Step 7: Adjust the perspective of the image
Since the image is pasted straight but the TV is tilted, we have a perspective problem. So to adjust the perspective, right-click inside the Transform box and select Perspective .
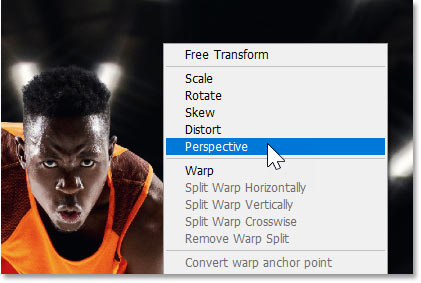
In Perspective mode, dragging a corner handle horizontally or vertically will move the opposite corner handle along with it but in the opposite direction.
So drag a corner handle up or down until the corners of both images are aligned. For example, drag the top right corner handle up.
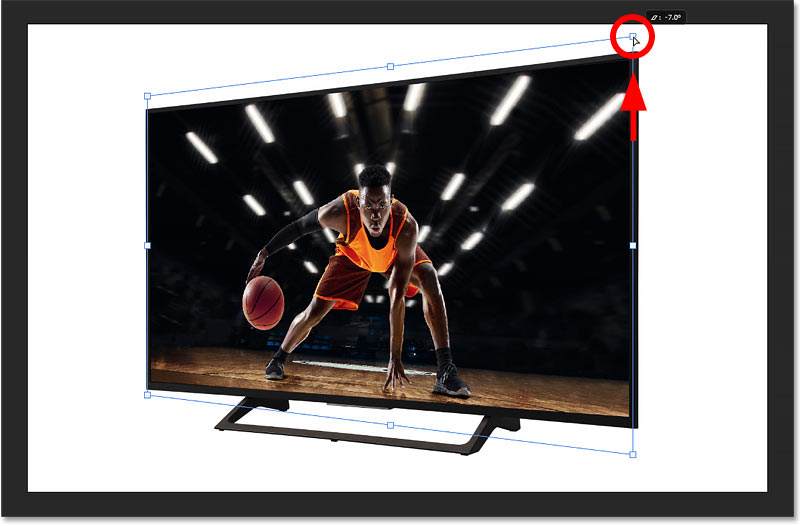
Fine-tune perspective with Distort mode
Sometimes Perspective mode is all you need to align the top and bottom corners together. Other times, you can't align one corner without skewing the other.
Note that the top corner is now correct but the bottom corner is not.
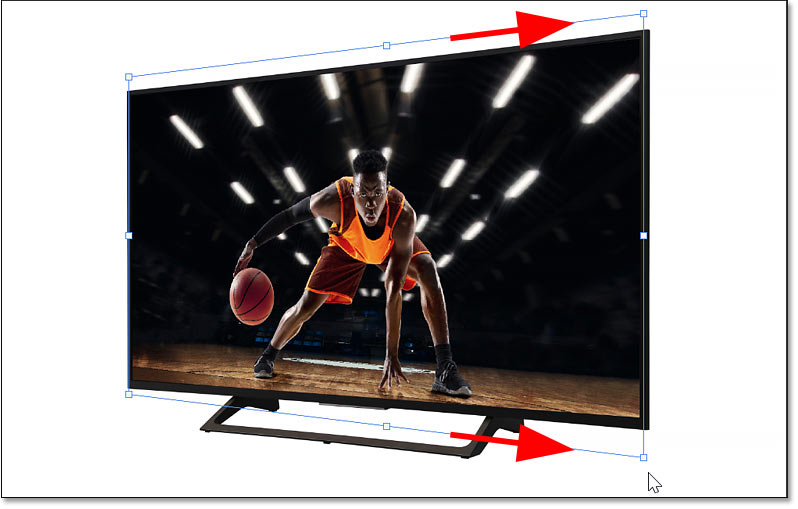
To fix that, right click inside the Transform box and switch from Perspective to Distort mode.
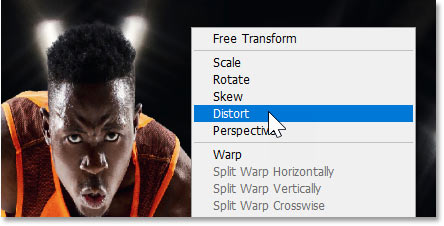
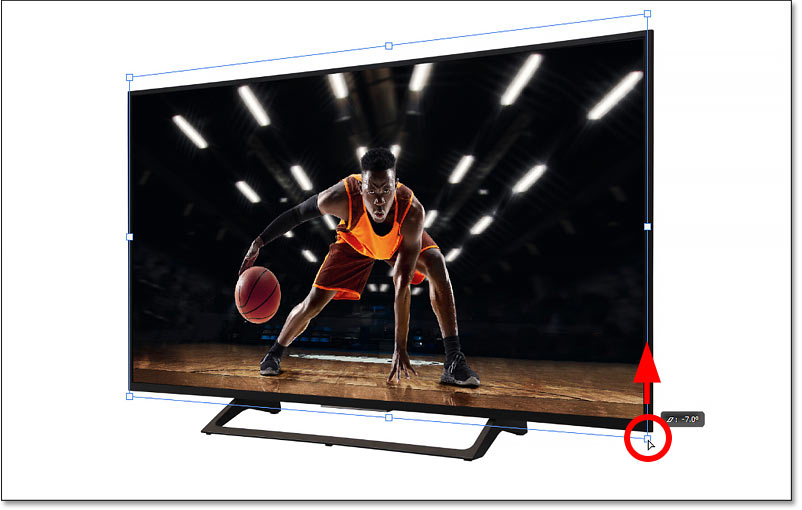
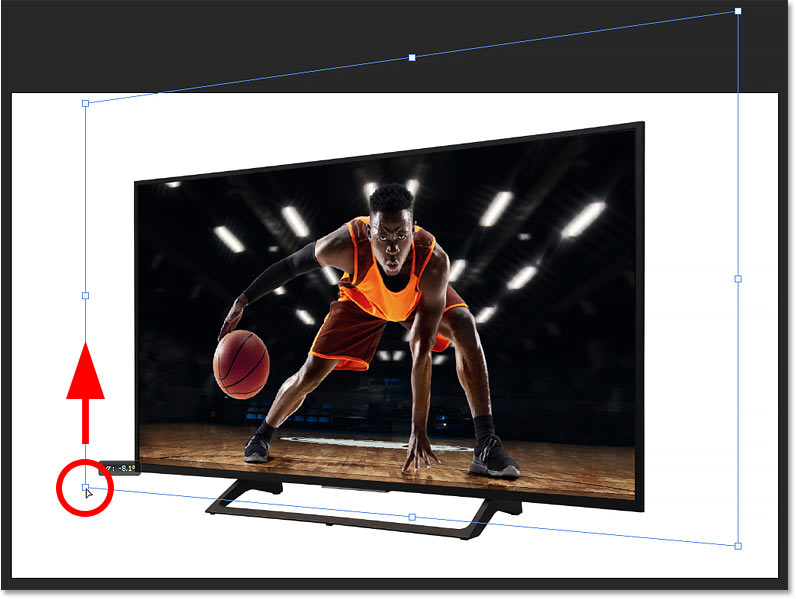
In Distort mode, each corner handle can move independently. So you can drag the bottom-right corner handle up to align the bottom corners without affecting the top corners.
If you hold the Shift key on your keyboard while dragging, you limit the direction you can move, making it easier to drag straight up or down.
Switch back to Free Transform mode
The author wants the basketball player to take up more space on the screen. But before he can resize the image again, he needs to right-click inside the Transform box and switch from Distort or Perspective mode back to Free Transform.
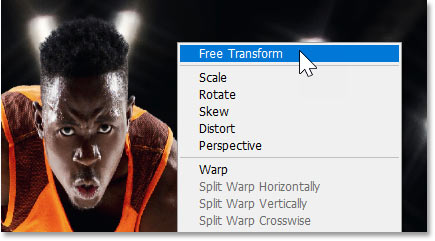
Then drag the corner handles outward to resize the image.

Reposition the image
You can also drag inside the Transform box to reposition the image and center the subject.
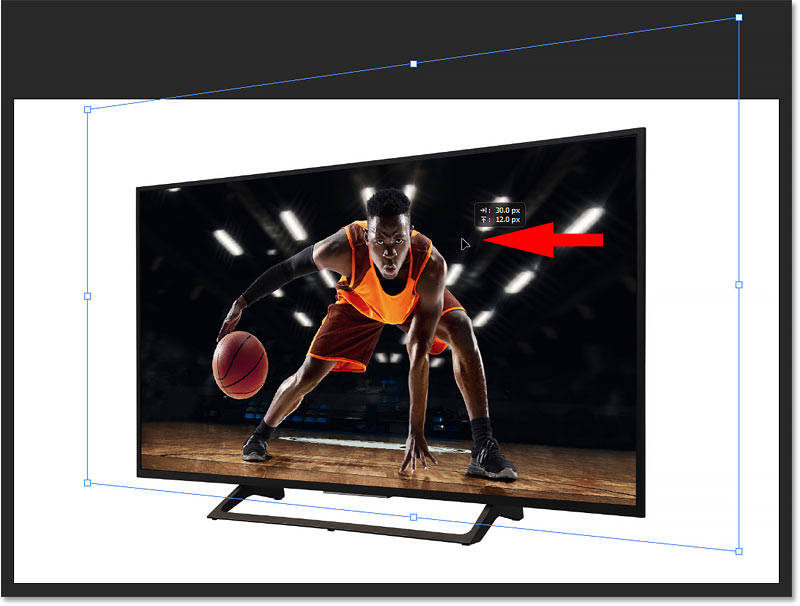
Fix any new perspective issues
If resizing the image loses perspective again, right-click inside the Transform box and switch back to Distort mode.
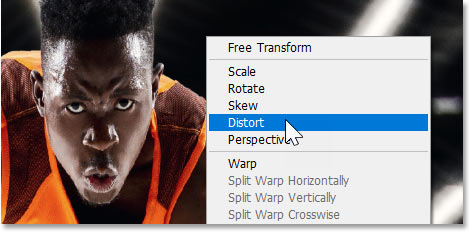
Then drag any corner handles as needed.
Step 8: Close Free Transform
To accept and close Free Transform, click the check mark in the Options bar.

After resizing the image, centering the object on the screen, and fixing any remaining perspective issues, here is the final result.


 How to cut a circle image on Paint
  How to fix the error of saving JPEG images into JFIF on Chrome
  Instructions on how to crop a circle image online
  How to create a 3x4 photo in Paint
  How to batch format photos in Windows 10
  How to delete text in photos with Paint