Take photos of Bokeh Cam FX phone fonts
Take photos to remove fonts, shooting mode only available on smartphones with dual cameras, or with camera aperture suitable to capture deleted fonts. The mode for removing fonts is usually Portrait Camera mode or portrait mode available in that camera mode menu.
And there are many applications that support users to capture fonts when their phones are not available in this mode, Bokeh is one of those applications that not only supports users to capture font deletion images that this application also provides. Edit tools, add photo effects quickly and for free. Below, we will show you how to take photos of fonts and edit photos with the Bokeh application.
- How to download Instagram photos to computers and phones
- How to add features to the Home button on iPhone
- How to mute the screen shot of Android phone
Photography instructions delete the Bokeh Cam FX fonts
Download Bokeh Cam FX for iOS
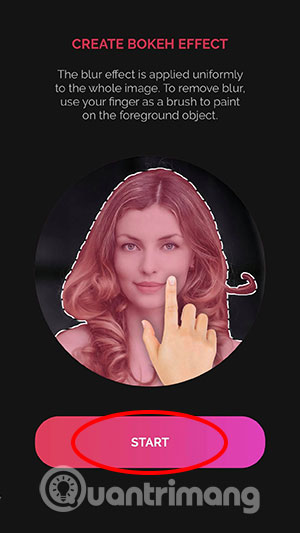
Step 1: Download the Bokeh Cam FX app for iOS above, then boot up, allowing access to your Photo Album . Then select a photo that you want to delete the font, press Start to start deleting the image.

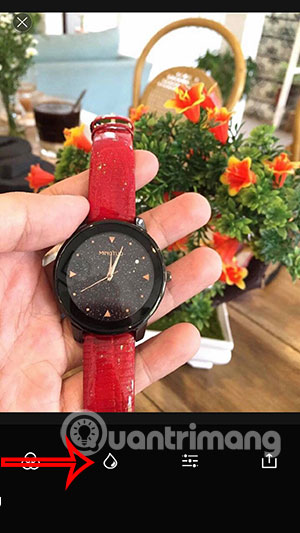
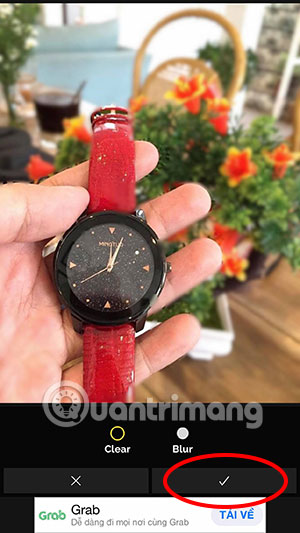
Step 2: Click on the Blur icon in the toolbar, followed by your image will be Blur all degrees. To select the featured part, click Clear and delete the blur in the part you want to remove. After deleting the blur, click on the V mark to save your edit.
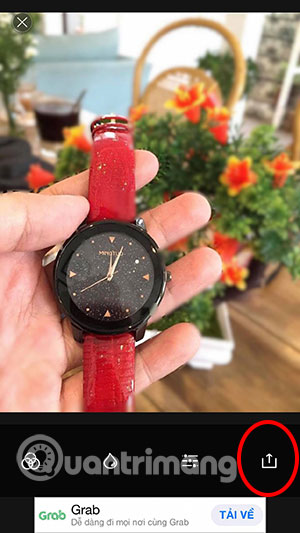
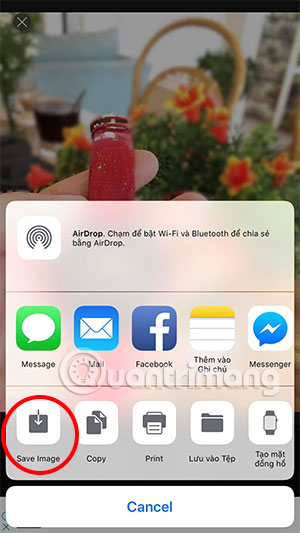
Step 3: Next, click on the image download icon on the right, then click Save Image to save. In addition, you can share your photos on social networking applications like Facebook, Messenger, Twitter . or send via message, via mail.
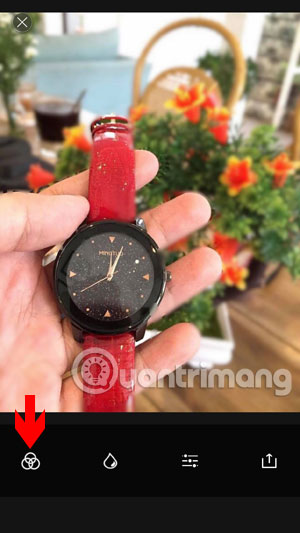
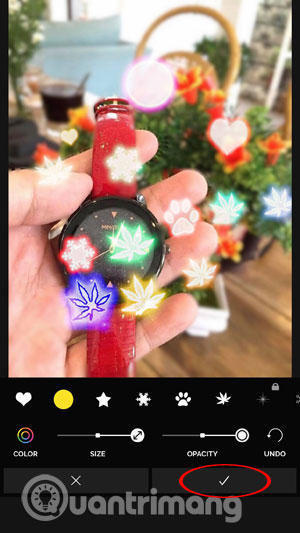
In addition to capturing fonts, you can also add bokeh images according to the available patterns by clicking on the Bokeh icon as shown below, then select available bokeh sizes and sizes, colors . Done editing Click on the check mark below the image to save it.
In fact, taking photos of the font deletion on BokehCamFX just creates a really thick Blur layer, then use the Clear tool to delete the Blur in the main image area. This approach is quite familiar to users or using the Blur tools on photos, this is a manual way to remove fonts for those who are not eligible to own a photo-taking smartphone.
Another tool that many photo editors use on your computer is to delete the photo background, this tool will help you to separate the background and characters from the image for another jigsaw. Often, the tools to perform photo background deletion will be Photoshop, GIMP . But now there is an online tool to help you split the background image with just a few clicks that is Remove.bg, you can see details at article How to delete photo backgrounds without Photoshop using Remove.bg.
See more:
- Instructions to change DNS Server on Windows, Mac, iOS and Android
- Top the best PUBG Mobile play emulators and download links
- Mint browser for Android, super light, fast speed and suitable for low profile smartphones
- Instructions to reduce lag, reduce high ping when playing online games