How to install and remove fonts on Mac
If you are not satisfied with the built-in fonts in Mac OS, why not download a new font from a free website and install it on your Mac?
Table of Contents
If you are not satisfied with the built-in fonts in Mac OS, why not download a new font from a free website and install it on your Mac? This is not difficult at all. If you still don't know how to do it, read our following article.
Font management on Mac
You can manually install fonts on your Mac or use Font Book.
Font Book is included in Mac system and is the standard font management since OS X 10.3 (Panther). There are other font management tools, but Font Book has all the most basic features you need, including the ability to add, delete and manage fonts.
We recommend using Font Book, as it has the ability to disable fonts as well as solve duplicate fonts. But in this article, we will also show you how to add manual fonts.
Change the default installation location in the font book
In Font Book, there are two options for installing fonts. You can set the font for your own use (default User mode) or let all computer users can use them ( Computer mode).
To change the default font installation location, open Font Book and go to Font Book> Preferences , or press Cmd +, (comma). Select an option from the Default Install Location list .

Install new Fonts with Finder and Font Book
After you have chosen where you want to install the font by default, open the Finder and navigate to where you have stored the downloaded font. Double-click the font you want to install.
Click Install Font on the dialog box displayed.
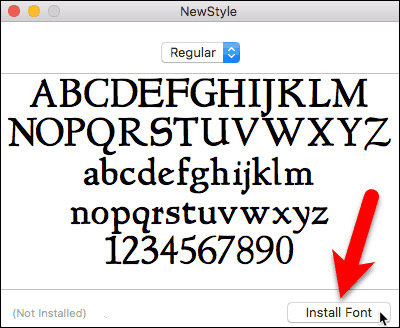
The Font Book opens, and the font will be installed exclusively for you ( User ) or for all users ( Computer ), depending on what you have selected in Preferences .
The font preview is displayed in the right pane.
Install new font from right in Font Book
You can also add a font from within Font Book. Suppose you have set the default location to User, but you want to add the font for all users to use without changing the default location.
Click Computer in the left pane. Then, right-click on any font in the list on the right and select Add Fonts .

Find the folder containing the font you want to add, select the font and click Open .

Resolve duplicate fonts when installing new fonts in Font Book
If you are installing fonts in Computer mode and the same font in User mode (or vice versa), a warning message tells you that many copies of a font have been installed.
You can solve the problem automatically, help Font Book make decisions about which font still works and which font is disabled.
In the case of the following example, we will solve the problem manually, so we click Resolve Manually .

Both the Active copy and the font's inactive copy will be displayed. See Access to know who has access to the selected copy of this font.
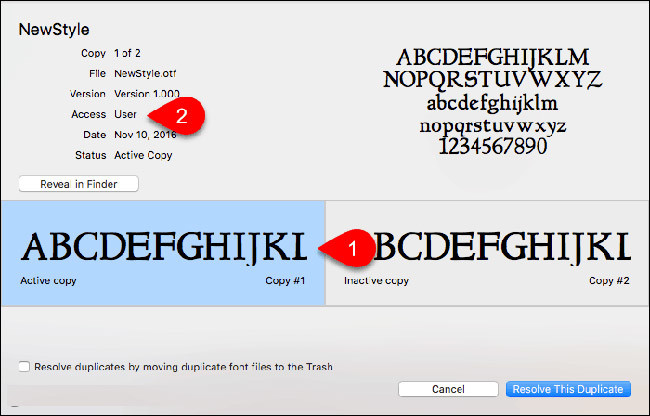
We want to make this font available to all users, so click on the Inactive copy, which Access is Computer . We want to turn this copy into Active , so we click Resolve This Duplicate .
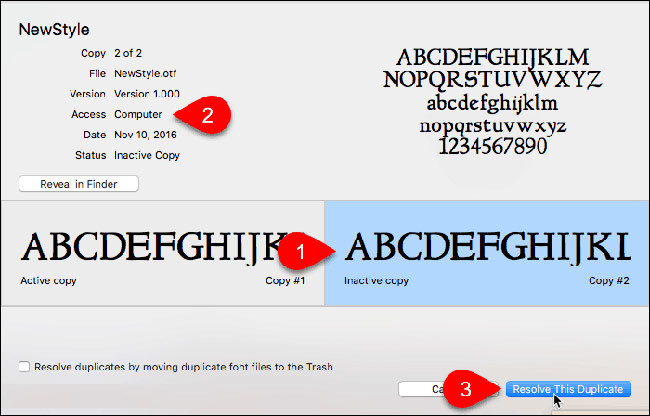
The copy of the font in Computer mode is enabled and the copy in User mode will be disabled or Off .
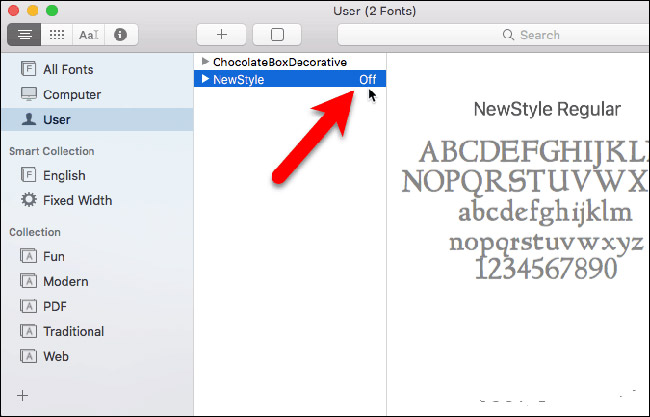
Font settings have not been downloaded in Font Book
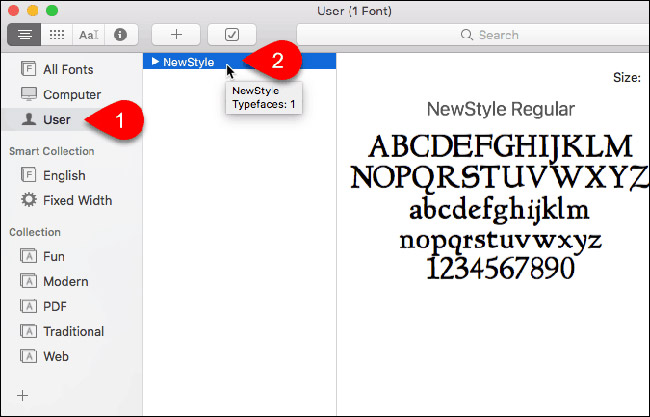
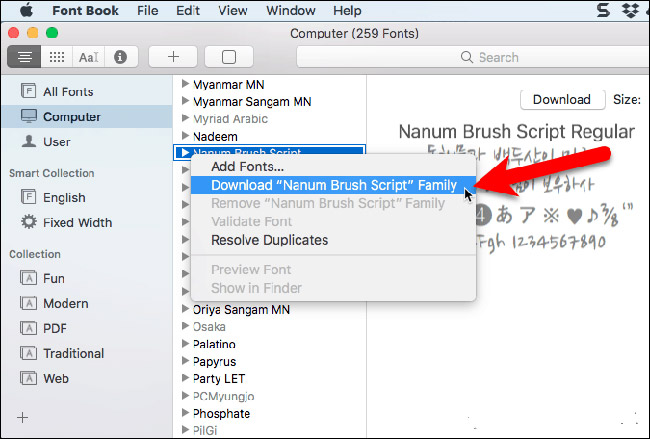
Many fonts are installed on your Mac for all users, in Computer mode. In this list, you will see some fonts that are gray. These fonts are disabled (indicated by the word Off to the right of the font name) or they have not been downloaded yet.
To download fonts that are not available on your computer, right-click on the font and select Download Family . You can also click the Download button in the right pane.
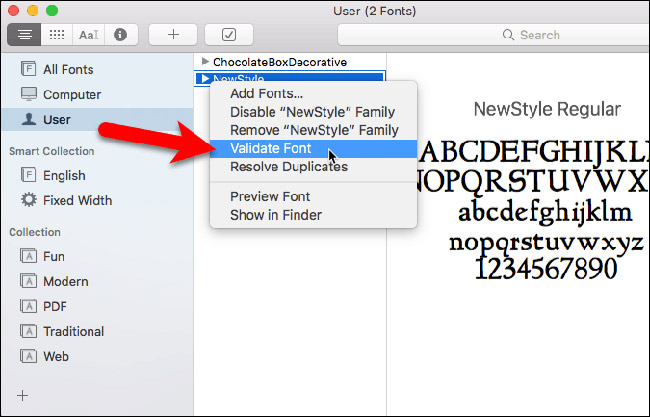
Validate fonts on Mac
When you install the font in Font Book, it will automatically check for errors or be authenticated. You can also authenticate the font manually after installation if an error occurs with that font.
Disabled fonts remain on Mac but cannot be used in applications.
Select the font (s) you want to authenticate and do one of the following:
Right click on the font and select Validate Font .- Select File> Validate Font .
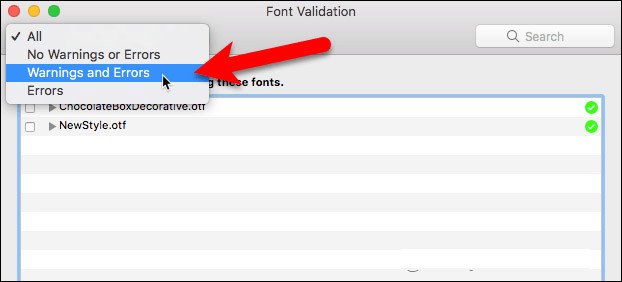
One of the three icons is displayed next to each font on the Font Validation window:
- The green icon indicates that the font has been transferred.
- A yellow icon indicates a font warning.
- The red icon indicates an error: The font has not been successfully authenticated.
To resolve triggered and disabled alerts and errors (the next section will show you how to disable fonts), select the font and click Remove Checked .

If you have a long list of authentic fonts, there is a way to make it easier for you to find problematic fonts. Select Warnings and Errors from the list at the top of the Font Validation window.
To validate the font file before installing, open Font Book and go to File> Validate File . Select the file and click Open . Font Validation window displays the status of the font file. Then, you can install that font, if you want, on the Validation Font window by selecting the font and clicking Install Checked . We recommend that you do not install fonts that display warnings or errors after authentication.
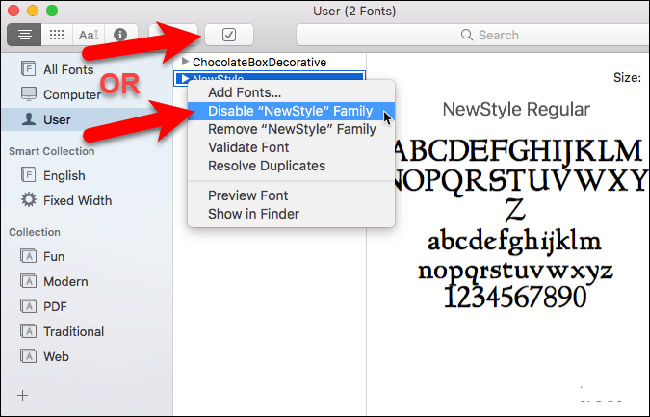
Disable fonts on Mac
If you decide you don't want to use a font anymore, but you don't want to delete it, you can disable that font.
First, select the font (s) you want to disable. Then, do one of the following:
- Right click on the font and select Disable .
- Click the Disable button.
- Go to Edit> Disable .
Note: System fonts cannot be disabled.
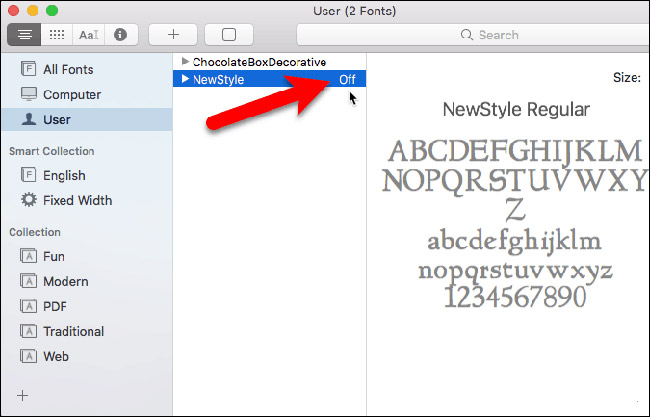
The disabled fonts are displayed in light gray and labeled Off . They are not deleted from your Mac but they cannot be used in applications.
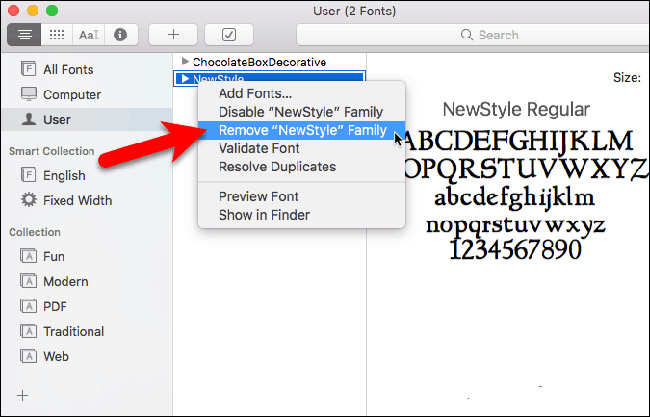
Remove fonts on Mac
If there are fonts you don't want to be on your Mac, you can delete them.
To remove the font in Font Book, select that font and do one of the following:
- Right click on the font and select Remove .
- Press the Delete key.
Note : The system font cannot be deleted.
Click Remove on the display confirmation dialog.
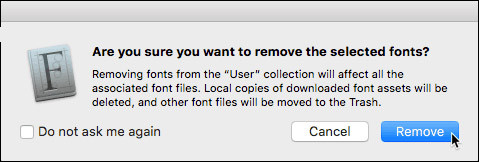
Deleted fonts will be transferred to Trash and not in Font Book or in applications.
Restore standard fonts on Mac
If you are having trouble with any of the fonts you have installed in Font Book, you should restore the fonts that were originally installed on your Mac. This will move the fonts you have installed into a separate folder, making them no longer available for use in the application.
Open Font Book and go to File> Restore Standard Fonts .
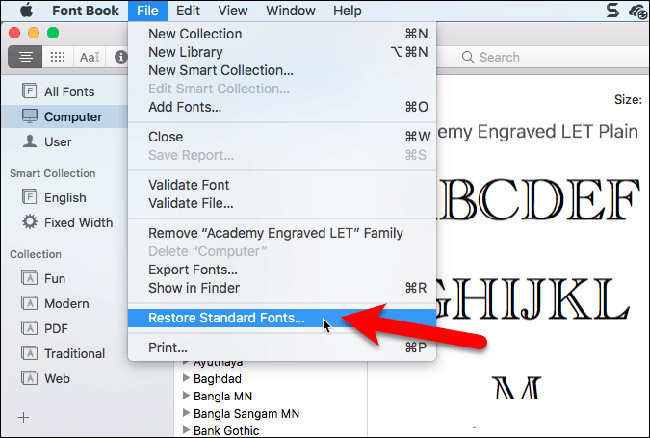
Click Proceed on the confirmation confirmation dialog.

You are informed that the standard font has been restored. Click OK .
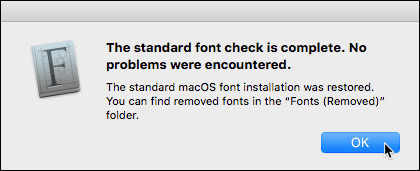
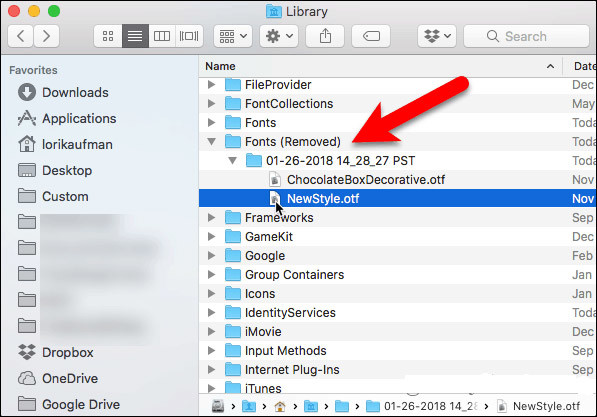
Other fonts are moved to a folder in the user's Library, ~ / Library / Fonts (Removed) or the machine's main Library directory, / Library / Fonts (Removed) , depending on where it is installed.
To reinstall the deleted fonts, reinstall them using one of the methods we mentioned above.
Install fonts manually on Mac
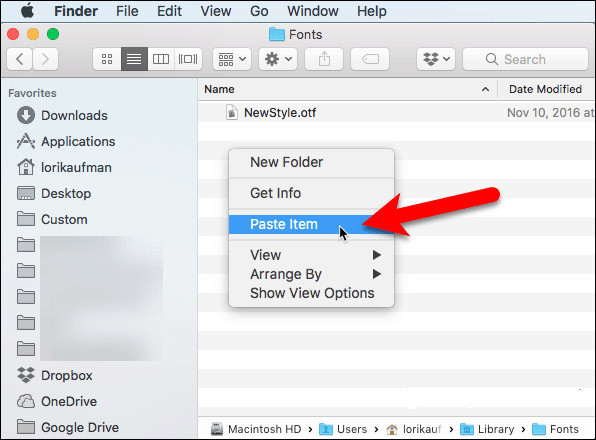
If you want to install fonts manually, you can copy the font files into the appropriate Fonts folder on your Mac.
To set the font only for your use, copy the font file and go to the / Users / Username / Library / Fonts folder, replace the Username with your username. If you want the font to be available to all users, go to the / Library / Fonts folder on the Mac hard drive.
If you don't see the Library folder in the Finder , open the Go menu , press and hold the Alt key to make the Library available on the menu. Then select Library . You can also make the Library folder available permanently in the Finder.

Paste the font file into the Library folder by right-clicking and selecting Paste Item or by pressing Ctrl + V.
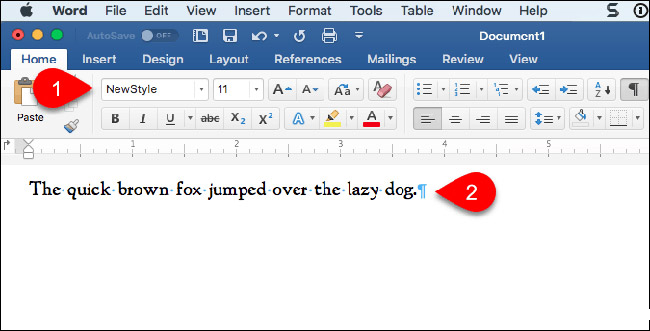
Manually installed fonts are now available in the application. For example, this is the NewStyle font used in Word documents.
See more:
- How to convert Mac font (dfont) to Windows font (ttf)
- Instructions for installing new fonts in Mac OS X
- Website helps you manage all fonts installed in your computer
Was this article helpful?
Your feedback helps us improve.
Related Articles
 How to install and uninstall fonts on Windows 113 minutes read
 How to install and remove fonts on Linux7 minutes read
 How to install (and uninstall) fonts on Windows 113 minutes read
 Instructions on how to install and remove fonts in Windows2 minutes read
 5 notes to help capture beautiful and virtual fonts5 minutes read
 How to take photos to remove fonts on old phones7 minutes read
Reader Comments 0
Sign in with email or Google to join the discussion.