Table of Contents
Explore powerpoint 2019 (part 12): lists, including the key concepts, practical examples, important considerations, and useful guidance.
By default, when you type text into a placeholder, bullet points are placed at the beginning of each paragraph, automatically creating a bulleted list. If desired, you can modify the list by selecting a different bullet point style or switching to a numbered list.
How to modify bullet point styles
1. Select an existing list that you want to format.
2. On the Home tab, click the Bullets drop-down arrow.
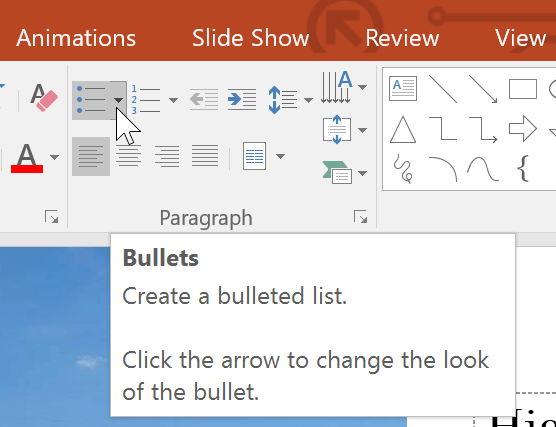
3. Select your desired bullet point style from the menu that appears.
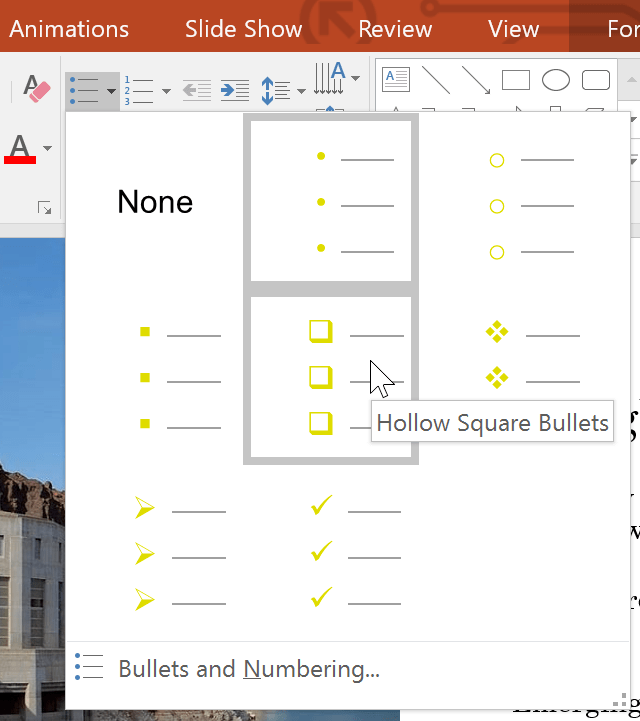
4. The type of bullet points that will appear in the list.
How to modify a numbered list
1. Select an existing list that you want to format.
2. On the Home tab, click the Numbering drop-down arrow .
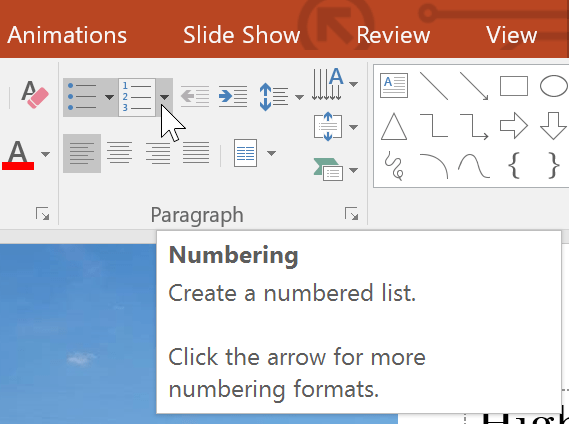
3. Select your desired numbering option from the menu that appears.
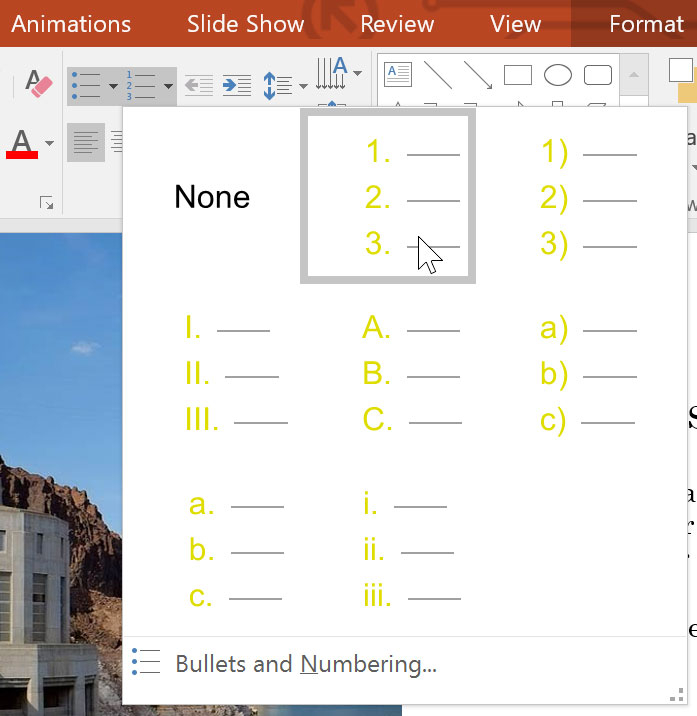
4. The numbering style that will appear in the list.
How to change the starting number
By default, numbered lists start from 1. However, sometimes you might want to start counting from a different number, such as if the list is a continuation of a previous slide.
1. Select an existing numbered list.
2. On the Home tab, click the Numbering drop-down arrow .
3. Select Bullets and Numbering from the menu that appears.
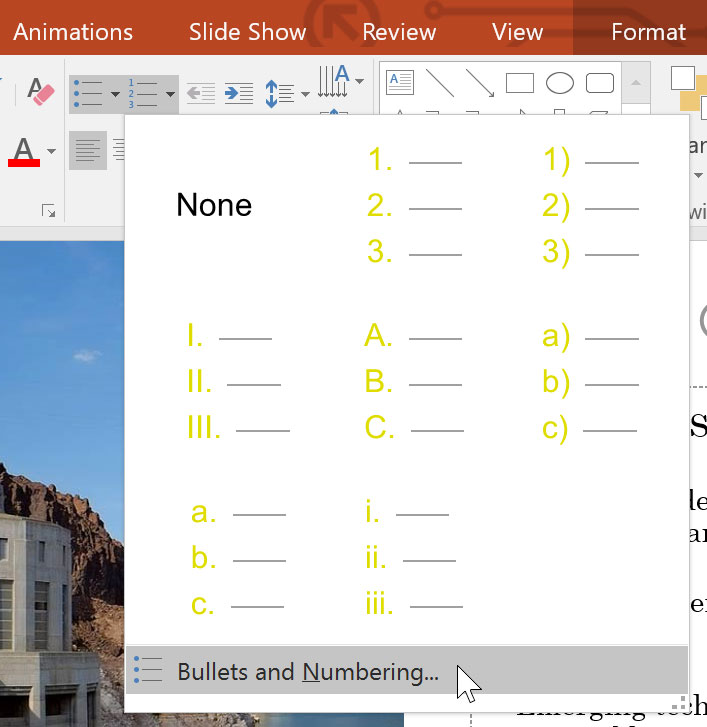
4. A dialog box will appear. In the Start At field, enter your desired starting number.
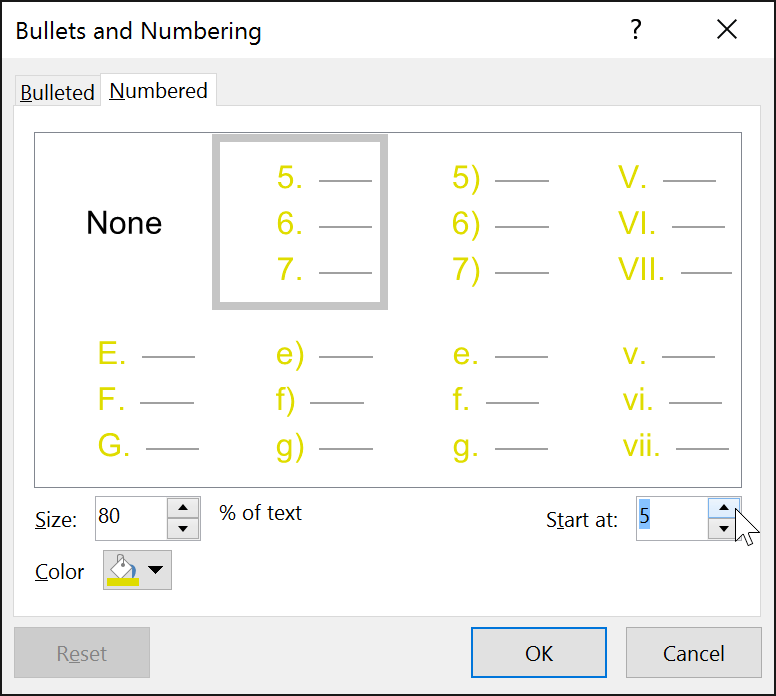
5. The numbering of the list will change.

Modify the list's appearance
Whether you're using a bulleted or numbered list, you might want to change its appearance by adjusting the size and color of the bullet points or numbers. This can make your list stand out and better fit the format of your presentation.
How to resize and color
1. Select a list that already has bullet points.
2. On the Home tab, click the Bullets drop-down arrow.
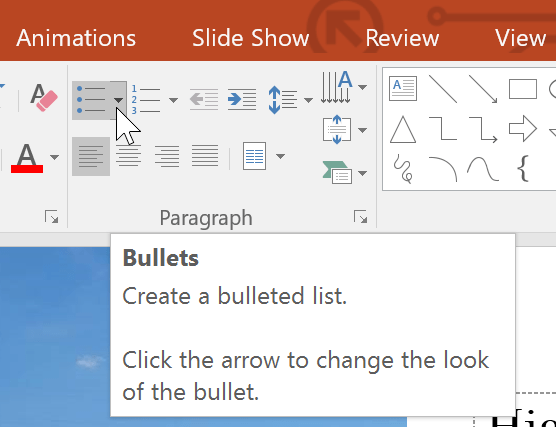
3. Select Bullets and Numbering from the menu that appears.
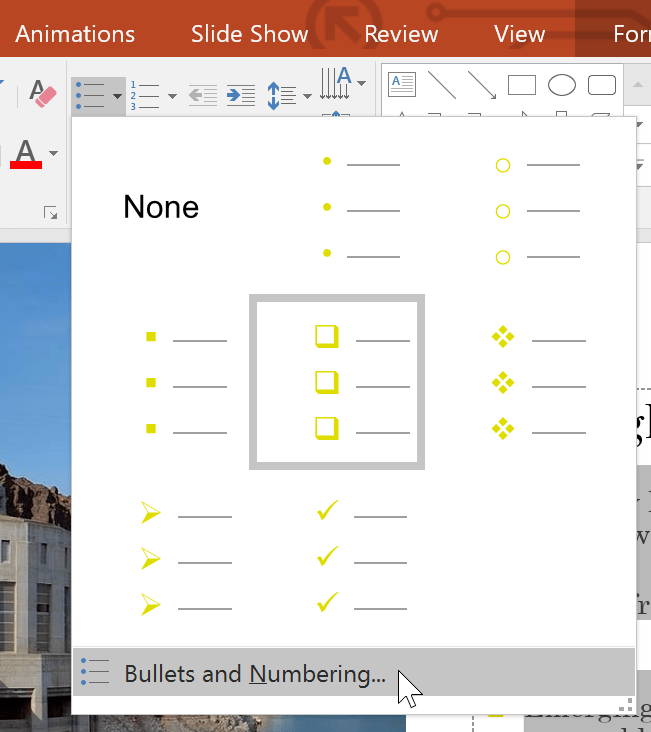
4. A dialog box will appear. In the Size field, set the bullet point size.
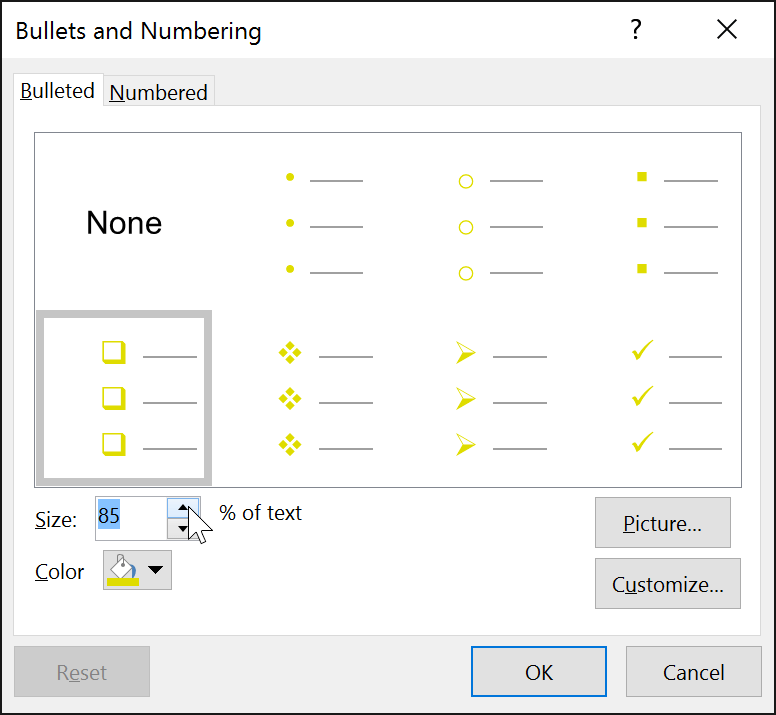
5. Click the Color drop-down box and select a color.
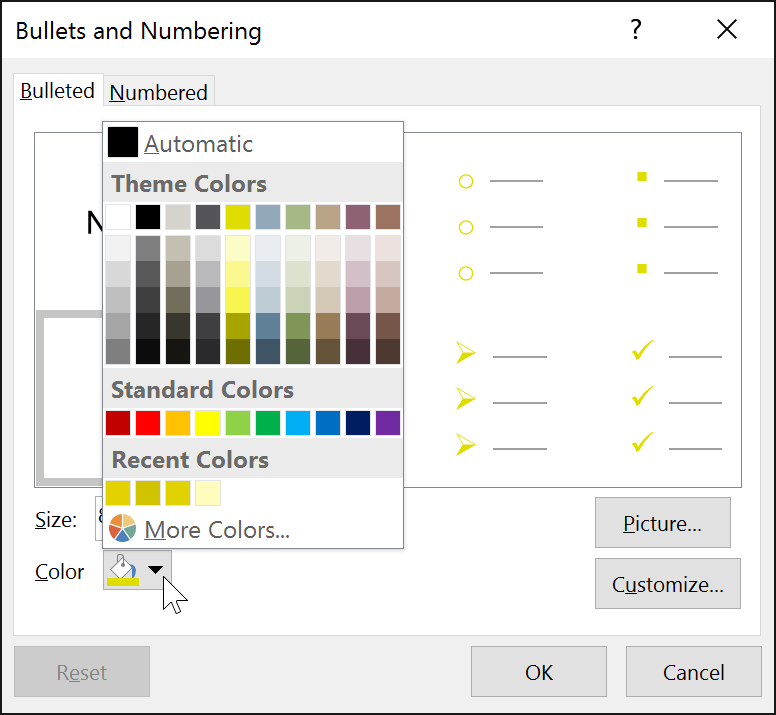
6. Click OK. The list will update to display the new bullet size and color.
Customize bullet points
Customizing the appearance of bullet points in a list can help you highlight certain list items or personalize the list's design. A common way to customize bullet points is by using symbols.
How to use an icon as a bullet point
1. Select a list that already has bullet points.
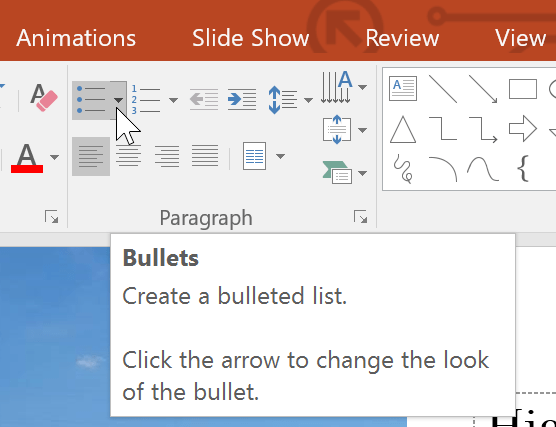
2. On the Home tab, click the Bullets drop-down arrow.
3. Select Bullets and Numbering from the menu that appears.
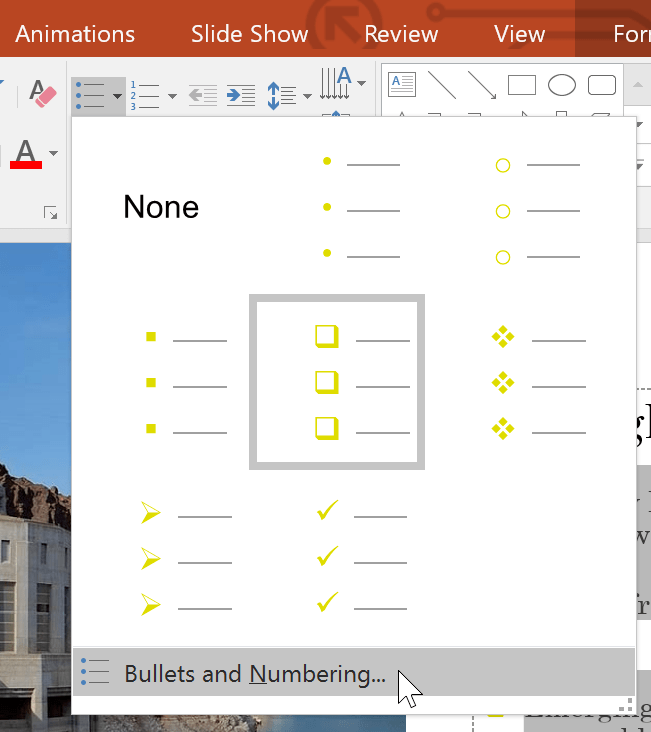
4. A dialog box will appear. On the Bulleted tab, click Customize.
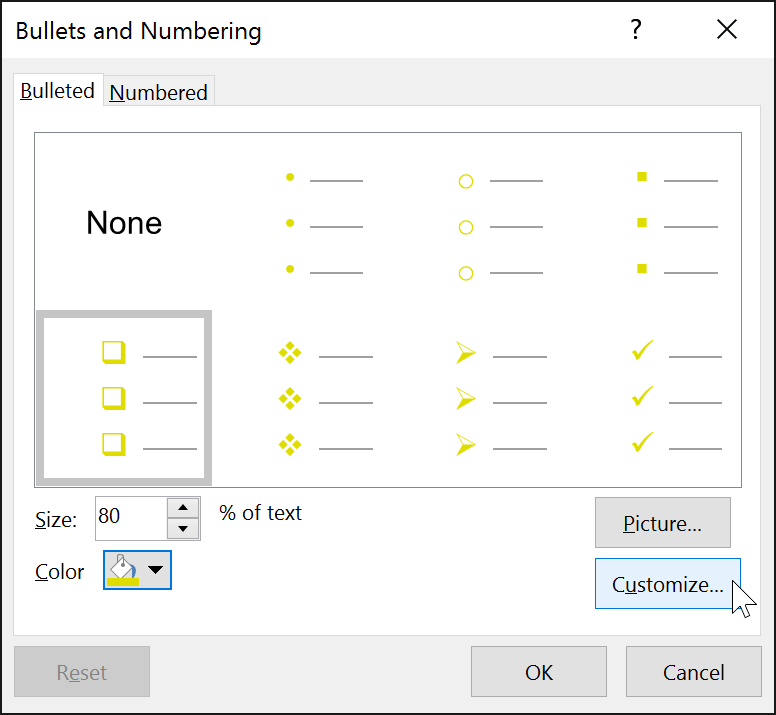
5. The Symbol dialog box will appear.
6. Click the Font drop-down box and choose a font. Wingdings and Symbol fonts are good choices as they have many useful symbols.
7. Select your desired icon.
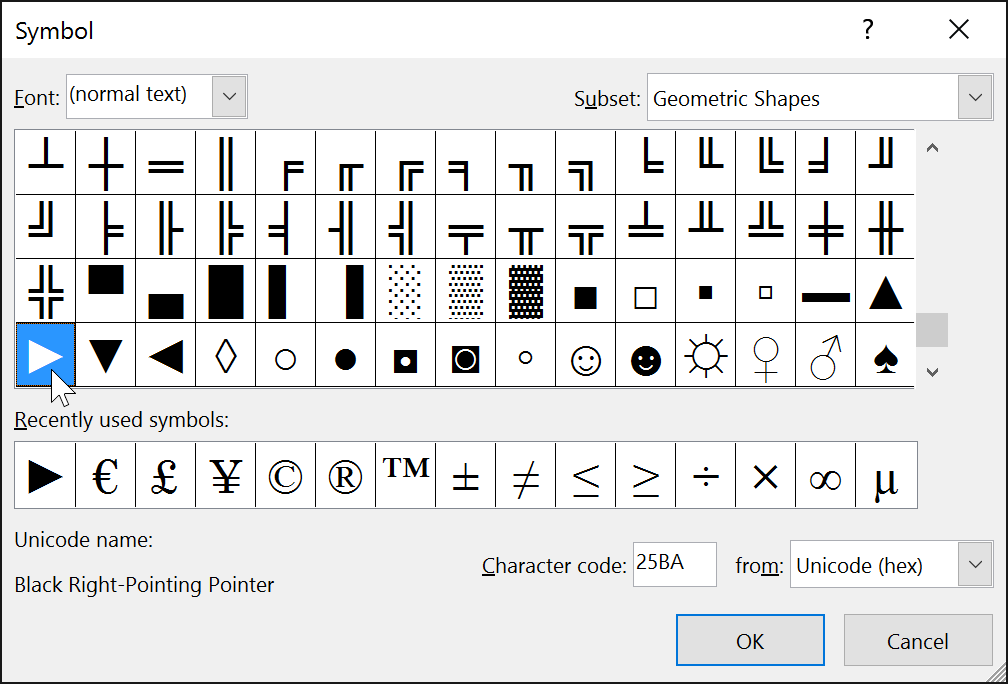
8. Click OK. The icon will now appear as the selected bullet point option in the Bullets and Numbering dialog box.
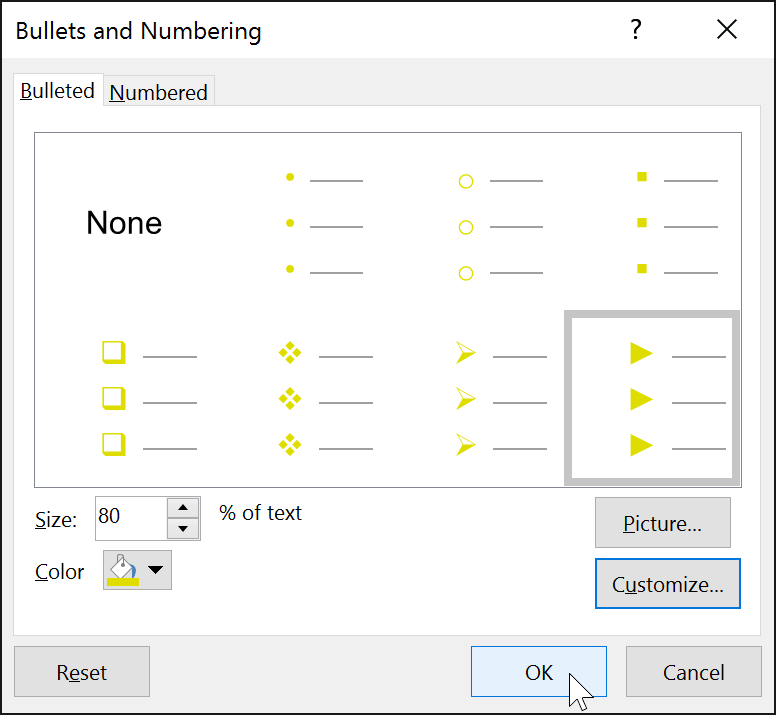
9. Click OK again to apply the symbols to the list in the document.
To change the spacing between bullet points and text, you can move the first-line indent marker on the Ruler. For more information, see the article: Indentation and Line Spacing.
Final Thoughts
Understanding powerpoint 2019 (part 12) makes it easier to evaluate the information and apply the most relevant recommendations. Focus on the key points above and verify details that may change over time.
FAQ
What is powerpoint 2019 (part 12)?
Explore powerpoint 2019 (part 12): lists, including the key concepts, practical examples, important considerations, and useful guidance.
What key points does this article cover?
The article focuses on How to modify bullet point styles, How to modify a numbered list, How to change the starting number, with practical explanations and examples.
How can you use this information in practice?
Use the explanations to compare options, verify important details, and make a more informed decision. Apply the recommendations that best match your goals and situation.
Related Articles
 PowerPoint 2019 (Part 1): Getting Started with PowerPoint: Explained7 minutes read
 PowerPoint 2019 (Part 11): Presenting Slideshows: Explained9 minutes read
 PowerPoint 2019 (Part 6): Applying Themes: Explained5 minutes read
 PowerPoint 2019 (Part 5): Working with Text: Explained4 minutes read
 PowerPoint 2019 (Part 16): Shapes: Explained7 minutes read
 PowerPoint 2019 (Part 10): Printing Your Presentation: Explained4 minutes read
Reader Comments 0
Sign in with email or Google to join the discussion.