Instructions to divide and merge drives right in Windows 7
If in Windows XP, when you want to split or merge disk partitions on a hard drive, we can't directly manipulate Windows but need to use external software (PQ Magic, Arconis, Paragon ...). As for Windows 7, this is easy because that feature has been improved ....
If in Windows XP, when you want to split or merge disk partitions on a hard drive, we can't directly manipulate Windows but need to use external software (PQ Magic, Arconis, Paragon .). As for Windows 7, this is easy because that feature has been improved.
- Video tutorial to divide and merge drives right in Windows
The following is a tutorial on how to use the features in Windows 7 to quickly and effectively split and merge drives with just a few simple steps. This method also has the advantage of not needing to use external software and not losing your data.
The following article does a little bit of detail, so it seems a bit " lengthy" , but when you do it directly, you will find it very simple with just a few clicks.
1. How to divide the drive:

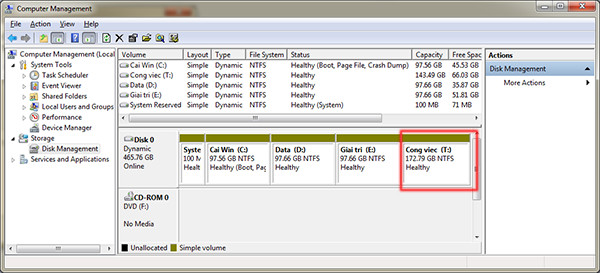
4 original drives in the computer (C; D; E; T)
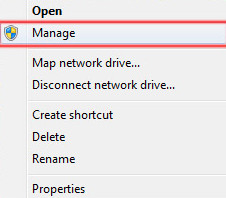
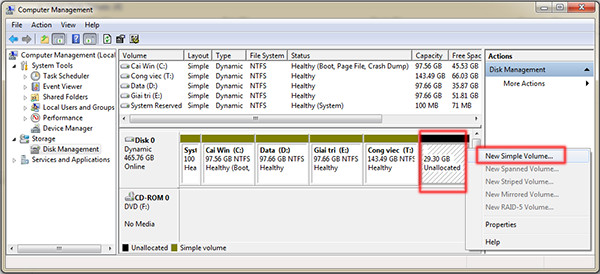
Right-click My computer> select Manage (or hold down the window key + R > type diskmgmt.msc ) to open the drive management window in the computer
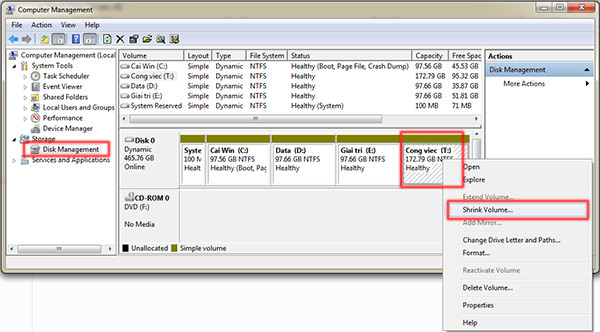
In this window select Disk Management (left)> right-click on the drive you want to share Shrink Volume . Here I choose drive T.
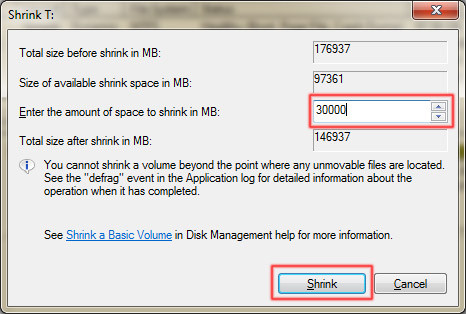
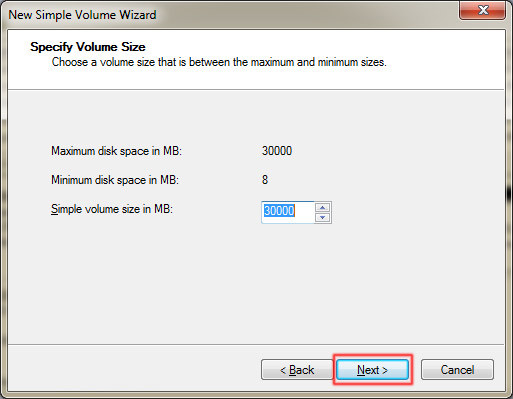
The partition table appears showing the information of the prepared drive. Enter the capacity of the new drive to create (in MB) in the box " Enter the amount of space to shrink in MB "> then press Shrink . Here I enter 30000 MB equivalent to 30 GB which will be the newly created volume.
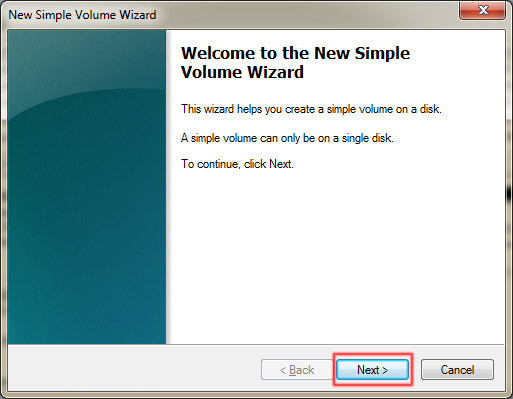
We have seen a new partition in the drive management panel that has not been formatted yet. Right-click on this new drive and select New Simple Volume . to format this drive to use it.
Click Next to continue
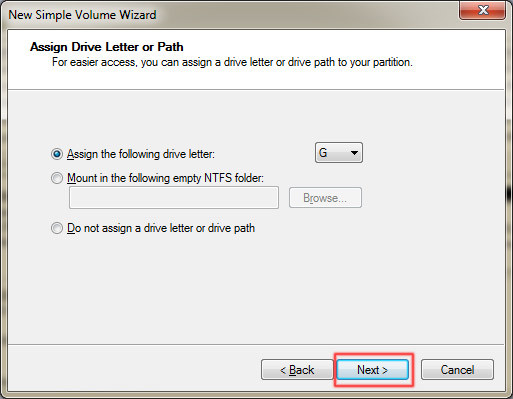
This new drive is labeled G , which can be changed to another label> click the down button> Next
By default, it will switch to NTFS format, can be changed to another format depending on your needs> Next
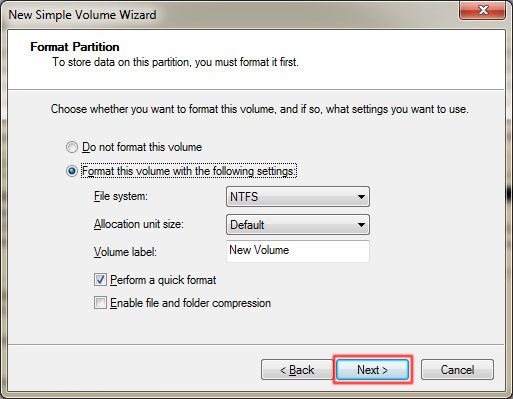
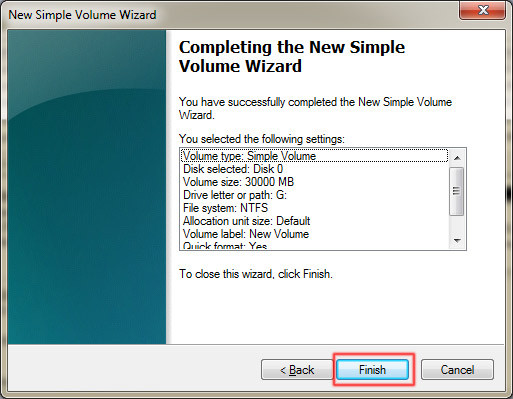
Click Finish to finish. Thus the new hard drive partition labeled G , capacity of 30000 MB (equivalent to 3 GB) has been extracted from the original T drive ready to be used.
2. How to merge drives
Note:
- It is only possible to merge the drive right next to each other, the drive is not together. For example, look in the Computer Management table below, drive E is between two drives D and T, so you can combine drive E with drive D or drive E with drive T. And drive D with drive T is not side by side, so it cannot be merged with together.
- When adding drive A to drive B to form a common drive C, you must put a drive (A or B) into a new form (not yet formatted for use), then you can merge it. Therefore, it is necessary to backup the drive data to a new form to the other drive before proceeding to avoid data loss.
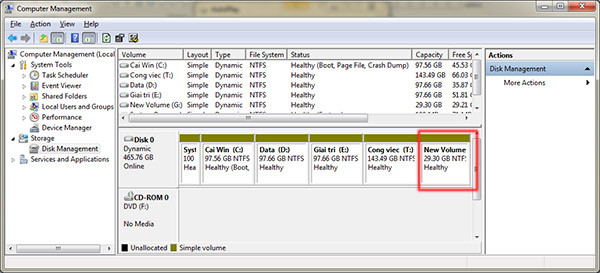
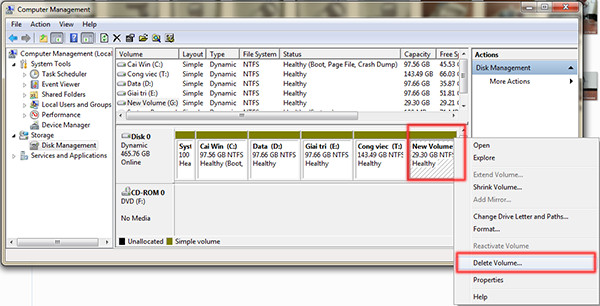
The specific example below with the newly created G (30 GB capacity) drive on top comes with a T (142 GB) drive next to a 172 GB drive.
Right-click this drive area> Delete Volume (bring the drive to a new, unused format)
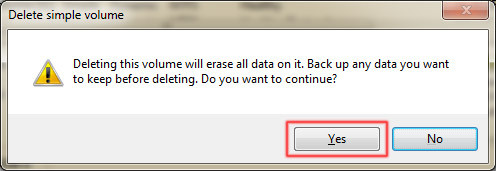
The data alert box in this drive will be deleted, you previously backed up, and then click Yes to continue
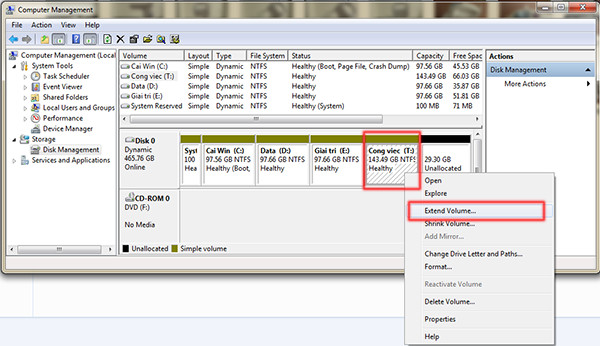
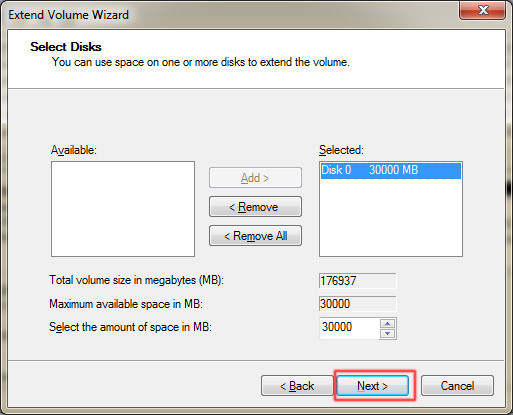
Right-click the T > Extend Volume drive to merge the drive
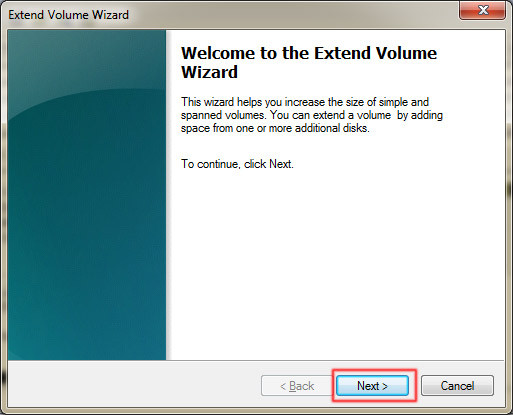
The dialog box appears> Next
The new dialog box appears, the Available table lists unformatted drives next to the T drive, you can select Add (to push to Selected options). Here only 1 G drive has been selected> Next
Only after a few seconds is done. Click Finish to finish
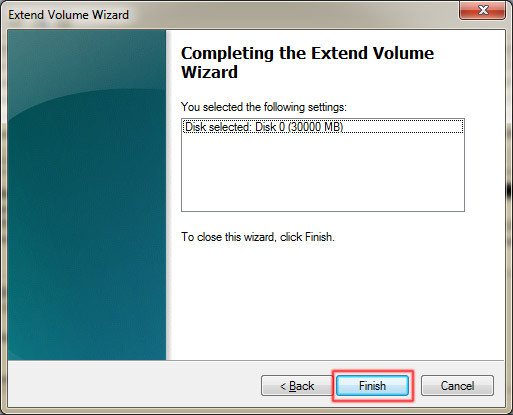
So G drive has been imported into drive T