Table of Contents
This updated guide examines How to Create a Partition and organizes the essential facts, background, and practical takeaways in clear American English.
Method 1
On Windows
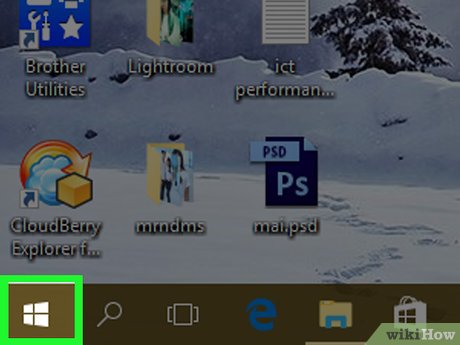 Open Start
 . Click the Windows logo in the bottom-left corner of the screen.
- You can also press the⊞Winkey on your computer's keyboard.
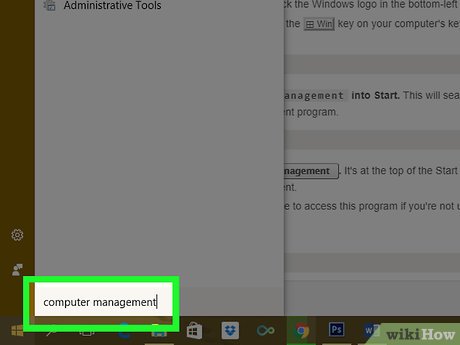 Typecomputer managementinto Start. This will search your computer for the Computer Management program.
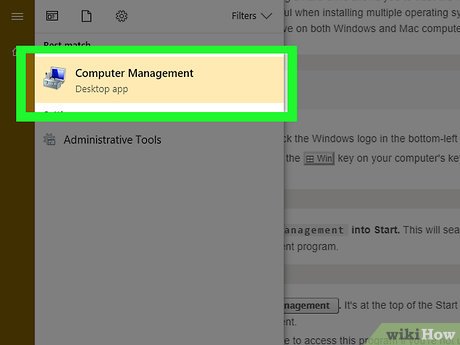 ClickComputer Management. It's at the top of the Start window. Doing so opens Computer Management.
- You may not be able to access this program if you're not using an administrator account.
 Click theDisk Managementtab. This tab is in the sidebar on the left side of the Computer Management window.
- If you don't see this option, first double-click Storage .
 Select your hard drive. In the window near the bottom of Computer Management, click your hard drive's box. This box should have the hard drive's letter (e.g., "(C:)") as well as the number of gigabytes (GB) of storage available to use.
 ClickAction. It's a tab in the upper-left side of the Computer Management window. Doing so prompts a drop-down menu.
 SelectAll Tasks. This option is near the bottom of the drop-down menu. Selecting it prompts a pop-out menu to appear.
 ClickShrink Volume…. It's in the middle of the pop-out menu. Clicking Shrink Volume... will prompt Windows to determine how much free space you have. When it finishes doing so, a new window will open.
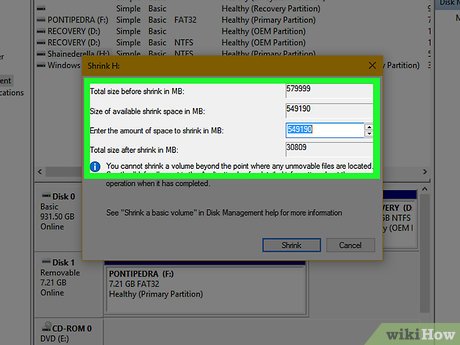 Determine your partition's size in megabytes. Type the number of megabytes that you would like your partition to be into the "Enter the amount of space to shrink in MB" text field on the right side of the page.
- The maximum number of megabytes that you can allocate is listed directly above the field that you type in.
- There are 1000 megabytes (MB) in one gigabyte (GB). To create a 5 GB partition, you would type5000into the text field.
 ClickShrink. It's at the bottom of the page. This will begin creating a segment of your hard drive to serve as the partition.
- This process may take a few minutes.
 Select the new partition. Click the new partition, which will say "Unallocated", to the right of the hard drive's space.
 ClickActionagain. This tab is in the upper-left side of the window.
 SelectAll Tasks, then clickNew Simple Volume…. It's near the top of the pop-out window.
 ClickNext. It's in the bottom-right side of the window. This will take you to the beginning of the partition setup.
 ClickNext. Doing so will accept your partition's size and take you to the next page.
 Select a drive letter, then clickNext. You can change the partition's drive letter (e.g., "E") by clicking the drop-down box and then clicking a new letter.
- This is an optional step.
 Check the "Format this volume with the following settings" box. It's near the top of the page. This option will set up your partition with Windows default settings, which will allow it to work with Windows like your regular hard drive.[1]XResearch source
- If the "File system" box doesn't say "NTFS", click it and then click NTFS . This will format your partition for Windows.
- You can also change the partition's name in the "Volume label" box.
 ClickNext. It's at the bottom of the page. This will take you to the final page.
 ClickFinish. Doing so will begin partitioning your drive. Once this process completes, you will be able to interact with the partition in the This PC program; it will appear alongside your hard drive in the "Devices and drives" section.
- Partitioning can take several minutes to several hours, depending on the size of the drive and the partition's size.
Method 2
On Mac
 ClickGo. This tab should be in your Mac's menu bar at the top of the screen.
- If you don't see Go , click the desktop or open a new Finder window to make it appear.
 ClickUtilities. It's at the bottom of the Go drop-down menu.
 Double-clickDisk Utility. This icon resembles a Mac hard drive with a stethoscope on it. Doing so will open the Disk Utility program.
 Select your hard drive. Click your Mac's hard drive in the upper-left side of the Disk Utility window, just below the "Internal" heading.
 ClickPartition. This tab is at the top of the Disk Utility window.
 Click+. It's below the hard drive circle that's on the left side of the page.
 Determine your partition's size. Click and drag the knob at the bottom of the hard drive circle counter-clockwise to increase the partition's size, or clockwise to reduce it.
- You can also type a number in gigabytes (GB) into the "Size:" field to set your partition's size.
 Select a file format for your partition. Click the File format drop-down box, then click a format. This will set your partition's file system as your selected format.[2]XResearch source
- If you're setting up your partition for use with Mac, click a MacOS Extended option in the drop-down menu.
- You can also enter a name for your partition in the "Name:" field.
 ClickApply. It's in the bottom-right corner of the page. Doing so will prompt your Mac to begin creating your partition.
- This process will take a while, especially if your hard drive and partition are both larger than one terabyte.
 ClickDonewhen prompted. Your Mac's partition has successfully been created.
FAQ
What is How to Create a Partition about?
It provides a structured overview of click, explains the main context, and highlights practical takeaways for readers.
Why does this topic matter?
Understanding the main concepts helps readers evaluate the issue, avoid common mistakes, and make better-informed decisions.
How should readers use this information?
Use the guidance as a practical starting point, confirm details that may have changed, and follow current product, safety, or security recommendations.
Related Articles
 This Is How to Delete Recovery Partition and Recovery Partition11 minutes read
 Paragon Partition Manager: Complete Guide4 minutes read
 How to Create a Recovery Partition to Customize Windows Recovery10 minutes read
 How to Fix the 'We Couldn't Create a New Partition' Error in Windows 109 minutes read
 Fix 'Setup Was Unable to Create a New System Partition or Locate4 minutes read
 EASEUS Partition Master - Download the Latest EASEUS Partition Master3 minutes read
Reader Comments 0
Sign in with email or Google to join the discussion.