Instructions to mount the hard drive into a folder on Windows 10
Setting up a mout-point directory path not only minimizes the number of drive letters on your computer, but also helps you organize and manage drives better, even in the rare case Can connect to multiple drives.
Table of Contents
When there are multiple hard drives connected on the computer, it is best to mount these hard drives into folders.
Instead of using RAID or using methods to group logical drives, on Windows 10 you can use the feature that allows you to assign a mount-point directory path to a hard drive, and appear as a folder on the computer instead of using the drive letter.

1. How to assign the mount-point directory path to the hard drive?
1. Press Windows + E key combination to open File Explorer.
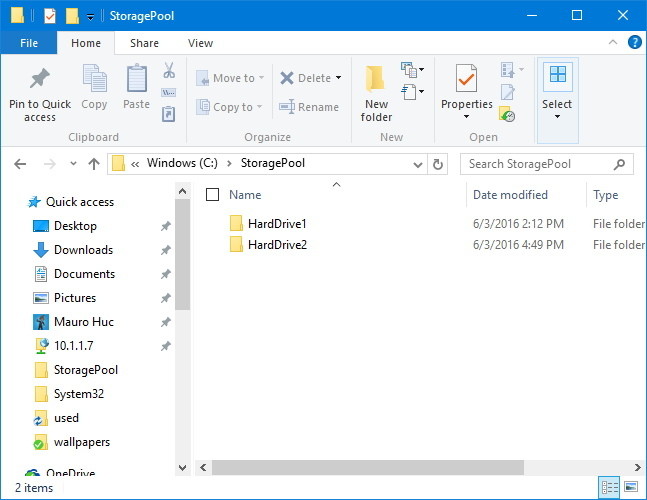
2. Navigate to the location where the folder you want to mount-point to create a folder named descriptions. Such as StoragePool .
3. Double-click the new folder you just created and create a folder for each hard drive you want to mount with a descriptive name. Such as HardDrive 1 and HardDrive 2 .
4. Press Windows + X key combination to open the Power User Menu and select Disk Management .
5. Right-click any empty drive that you want to mount as a folder and select New Simple Volume.

6. Click Next.
7. Click Next again.
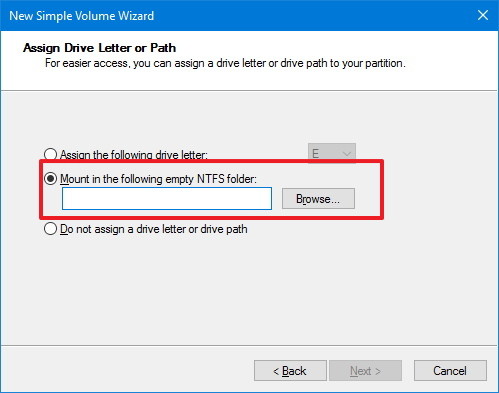
8. Select the option Mount in the following empty NTFS folder and click Browse .
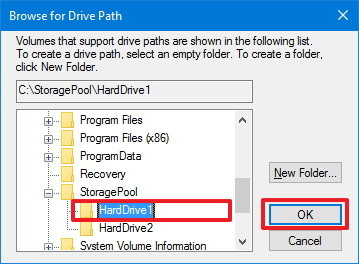
9. Select the folder you want to mount mount point. Such as C: StoragePoolHardDrive1 .
10. Click OK.
11. Click Next.
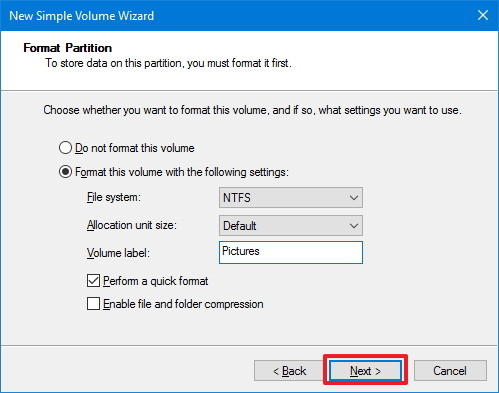
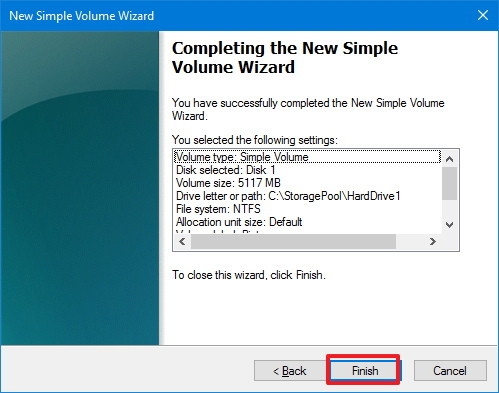
12. Make sure you have changed the drive name with the description name, and check Select Perform a quick format .
13. Click Next.
14. Click Finish to complete the process.
The most outstanding feature of this method is that it is not destroyed, meaning that you add or delete the mount-point directory path, your data will not be deleted. However, the drawback is that this method only works with NTFS file system drives.
2. Assign the directory path to mount-point to the drive with data
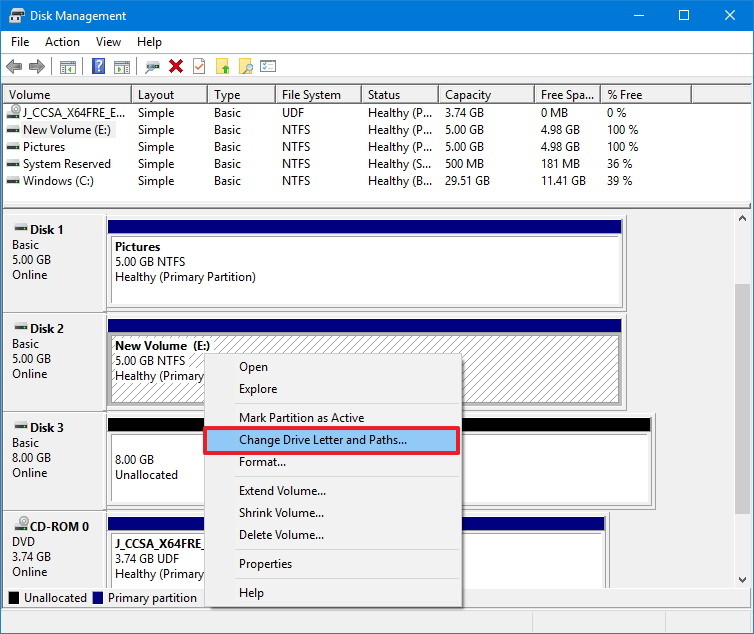
If the drive contains data, follow the steps below to remove the drive letter and access the mount point.
1. Right-click the drive and select the Change Drive Letter and Paths option .
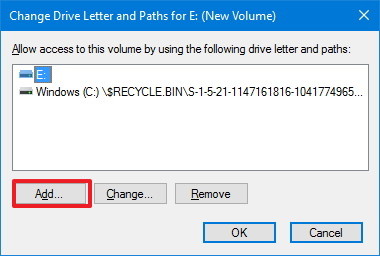
2. Click Add.
3. Select the option to Mount in the following empty NTFS folder and click Browse.
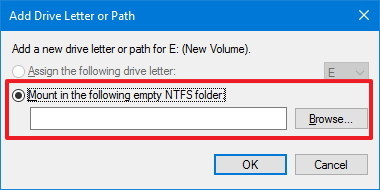
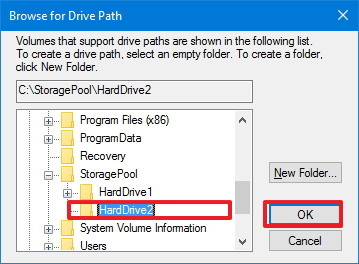
4. Select the folder you want to assign mount-point to. Such as C: StoragePoolHardDrive2.
5. Click OK .
6. Click OK again to complete the process.
7. Right-click the drive and select Change Drive Letter and Paths again.
8. Select the old drive letter and click Remove .

9. Click Yes to confirm the deletion of the drive letter.
Alternatively, you can do the same steps to remove the mount-point directory path or restore the drive letter.
Setting up a mout-point directory path not only minimizes the number of drive letters on your computer, but also helps you organize and manage drives better, even in the rare case Can connect to multiple drives.
This solution is extremely useful when you are sharing a folder on the Network. Instead of having to create a new Shared Network page, you just need to mount the drive into a folder inside the folder being shared on the Network.
It is important to note that each hard drive will continue to operate independently, which means that if a drive fails, you will not lose data on other drives. However, in order to prevent a bad situation from happening, it is better to make a backup before making any changes on your computer.
Refer to some of the following articles:
- Steps to disable or completely remove the Onedrive application on Windows 10
- Activate Credential Guard to enhance Windows 10 security
- Wifi on Windows 10 does not connect after starting from Sleep mode
Good luck!
Was this article helpful?
Your feedback helps us improve.
Related Articles
 How to mount the hard drive and partition using the Linux command line9 minutes read
 How to mount a folder as a virtual drive on Windows6 minutes read
 How to mount SATA port for desktop3 minutes read
 'Turn' a folder into a virtual drive on Windows 104 minutes read
 Instructions for using Clonezilla to copy Windows hard drives8 minutes read
 How to fix portable hard drive not recognized when connected to computer7 minutes read
Reader Comments 0
Sign in with email or Google to join the discussion.