Instructions on how to check in for Facebook Fanpage
Currently the use of social networks, especially Facebook to promote and introduce products and services to users, is very popular. Even Facebook has become one of the important online marketing strategies of many businesses and companies. Especially when the number of Facebook users keeps increasing, it makes your products more accessible to users.
And if a Facebook Fanpage gets a lot of people checking in after visiting, it also makes it easy for the online community to know the product or service of that site. However, because the Fanpage interface on Facebook has changed, the check in for Facebook Fanpage locations has changed. If you are looking for ways to create a place for your Facebook page, please refer to the article below.
How to check in location for Fanpage Facebook
Step 1:
First of all, please visit the Facebook Fanpage that I am managing. To create a place for the page, first go to the page interface and click Select About on the menu to the left of the page's interface.

Step 2:
In this new interface, we will see Fanpage information. Next, in the General section of Products / Services, click Edit .

Step 3:
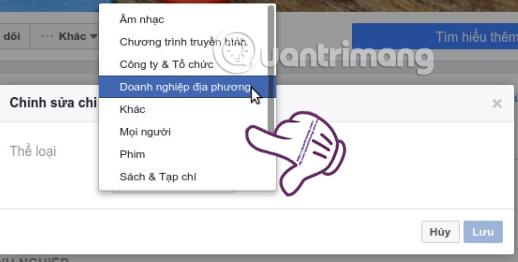
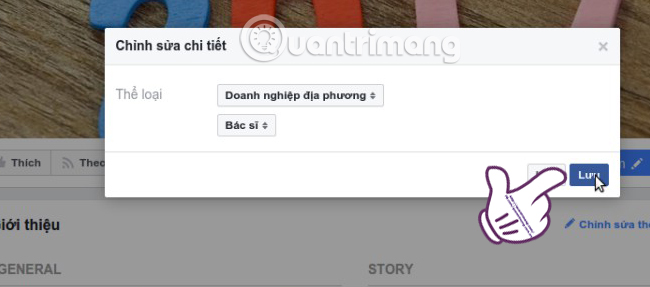
Next comes the small dialog box Edit details . Here you will select the category for Facebook Fanpage that you are managing. There will be many items for us to choose appropriately for the content as well as the page information.

As soon as you have made your selection, click Save to save the changes.

Step 4:
Next appears a small window with content Add more information to help visitors , we click on Edit page information to continue.

Step 5:
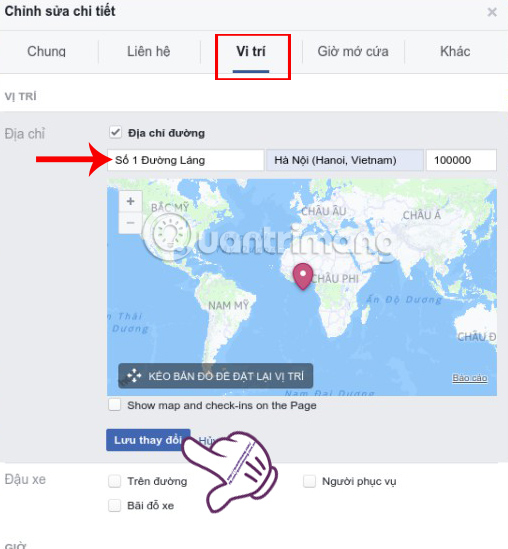
At the Edit Details dialog box, we will click on the Location section . In the Address field below, you will select the Street Address then enter the Facebook Fanpage location . Finally click Save changes to save the Facebook Fanpage location.

Step 6:
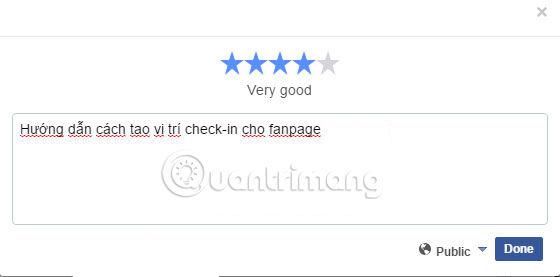
Now we go back to the 5-star rating and evaluation section for Facebook Fanpage to add some positive comments. This will help the Facebook Fanpage that you manage to prioritize to create check in.

Above is a tutorial on how to create a place, check in for Facebook Fanpage. This will help your Facebook Fanpage be promoted more in the online community, helping to increase the rating of the page as well as the information and products of the site are known more.
Refer to the following articles:
- How to turn off status status on Facebook?
- How to censor comments on Facebook Fanpage
- How to permanently delete Facebook account
I wish you all success!