Instructions on how to create Facebook Fanpage for online sales
Due to the continuous development of social networks, especially Facebook, many businesses, companies or even small business shops have used social networks to promote their products.
Sales, online business on Facebook will help your products and brands get closer to everyone, increase the number of people visiting the site, synonymous with the business of businesses and shops as well. more developed. So how to create an online Facebook Fanpage? In the article below, Network Administrator will guide you how to create Facebook Fanpage to sell online.
How to create Facebook Fanpage quickly
Step 1:
At the main interface on Facebook, we click on the inverted triangle icon and select Create page . Or visit https://www.facebook.com/pages/creation/ link

Step 2:
Next, in the new interface you will see Facebook categorized into 6 categories. We will select the Local Business section or location .

Step 3:
In this step, users will fill in their Fanpage details including:
- Choose a category: there are many types of businesses for us to choose from. Here, you can click on Shopping / Retail .
- Business name or location: enter Facebook Fanpage name . Note, users should prioritize the name Fanpage short, easy to remember, it is best to follow the product name + shop name or brand . Thus, users will be able to easily find a store when searching on Facebook or Google.
- Street, street, city addresses: enter specific, clear addresses.
- Zip code: 70000 if in HCMC or 10000 if the store is in Hanoi .
- Phone: enter the phone number to contact customers.
After you have entered all the basic information for Fanpage to sell your products online, click Start to continue.

Step 4:
Soon, we will come to the basic Facebook Fanpage interface. In the middle you will see the Welcom to Your New Page line. Below will be the options to set up additional information needed for Fanpage. First, click the Add cover photo . Facebook's cover image has a size of 851 x 315 pixels. Readers can refer to standard size post for Facebook Fanpage cover photo.
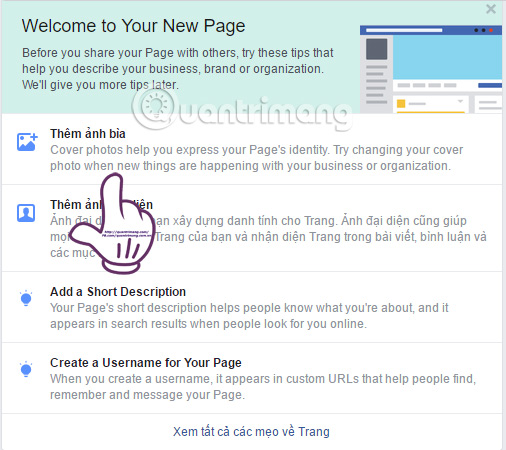
Click on the Upload image to post cover photo for Fanpage.

Step 5:
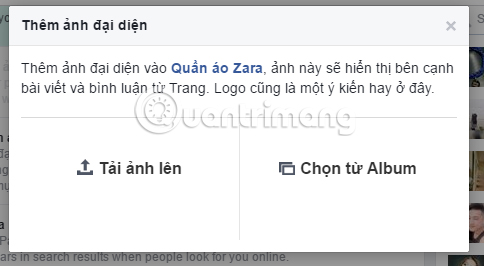
Next, click on the item Add a fan image for Fanpage to sell on Facebook.

Here, users can download images directly or use the images available on Fanpage's album to make the avatar.
Step 6:
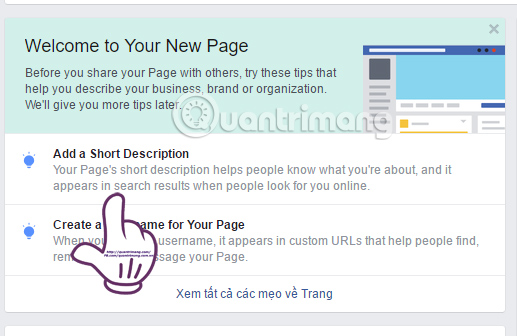
Next, click on the Add a Short Description button to fill in the information for Fanpage to sell the goods you are managing.
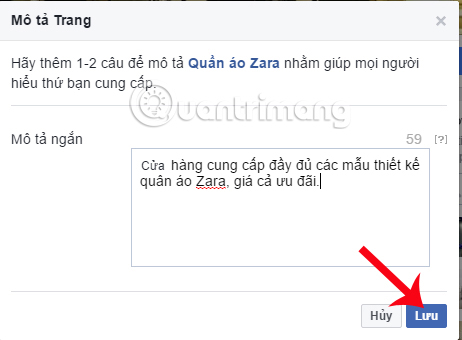
Users write a brief description, full of information about business products for customers to know. Click Save at the bottom.
Step 7:
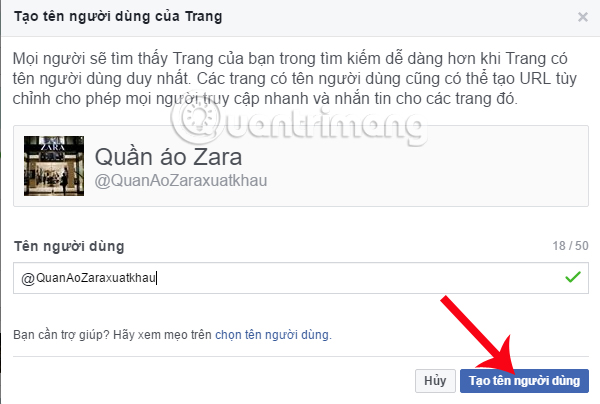
Click Create a Username for Your Page , enter this Facebook Fanpage website address. Users should choose a short name, no sign, there may be a number or a dot.

Facebook will help us check if that username is already on Facebook. If you are infected, you will receive a notification and must enter a new name. After entering the username of the page, click Create user name below to save it.
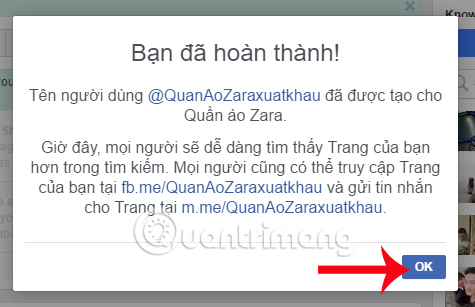
When creating a successful username, we will receive a notification from Facebook as shown below. Click OK .
Step 8:
When you have completed the above step, you will have Facebook Fanpage selling goods as shown below. To add some other information to the page, click the About item on the left interface of the page.

Step 9:
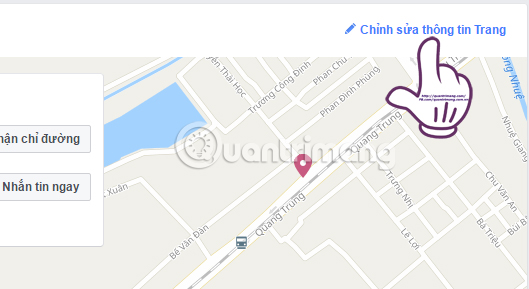
Click the Edit page information section .
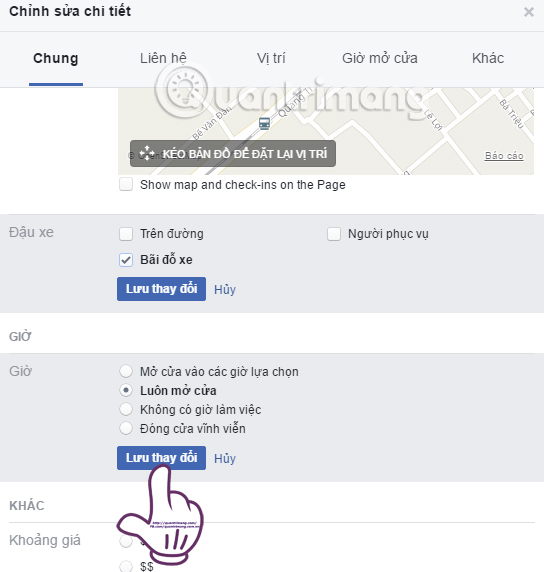
At the Edit details interface, you can add specific information to the site such as phone, website, email address, working hours, . Click Save changes in each edit item to save new information.
Step 10:
Go back to the main interface of the page, click the Add button . This will help customers interact with your site faster.

There will be many interactive buttons for us to add to Fanpage. For example, here I will choose Get in Touch, how to quickly contact the page. Here, you can create a Call Now button, Contact us, Send message, Register, Email. Here I will select Message log.
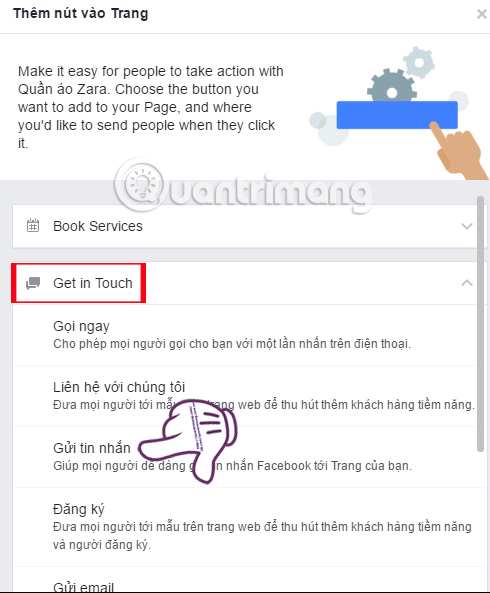
Click Next Add a button below to create a Send Message button for Fanpage. Alternatively, you can click Turn on Quick Reply to respond quickly to messages for customers.
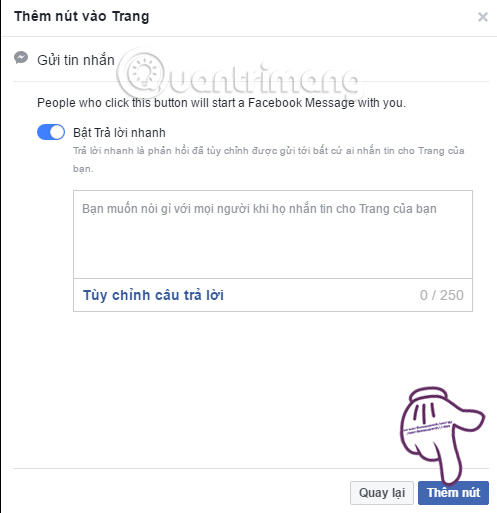
So you have completed the steps to create yourself a Fanpage selling online on Facebook already. The next step is to post product images, invite friends, as well as add some other customizations for the Facebook Fanpage under management.
Refer to the following articles:
- Instructions on how to lock, hide Facebook Fanpage temporarily
- This is how to delete Facebook Fanpage
- How to censor comments on Facebook Fanpage
I wish you all success!