Instructions for dividing groups in Google Meet
The Breakout Rooms feature on Google Meet allows meeting organizers to randomly or selectively assign participants to small groups for discussion, learning, and interaction. Details on how to create and divide groups have been shared below, please refer to and implement..
Google Meet allows meeting organizers or teachers to divide attendees into small groups to discuss without being interrupted by other groups.
How to split into groups in Google Meet
2.1. How to create a breakout room on Google Meet using a browser extension
Step 1: Download the Google Meet Breakout Rooms extension on your browser here: Google Meet Breakout Room
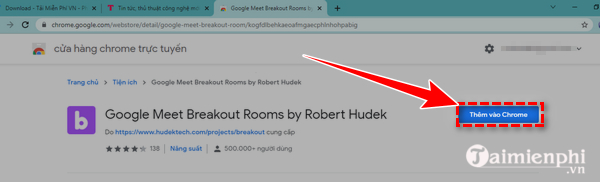
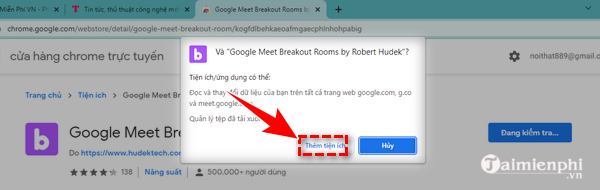
Display notification to grant permission to extension/application on Chrome => click " add extension "
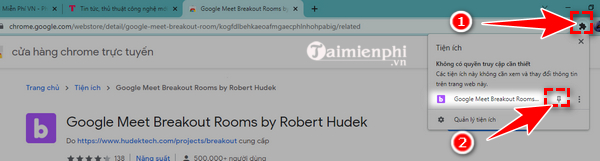
Step 2 : The browser displays the icon of the Google Meet Breakout Rooms feature (Purple b-shaped icon).

If you don't see this icon, you can go to Chrome browser, find the extensions you are using, select Google Meet Breakout Rooms extension and press " pin " to pin the extension to the browser.
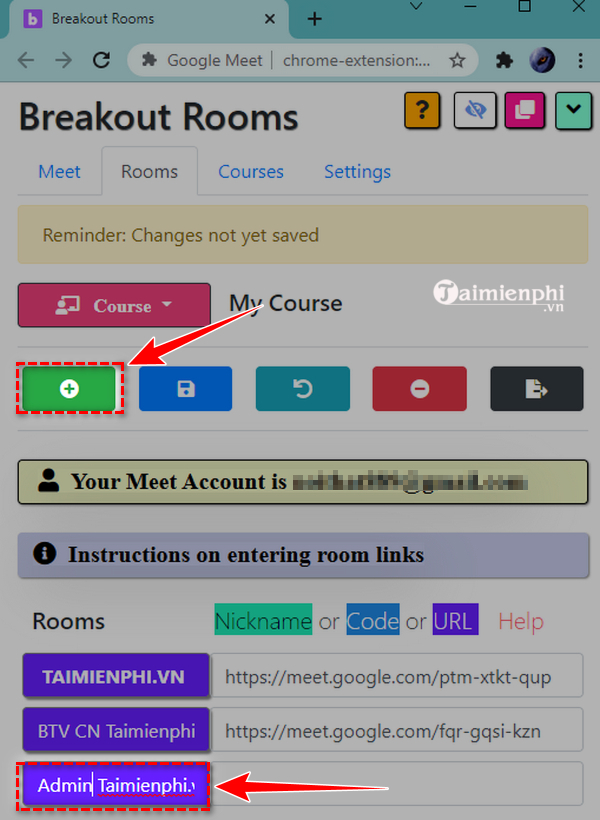
Step 3 : Open the Breakout Rooms utility by clicking on the purple b-shaped icon => switch to the " Rooms " tab.
- Here you will see the pre-created main room with the link to invite attendees.
- You can also click on the green box to rename the classroom.

Step 4: Click the blue (+) iconto create a group, you can name the subgroups.
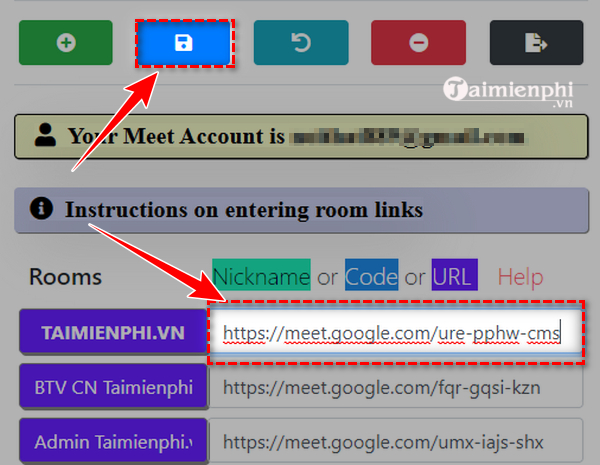
Step 5: Click on the " Save " iconas shown to create a link for the newly created group.
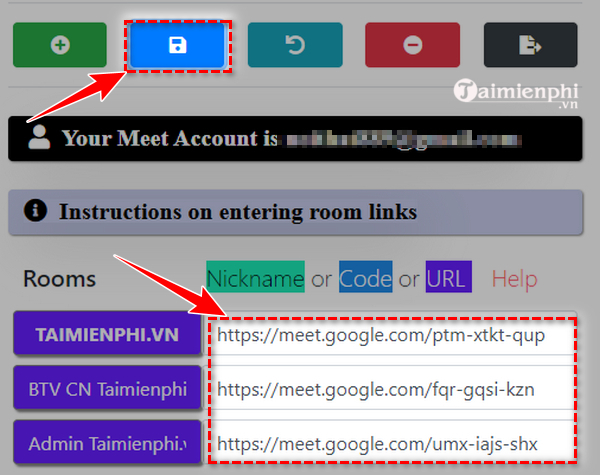
Here, if you have created a classroom on Google Meet before and invited all members to join, you can link the main classroom created by Google Meet and replace it with the official classroom link of the class.
Step 6 : Divide into discussion groups, assign members to groups
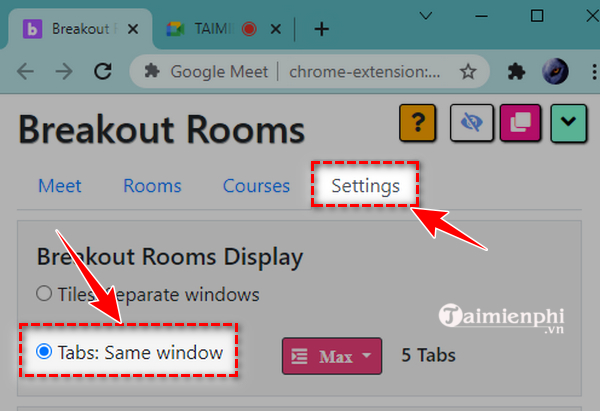
- From the Google Meet Breakout Rooms utility control panel, switch to the " Setting " tab to set up and divide members into groups.
- In the " Breakout Rooms Display " section, select " Same window " to specify the same window viewing rights.
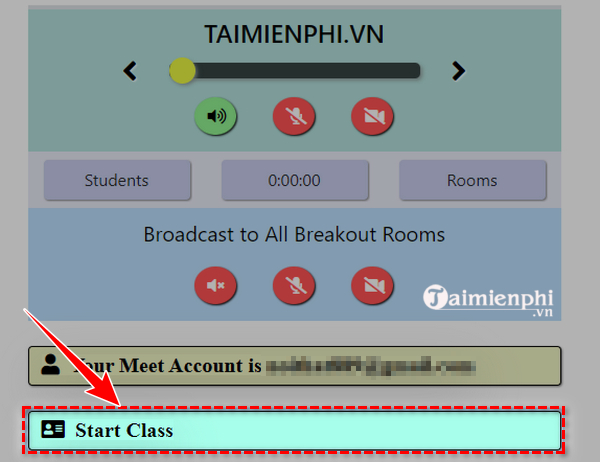
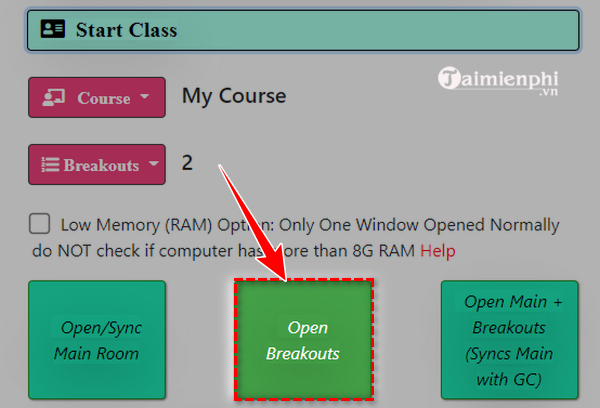
Step 7: Return to the " Meet " tab, click " Start Class " to start the class.
Here, in the " Breakout " section, select 2 to match the number of groups just created in the class.
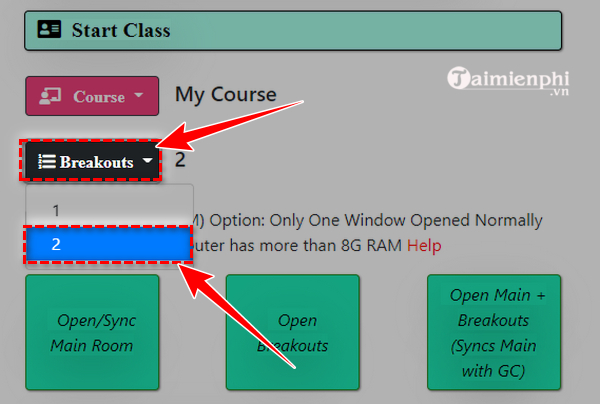
Step 8 : Click on the " Assign Breakout - Ad Hoc " box below, you will see the members participating in the class and the small groups just created on Google Meet.

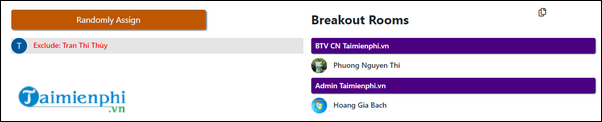
Here, you can click " Randomly Assign " to randomly assign class members to any discussion group.
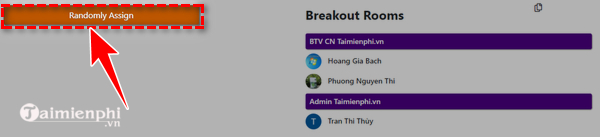
If the organizer wants to manually assign individuals to a discussion group, they can hold down a participant's name and drag them to the desired group. You can also remove members from a group by dragging their name to the " Randomly Assign " column. The name of the removed person will then appear with the text " exclude ".
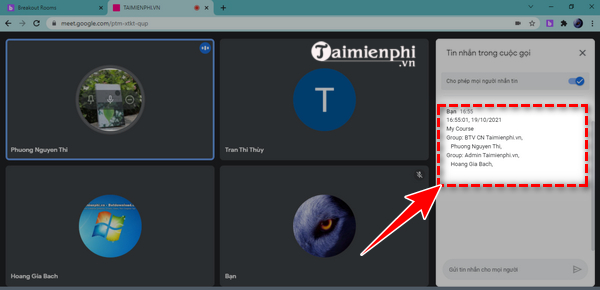
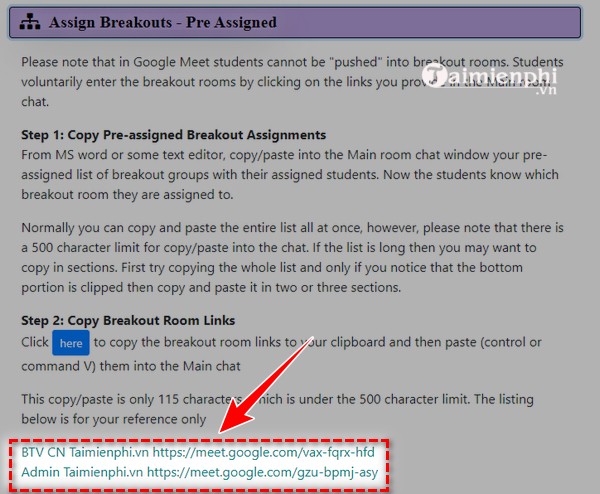
Step 9 : To send group information and member arrangement, click on the copy icon in the " Breakout Assignments " section.
Then, go to the online meeting room on Google Meet and send the information to the group chat.

Additionally, from the Breakout Rooms utility control panel, you can select " Assign Breakouts - Pre Assigned " to copy and paste the group joining link for members.
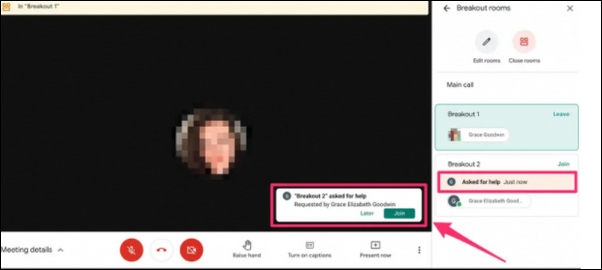
Step 10 : How to join a Google Meet group as a class organizer
Once the meeting is in progress, to join the discussion, return to the Breakout Rooms interface on Chrome, click the " Start Class " icon, then select " Open Breakout " to join the group.
Step 11: How to join a group as a member
After receiving information and group link from the organizer, members click on the designated group, press " Request to join " and wait for organizer approval.
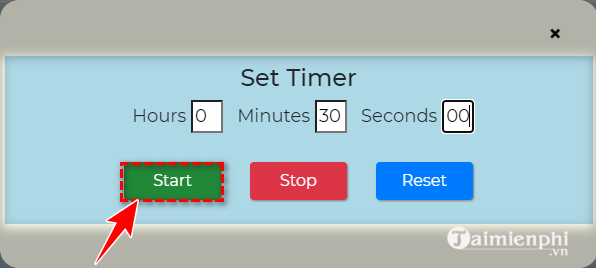
Step 12: Set up discussion time on Google Meet group
On the Breakout Rooms application interface, in the " Meet " tab, click on the time icon at the top to set the discussion time.
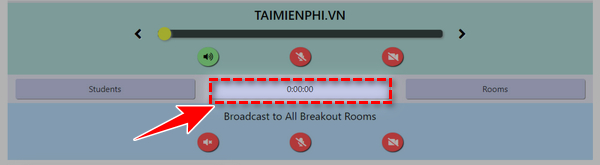
Then, select the desired time and press "Start" to start the discussion timer. The screen will display the countdown time for each group, and automatically turn off when the time is up.
2.2. How to split a group in Google Meet from a paid account
Step 1 : Start a video call on Google Meet.
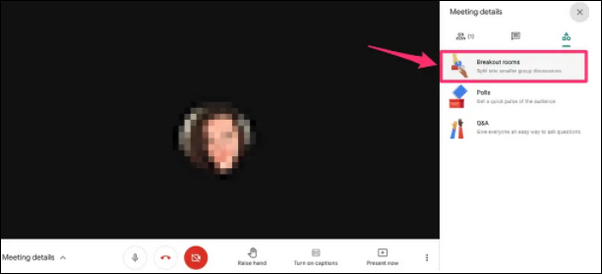
Step 2: Click on the " action " icon(the icon made up of a circle, square and triangle) in the bottom corner of the call.

Step 3: Click " Breakout Rooms "
Step 4 : Click on the pencil icon to edit and select the number of Breakout Rooms (number of groups) you want to create.
Step 5 : Participants will be assigned to groups. You can click on each member's name and drag and drop them into other groups as desired.
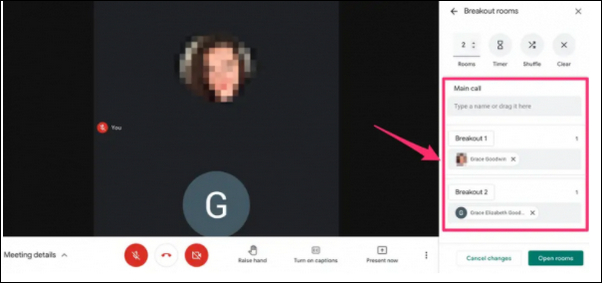
Step 6 : Click " Open Rooms " in the bottom right corner to activate the groups. Next, you can also Move to each group, press " join " if you want to participate in the discussion of each group.
Above, TipsMake has summarized how to create a breakout room on Google Meet and tips for dividing groups for both free and paid accounts. Read and follow the instructions in the article to improve your skills in using Google Meet for online meetings or classes.
Along with Google Meet, Zoom also integrates the Breakout Rooms feature, allowing the meeting host to divide the discussion group for the participants. To understand and know how to open and install this feature on Zoom, readers can refer to our tutorial article How to create a group on Zoom .