How to Use SnapNDrag
SnapNDrag is a great application for your Mac: it let's you perform screenshots in a very simple way. This article will teach you how to use this app! Download SnapNDrag. You can download SnapNDrag for free from Softonic here.
Table of Contents
Method 1 of 2:
Download and Installation
-
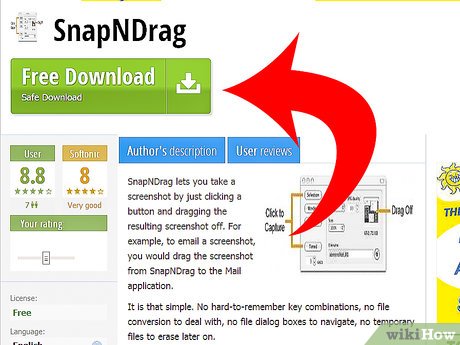 Download SnapNDrag. You can download SnapNDrag for free from Softonic here.
 -
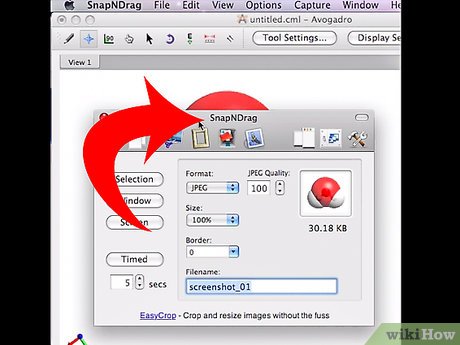 Open SnapNDrag.dmg Do this by searching your Downloads folder or directly open it from your browsers download bar. Then, in the window that appeared when you opened the .dmg file, drag the SnapNDrag icon to your Applications. Then double-click to open.
Method 2 of 2:
Using the App
-
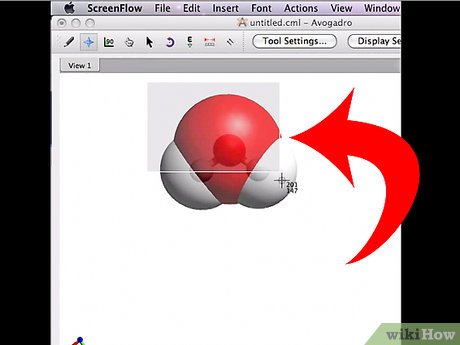 You can now take screenshots! There are 3 instant options: there is "Selection", which takes a screenshot of a part of your screen; "Window" Takes a screenshot of the tab you have open; "Screen" takes a normal screenshot of the whole screen. In addition to these 3, there is a fourth, "Timed", where you decide a set amount of time (by clicking the up and down arrows) and after that the app takes a "Screen" screenshot.
 -
 Edit your screenshots name. To edit it's name, take a screenshot and select it (by clicking it once) and look for the space which says screenshot_(number). It should be on the lower right. Then delete the default name, and name it what you want!
 -
 Change your screenshots location. Do this by opening the Finder window where you want your screenshot to be, and drag the file from the SnapNDrag app to your folder.
 -
 Edit your screenshot. You can edit your screenshot using Apple's Preview, which is the default application used when you try to open your screenshot. Go to the folder with the screenshot, double-click the file and it should open with Preview. In Preview, click the icon with a pen inside a box (it should be in the top-right part of the Preview app). From there, you can add lines, shapes, crop the screenshot and a lot more! If you want to know all of Preview's features, click here.
 -
 Enjoy using SnapNDrag!
Was this article helpful?
Your feedback helps us improve.
Related Articles
 26 useful screen capture apps for macOS17 minutes read
 Can Pokemon Go be played on a computer? The answer is yes!5 minutes read
 Summary - How to play Pokemon GO, virtual reality game catch Pokemon on smartphone5 minutes read
 Things you didn't know about 26 types of Pokeball - Part 24 minutes read
 Stardust's effective way in Pokemon GO4 minutes read
 AZ word about eggs in Pokemon Go3 minutes read
Reader Comments 0
Sign in with email or Google to join the discussion.