How to use Primary font
In addition to the fonts available on the computer, users can download and install Vietnamese fonts for the computer to limit Vietnamese typing errors. Especially for Primary school teachers, it is possible to install Primary font to make it easier for students to prepare exercises.
However, to use Primary font, users need to install external fonts, because they are not available in the computer. The following article will guide you how to install the Primary font on your computer.
- Fix errors not typing Vietnamese on Chrome
- How to fix errors do not type Vietnamese on Zalo
- Instructions for setting the default font in Microsoft Word
Instructions for installing Primary font on computer
Step 1:
Users click on the link below to download the Primary font set on the computer.
- Download the Primary font set
After downloading the user proceeds to extract the file using the decompression software.

Step 2:
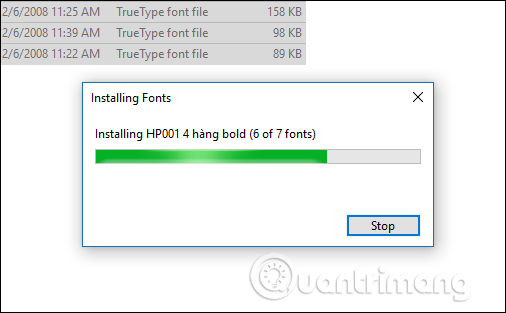
Continue to black out all unzipped font files and right-click and choose Install to install.

We wait for the font sets to be installed successfully on the computer.
Step 3:
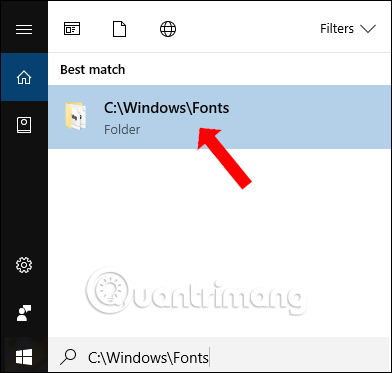
Leave this font folder intact, then enter the path C: WindowsFonts into the search bar on your computer. Click on the results of the Fonts folder on the top of the list.
Step 4:
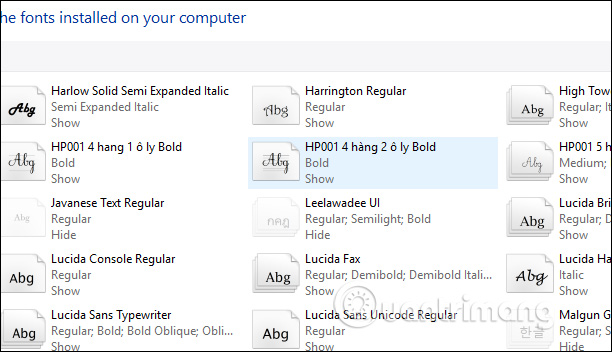
Then copy or cut the entire Primary font in the unzipped folder into the Fonts folder on your computer to use as a font on your computer.
Step 5:
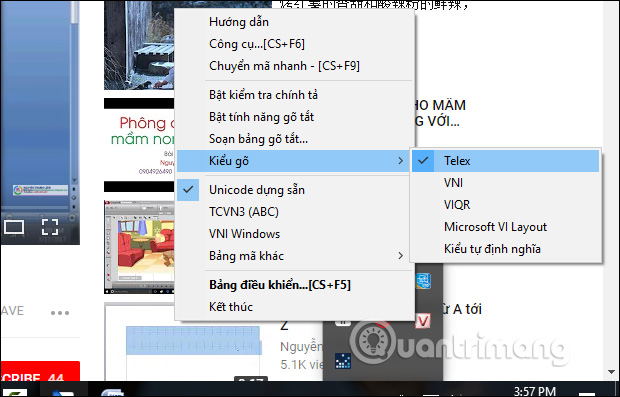
Click on the Unikey icon in the system tray and then turn off Enable spell checking if you're using, built-in Unicode and Typing Method Telex .
Step 6:
Now open Word and find the Primary fonts. Primary fonts include HL Hoctro, HP001 4 rows, HP001 4 rows 1 glass, HP001 4 rows 2 glass, HP001 5 rows, HP001 5 rows 1 glass. If you want to find any font, enter that font and will see in the font list.
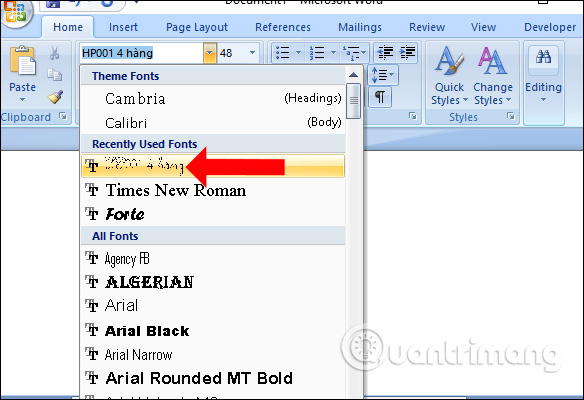
Enter the content and see the Primary font as shown below.
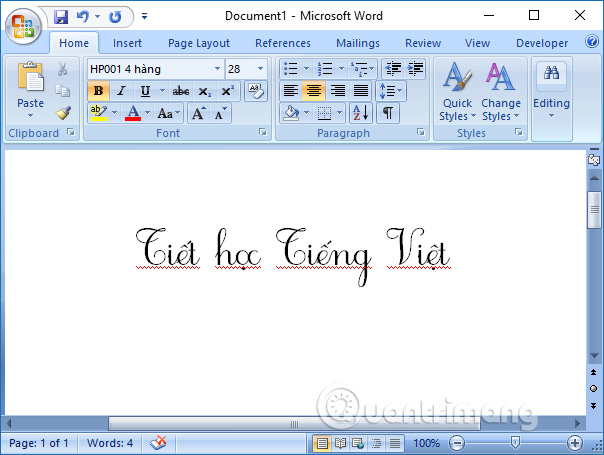
Step 7:
Also when adding this Primary font user can add Primary characters like reticle on Word. Click Symbol and select More Symbols to open the icon to select the icon.
In the Font section you also select the Primary font and will see the icons below.
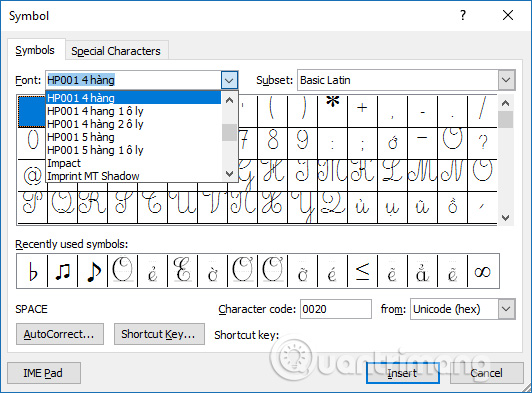
Select the grid icon to use.
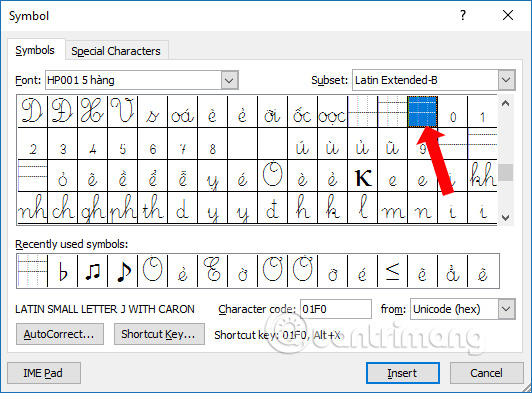
Step 8:
As a result, you will get the following lines.

If the rows are separated, click on the Home item and then select the Line Spacing section to choose Line Sapcing Options .
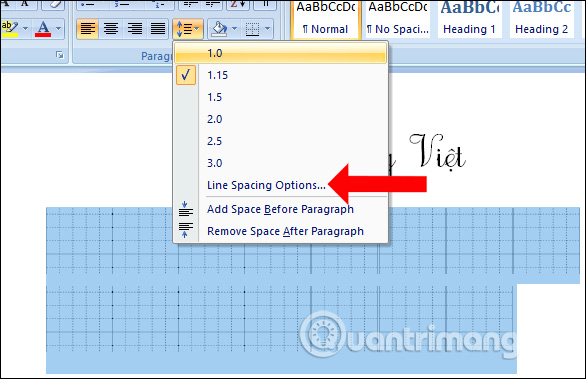
Then adjust the items as shown below and click OK to save.
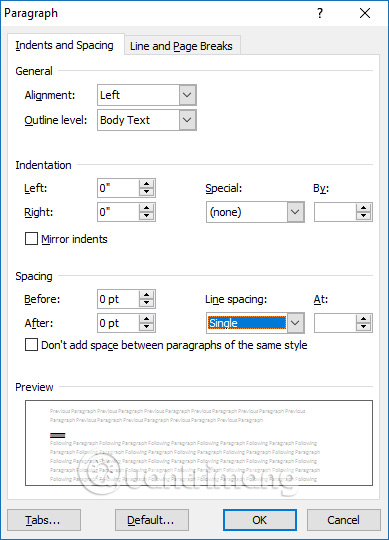
In case the lines are still not connected, it should be changed to another font. The result will be the grid line as shown below.
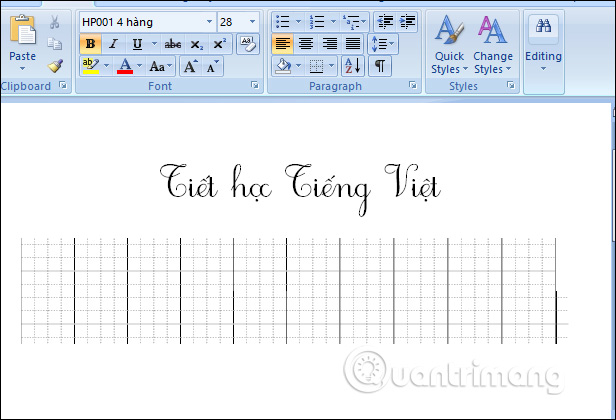
So you know how to write Primary text on Word by installing Primary font. Besides, it is also easy for us to learn how to write and write.
Video tutorial to install Primary font
See more:
- Summary of common shortcuts in Microsoft Word
- Create a quick dot (...) line in Microsoft Word
- How to create a cover page in Word
I wish you all success!