How to install and uninstall fonts on Windows 11
In addition to the built-in fonts, you can also install custom fonts for Windows 11 to expand your font selection. Below is a guide on how to install Windows 11 fonts and how to remove fonts when you no longer need them.
Table of Contents
Besides the built-in fonts, you can also install fonts for Windows 11 to expand your font selection. Once you successfully install fonts on your computer, all installed applications, such as Microsoft Office suite, Paint, etc., will be able to use those fonts. Below are instructions on how to install Windows 11 fonts and how to remove fonts when you no longer need them.
Instructions on installing fonts for Windows 11
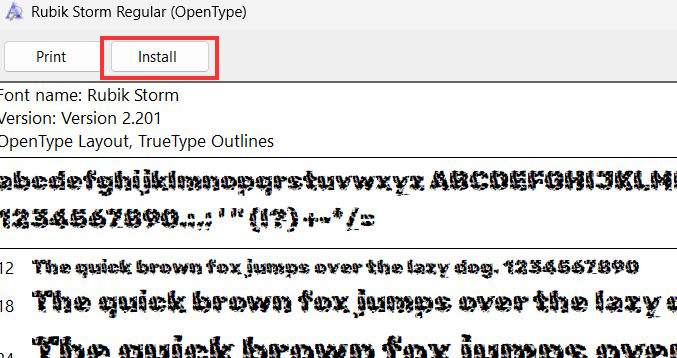
Download the font installer from internet sources to your computer and then extract it. Next, click on the font and select Install to begin the installation process.
Once successful, the font has been installed on the computer.
Instructions on how to uninstall fonts on Windows 11
Uninstall the font in Settings.
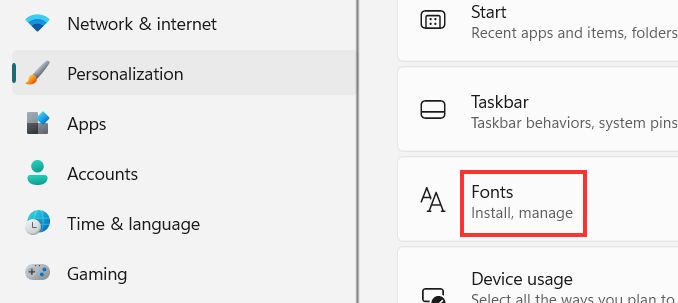
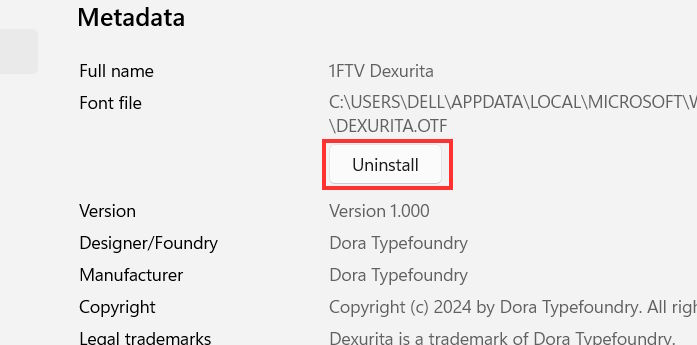
Go to Settings , then select Personalization on the left, then look to the right and select Font to adjust it.
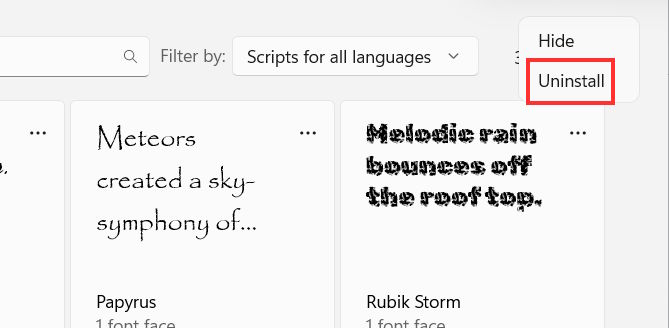
Scroll down and you'll see a list of fonts installed on your computer. Now, enter the font you want to delete into the search box . Click the three-dot icon next to the font and select Uninstall .
The font uninstallation process was then initiated.
Remove fonts from the Microsoft Store in Settings.
If you installed fonts from the Microsoft Store, follow these steps.
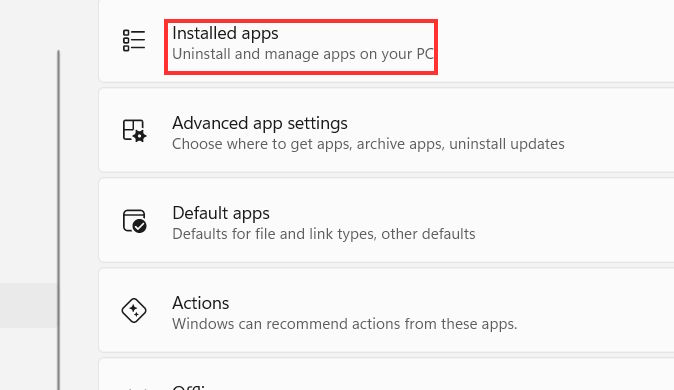
Open Settings, then tap on Apps , and to the side select Installed apps or Apps & features .
Then, locate the font you downloaded from the Microsoft Store , tap the three-dot icon , and select Uninstall to remove it.
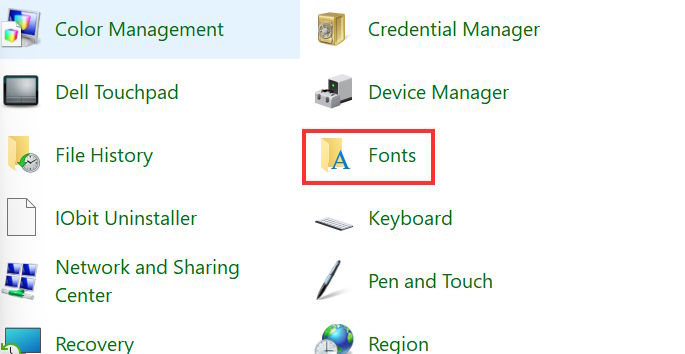
How to remove fonts from the Control Panel in Windows 11
We open the Control Panel on the computer and then click on the Fonts option to access the system fonts.
Next, open the font management interface in Settings so you can delete fonts directly from there.
Remove fonts from Windows File Explorer
You can access the font management folder installed on your computer by going to the path C:WindowsFonts .
Next, find the font you want to delete from your computer, then click the Recycle Bin icon to delete it.
Was this article helpful?
Your feedback helps us improve.
Related Articles
 How to install (and uninstall) fonts on Windows 113 minutes read
 How to install and remove fonts on Mac10 minutes read
 Steps to install Fonts for Windows 115 minutes read
 How to install fonts on Windows simply and quickly2 minutes read
 The simplest way to install additional fonts for computers and laptops3 minutes read
 Instructions for installing Font on Windows3 minutes read
Reader Comments 0
Sign in with email or Google to join the discussion.