Table of Contents
This guide provides a practical overview of Font Format in Word, including its main features, benefits, limitations, and important considerations.
The Font format includes the following options:
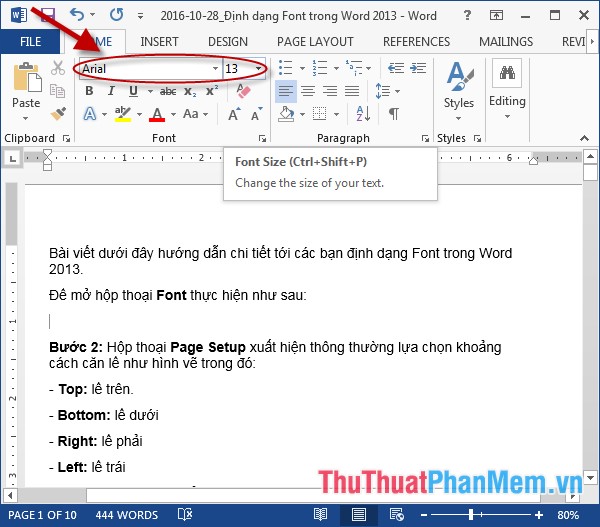
1. Choose a font, font size:
Font format, font size you click on the arrow in 2 items Font and Size as shown:
2. Font format:
- Font dialog box supports 3 main types of formats:
+ B: bold
+ I: italicize.
+ U: underline
It is possible to apply these 3 formats simultaneously to the same document. To format, just click the icon for each font:

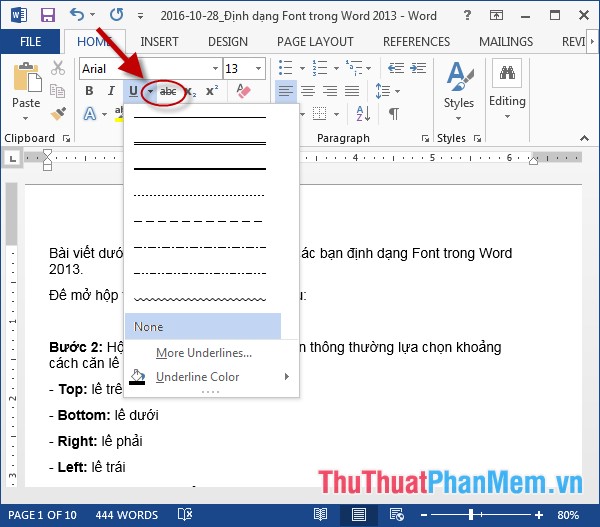
3. Implement the text format with horizontal lines.
To emphasize certain text, you can use extra lines for text by clicking on the icon as shown:
4. How to write the index above and the index below.
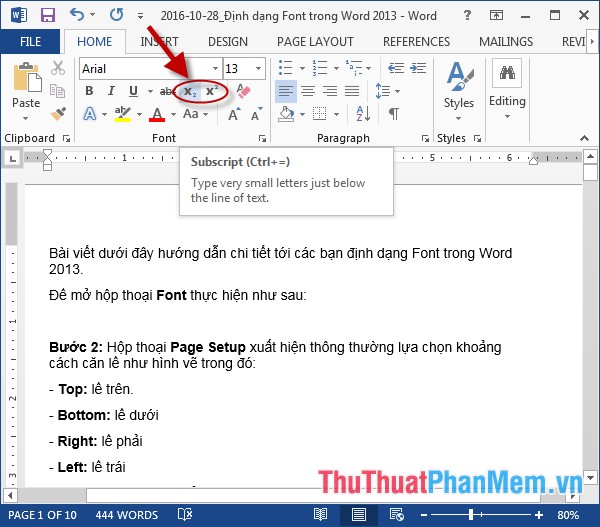
- Word 2013 supports you with the quick feature to display the icon of writing the superscript and the subscript right on the toolbar:
+ ({X_2}) Write down the subscript.
+ ({X ^ 2}) Write the index above.
To select how to write the index, simply click on the corresponding icon.
5. Apply word art format to words.
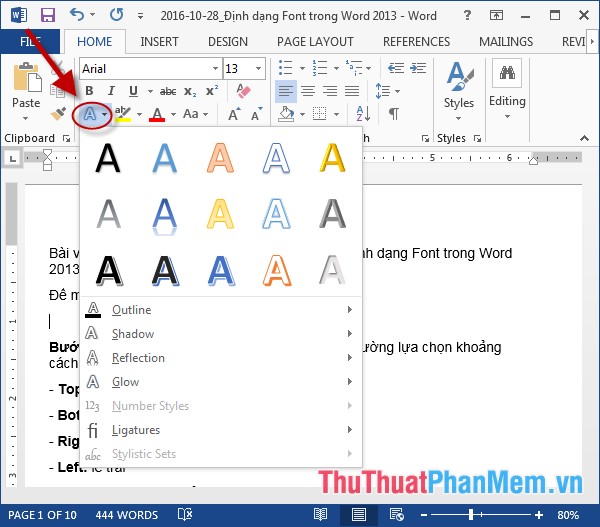
- Click on the icon A:  -> select the type of art font you need to apply:
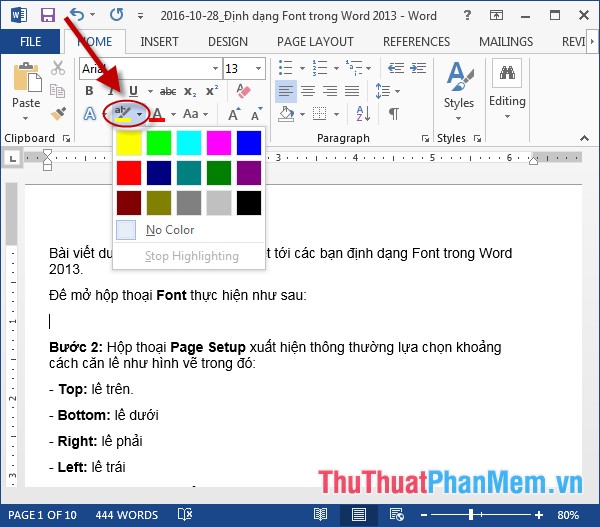
6. Fill the background with text.
- When you need to emphasize something in the text, you can use more features to fill the background with text -> click on the icon  -> choose the color to match with the text:
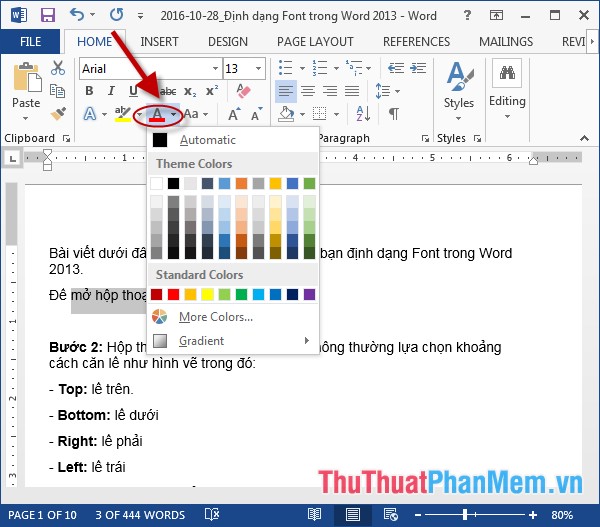
7. Select the color of the text in the text.
- Click on the icon  -> choose the color for the text according to your requirements:
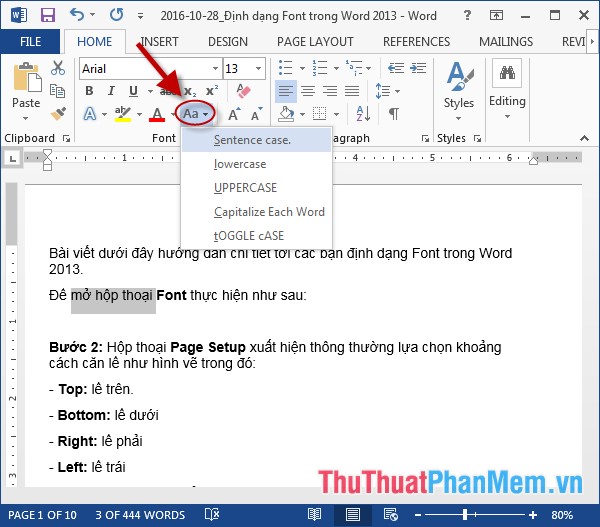
8. Select uppercase or lowercase letters.
- Click on the  font selection icon in the list:
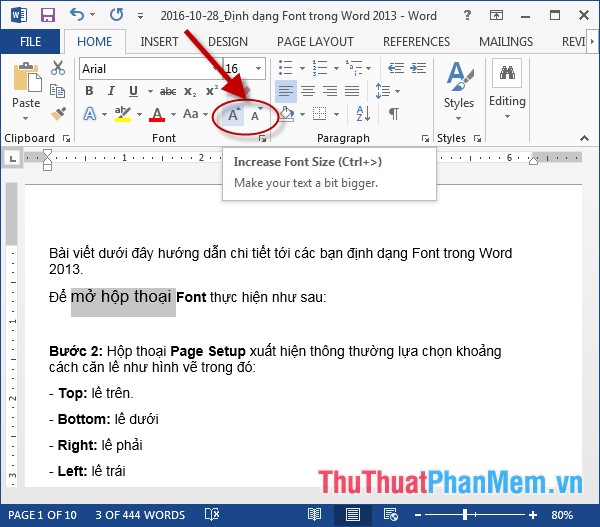
9. Zoom in, zoom out font size.
- Very convenient and simple, you just need to click on one of the 2 icons to  be able to enlarge or reduce the text, of which the large A symbol is for larger, the small A is for font size.
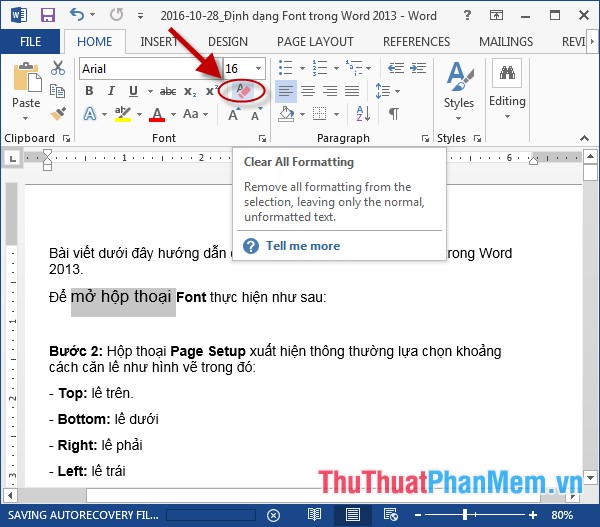
10. Available tools support deleting all formats.
- Click on the icon  to delete all the established formats:
Above is a detailed guide on Font format in Word.
Good luck!
FAQ
What should I know about Font Format in Word?
Focus on the key features, requirements, limitations, and practical use cases explained in this guide.
How do I get the best results with Font Format in Word?
Follow the recommended steps, use current software or information, confirm compatibility, and review settings before major changes.
Are there any risks or limitations?
Potential limitations depend on compatibility, data quality, cost, privacy, support, and how the product or method is used.
Related Articles
 Font Format on Word3 minutes read
 How to Keep Word Format When Sharing Documents: Word Tips4 minutes read
 Align Text, Adjust Font in Word 20138 minutes read
 Instructions for Setting the Default Font in Microsoft Word4 minutes read
 How to Use Primary Font: Install the Primary Font5 minutes read
 MS Word - Lesson 5: Format the Text: Microsoft Word 20074 minutes read
Reader Comments 0
Sign in with email or Google to join the discussion.