Set the default font in Word 2007 2010 2013
Before drafting, you usually install the font and font size in the first Font. It is simple but if you have to work a lot with Word, then setting the font and font size will be very time consuming.
To minimize the time spent setting font and font size, set the default font and font size. So the next time you open Word, you will not need to set the font or font size because the font and font size have been set by default according to your needs.
Here's an article on how to set the default font size and font size in Word 2007, 2010 and 2013.
Word 2007 version
Step 1: Open Microsoft Word 2007.
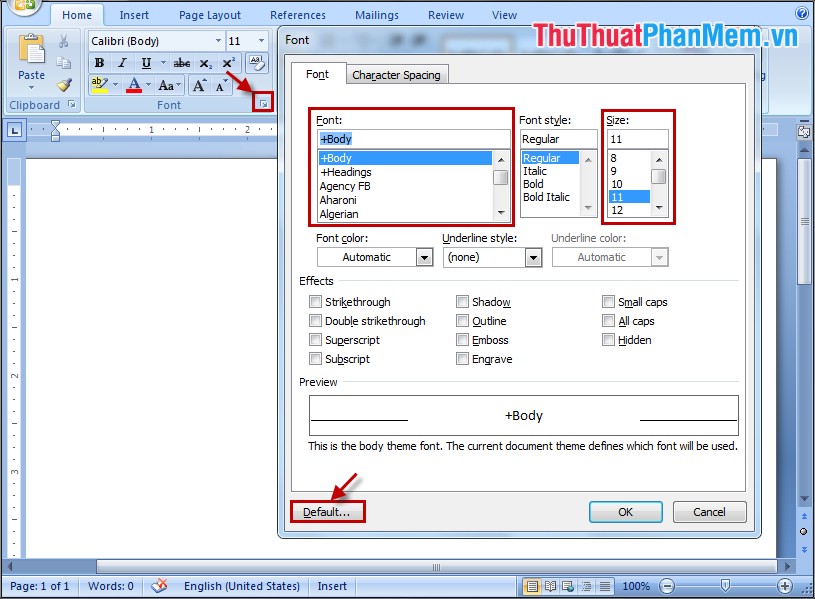
Step 2: In Home, select the Font extension icon (or press Ctrl + D ) to open the Font dialog box . In the Font dialog box, select the font and font size in Font and Size and then click Default to set as the default.

Word 2010 version
Step 1: You open Microsoft Word 2010.
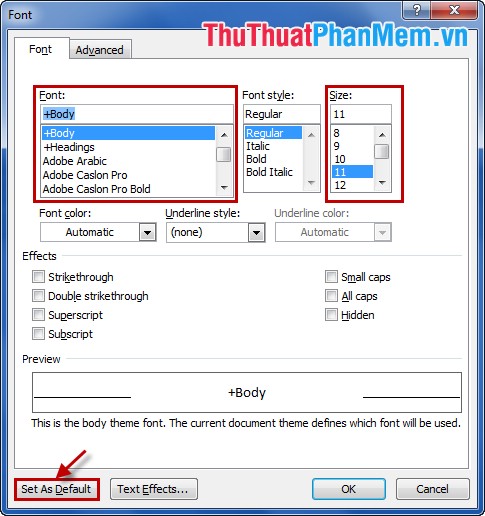
Step 2: Select the icon in Font (or Ctrl + D combination ).

Step 3: In the Font dialog box, select Font and Size as you like, then click Set As Default to set the default.

Word 2013 version
With Microsoft Word 2013, you follow the same steps as Microsoft 2010 to set the default font and font size.
Above are the default font and font size settings in Word, you can rely on the steps above to set up Word for your computer to shorten the time spent setting the font and font size in each text editors.
You should read it
- ★ How to align in Word - Instructions on how to align in Word 2007, 2010, 2013, 2016
- ★ Change the default font in Microsoft Word 2010
- ★ Align text, adjust font in Word 2013
- ★ Instructions on how to create frames in Word 2007, 2010, 2013, 2016
- ★ Repeat titles in Word - Instructions on how to repeat titles in Word 2007, 2010, 2013, 2016