How to Schedule Email Sending in Outlook
Network Administrator explains the detailed steps to schedule an email in Outlook. This feature can be done in both the Outlook desktop application and the mobile application.
Table of Contents
Scheduling emails in Outlook is a handy feature as it allows you to control when to send messages. This way, you can reach out to your prospects at the right time. In this guide, Network Administrator explains the detailed steps to schedule emails in Outlook. This feature is available in both the Outlook desktop app and the mobile app.
How to Schedule Email Sending in Outlook on Desktop
The process of scheduling emails in Outlook is pretty much the same across Windows, macOS, and the web version.
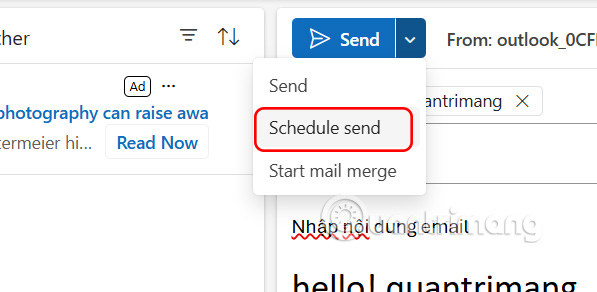
Step 1:
At the Outlook interface on the computer, we compose an email as usual . Then you click on the arrow icon next to Send . Now you select Schedule send .
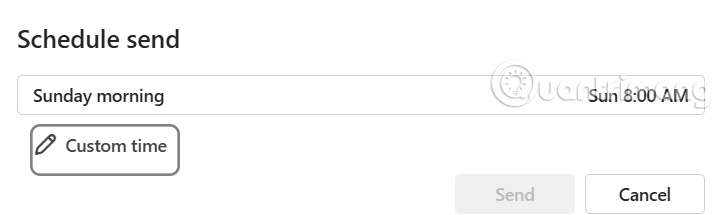
Step 2:
The Outlook email sending time selection interface appears. You can select the suggested time, or click Custom time to select a different email scheduling time you want.
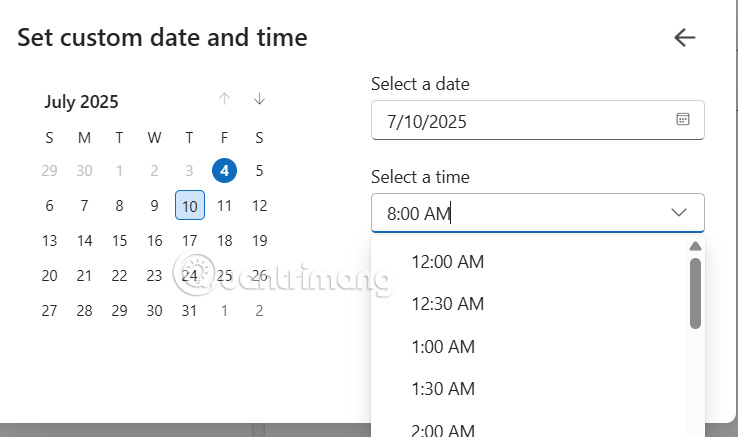
Step 3:
We select the date and time you want to schedule sending Outlook email and then click Send to schedule.
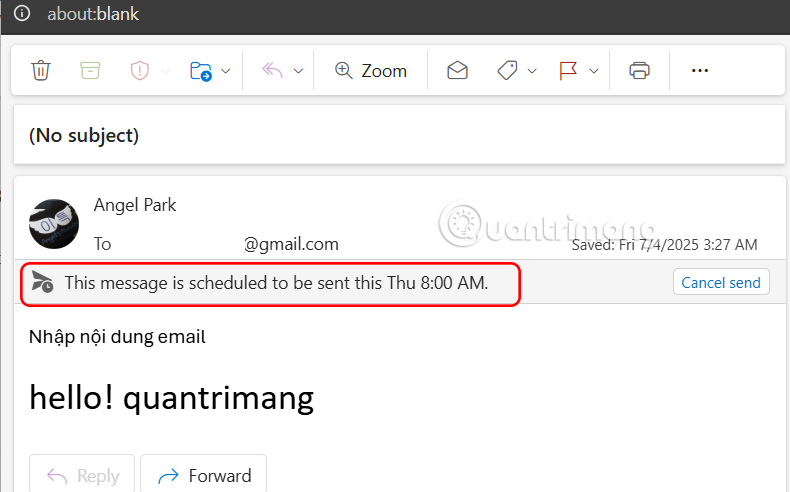
Scheduled emails sent in Outlook are saved with the time as shown below. Here you can click Cancel send to cancel scheduling the email on Outlook computer.
How to Schedule Outlook Emails on Android
Currently, only Outlook on Android has the option to schedule a timer.
Step 1:
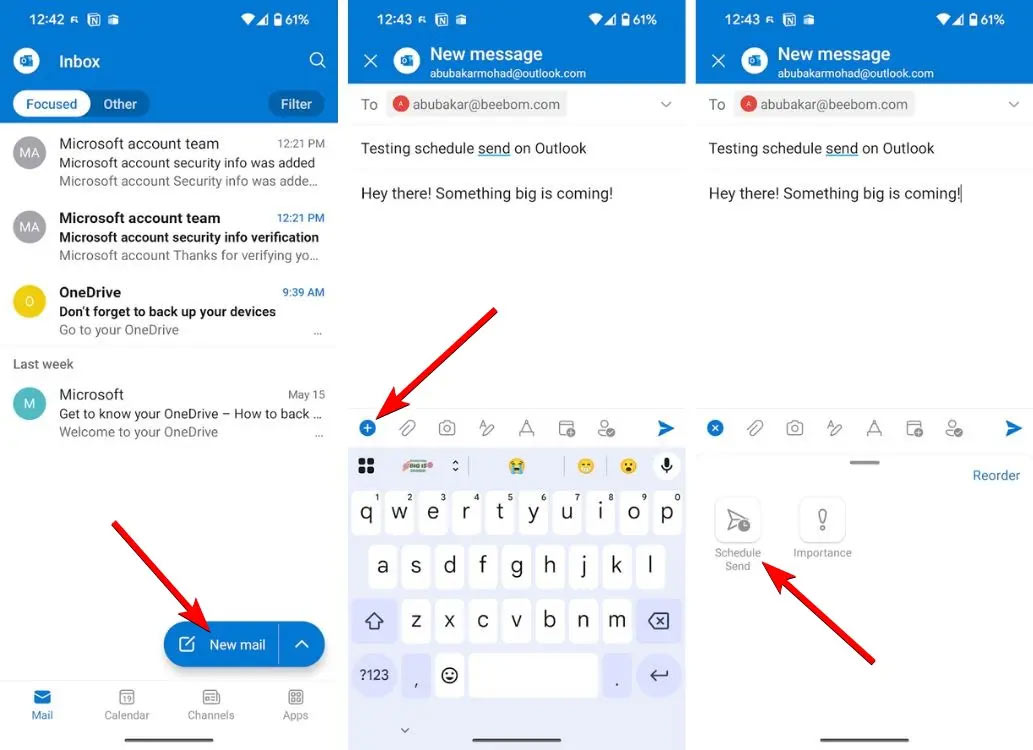
In the Outlook Android app interface, click New mail and compose a new email as usual.
Now click on the green plus icon in the toolbar below and select Schedule Send to schedule sending emails on Outlook.
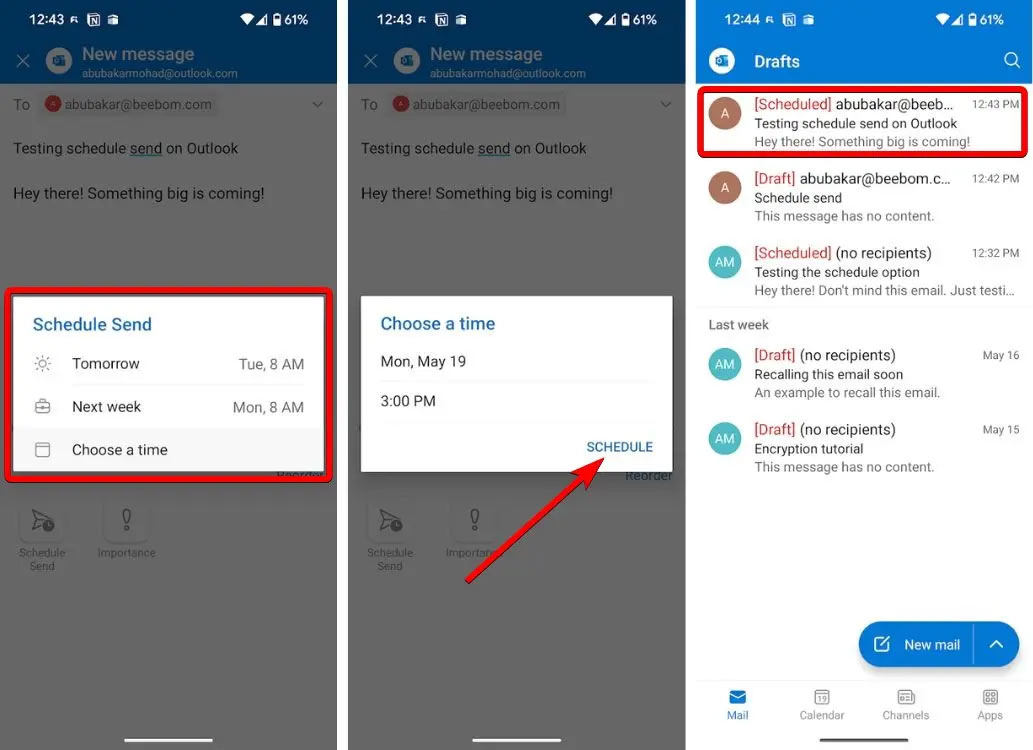
Step 2:
Next, you also choose the time you want to send this Outlook email and then click Schedule and you're done. The email scheduled to be sent in Outlook will be displayed in the Drafts section for you to track and cancel sending if you want.
Was this article helpful?
Your feedback helps us improve.
Related Articles
 Instructions for scheduling sending emails and delaying sending emails in Outlook7 minutes read
 How to Schedule an Event in Outlook2 minutes read
 Instructions for sending free SMS via Outlook3 minutes read
 How to enable Outlook email spell checking before sending4 minutes read
 How to schedule sending SMS on Android8 minutes read
 How to fix the error of not showing pictures in Outlook2 minutes read
Reader Comments 0
Sign in with email or Google to join the discussion.