How to 'save' a laptop when water gets in?
Spilling water on a laptop is an extremely unfortunate situation that can happen to you. In this situation, did you know how to "save" your laptop?
It's a nightmare for laptop users to carelessly spill a cup of coffee, water on a laptop or a shower when working outdoors. When liquids and electricity meet, liquids can destroy a lot of electronic circuits, leading to severe electric shock if not careful. So this article will show you how to handle when laptop gets water.
Handle laptop water
- Safety first
- Quickly handle the laptop that was poured into the water
- Tools needed to handle laptops with water
- Find instructions for maintenance or repair of laptops
- Disassemble laptop parts
- Dry laptop parts
- Assemble parts into the computer
- Turn on the power and hope
- Water resistant for laptops from the beginning
Safety first
Before you start, you may face the fact that your laptop may be dead. Unfortunately, at this point what you are about to do is just a "first aid" measure with the faint hope that hardware can be saved. However, if there is complete damage warranty or simple upgrade capability, you can use them.
But if you see any part of the computer sparks or fumes, stay away from it and if necessary remove it from the house. If you see the real fire, use the fire extinguisher to extinguish it. In this case, there is no way to 'save' your laptop, be prepared to buy a new computer.
Quickly handle the laptop that was poured in
If your laptop looks safe, does not smoke, has an explosion or danger sign, please:
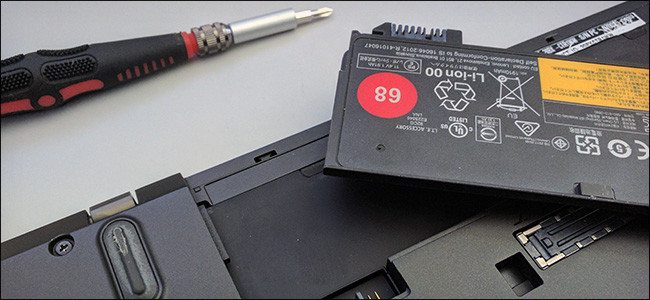
- Unplug the power cord with a dry hand and remove the battery if using a removable type. Now you don't need to worry about electric shock anymore.
- Continue to remove other hardware that is attached to your laptop such as a mouse, USB drive, removable devices and all other cables.
- Wipe the exterior of the laptop. Open the laptop to the maximum, hold the laptop in the direction of the screen and the keyboard downward, then wipe all wet surfaces with a towel or other non-microfiber absorbent fibers. Filtered water is the least harmful liquid, while sugar and alcohol will be the most harmful. In general, you must minimize the harmful effects of liquid by drying it as soon as possible.
After you've dried the machine, you have 2 ways to solve the problem:
- The first way: You can bring the machine to repair shops. If your device is still under warranty and the store where you purchased the machine with warranty support even in case of water intrusion, you can take your laptop for warranty service.
- Second way: Remove the device and fix it yourself. Note that disassembling a laptop may result in your product being denied warranty. You also need to be very careful when removing laptops, but quick fixes can increase the chances of survival for laptops.
Tools needed to handle laptops with water
-
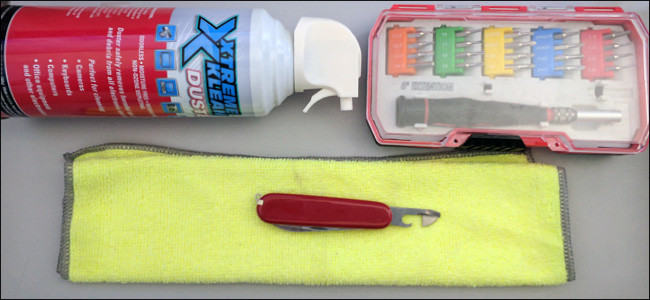
Tools : You may need a flat-head screwdriver and Philips head in multiple sizes. If there is a small Torx screwdriver set, use them. You may also need a small, narrow bar, a Swiss army knife.
-
A compressed air tank : Used to do dirt removal and cleaning.
-
A safe workspace : A clean and dry place, ideally where there is no carpet and a table using wood or rubber to place computer parts.
-
Rice or silica gel moisturizing package : One of these two types will help absorb moisture.
-
Heating device : An in-room heater or hair dryer.
Most of these tools are available in hardware stores, but without any tools you can use something similar instead because if not handled quickly, the water will absorb more and damage the laptop.
Find instructions for maintenance or repair of laptops
Use another computer or phone with Internet connection and view the PDF file, search Google for instructions on maintenance or repair according to your laptop model number. If found, save it or view it online.
The maintenance manual is a special guide created by your laptop manufacturer, for technicians and third party repair services. It will give you step by step instructions on how to disassemble the laptop. Maintenance instructions are often divided into sections for specific repairs (replacing RAM, hard drives, keyboards, monitors, etc.) but if you switch to the parts you can find ways to remove parts of laptop.
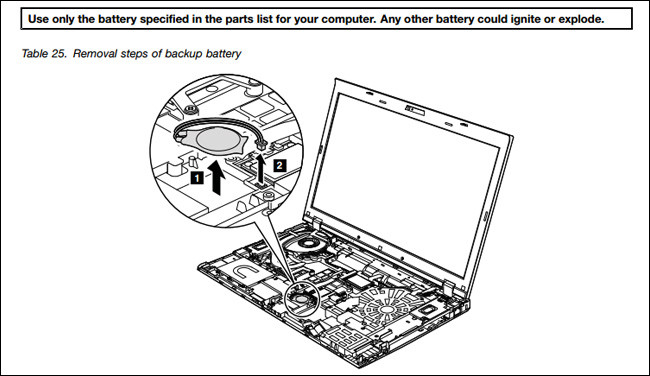
If you can't find maintenance instructions, especially with newer designs, you can still find the end user guide on how to disassemble a specific laptop model. Another place you can find is YouTube, which stores many instructions for removing various laptop model parts.
Disassemble laptop parts
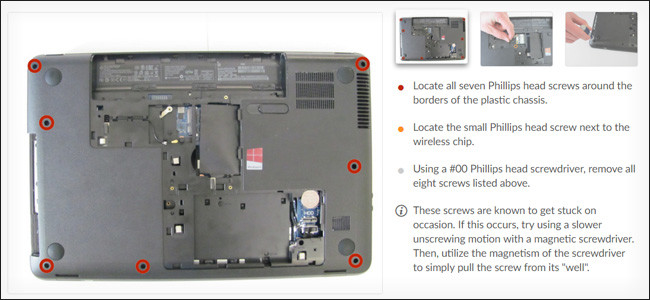
Follow the instructions in the maintenance or repair book and disassemble the laptop parts.
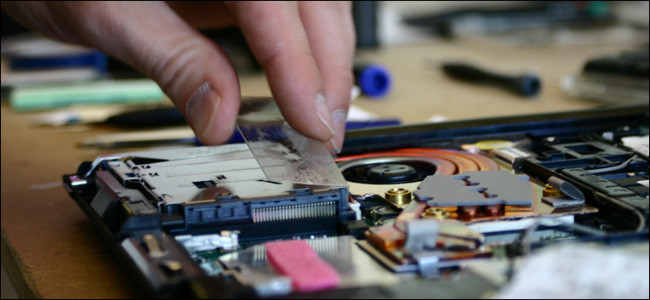
Let's start with the easiest part. Many laptops are designed to be removable RAM, hard drive or SSD (and sometimes even other components like drives) by screwdriver. Other computers require removing the plate below it. However, on new and more complex laptops (like Dell's XPS 13 and other ultraportable models) you can hardly remove these components. You may need to rely on plastic or metal pieces on the body seams to remove the sheet.
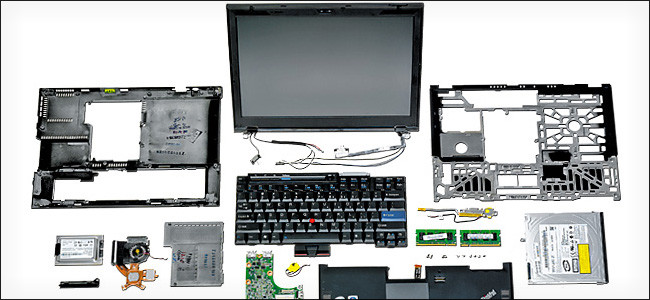
When you have removed the ingredients, place them in a safe place, do not conduct electricity as on rubber sheets or wooden tables, do not perform in areas with carpet and remember to wear tennis shoes. You can take notes or take photos with your phone to make it easier to reassemble your computer. You should put screws in the bag, box to not fall off.
Dry laptop parts
Check each part and use a towel to remove the liquid. You should be careful, do not let anything damage the circuit board. Once a part has been dried, use canned air to remove any remaining dust or fibers from the towel.
Then, put these ingredients in a warm and dry place, not too hot because high temperatures can damage these parts no less than water. It is ideal to put in a room with a heater in low mode. Or you can try drying gently with a low-level hair dryer, hold each part firmly in your hand and fan at least two feet from the fan.
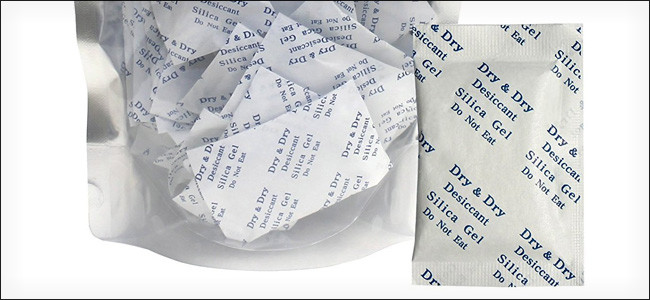
Leave the computer components outside for at least a few hours to run out of moisture. There are a number of ways you can speed this up using silica gel packs (small paper bags labeled 'DO NOT EAT' in electronics and luggage), you can carefully cover them on the This part is hygroscopic. If you don't have a silica gel pack, you can create your own dehumidifier by putting dry rice in a net bag, thin pillowcase or any other material that is airy enough to pass through the air (but not rice ). After a few hours, check all parts for moisture. If still, repeat the above actions.
Assemble parts into the computer
Now you will perform step three in the opposite direction. Again, you should work in a non-conductive place, use the maintenance book, photos or notes you made during the computer removal. If you find any remaining screws or components of the computer when the laptop is installed, this means you have missed some step. Remove and start over again.
Turn on the power and hope
After installation is complete, insert the battery, plug in the power outlet and press the power button. As mentioned above, your computer may have died when you were exposed to water, but if your computer is turned on, you "saved" it, make a backup of your computer data to prevent it. The same case happens and you may not be as lucky as this time.
Water resistant for laptops from the beginning
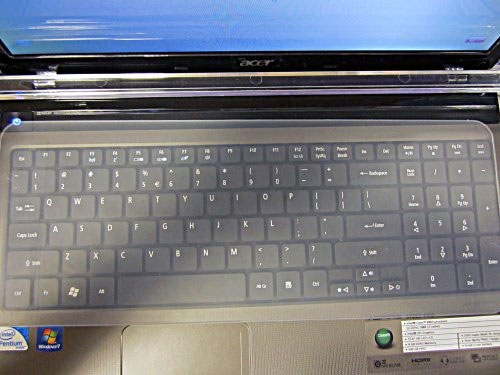
There are many products that can help protect your laptop from liquids, the most common of which is the silicon keyboard cover. You can also purchase skins for both the upper and lower parts of the camera body, as well as the screen protector cover. Buy waterproof laptop bags. Note that you should avoid covering the radiator vents: use scissors to cut holes to open the radiator slot for the computer.
I wish you all success!
See more:
- 13 things not to do when using a computer
- Tips for "first aid" mobile phone with water
- Habits are "killing" your laptop
- Laptop and tablet warranty manual (part 1)