How to Resize Pictures in Kingsoft Office Writer 2013
After you insert picture in Writer 2013 document, you can resize it to meet your needs. You can either change picture size manually, or change it in the picture format dialog box. Click the picture that you want to re-size. Eight little...
Table of Contents
Method 1 of 2:
Re-size picture manually
-
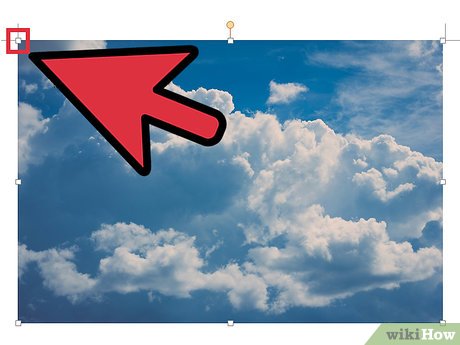 Click the picture that you want to re-size. Eight little squares will appear surrounding the picture.
 -
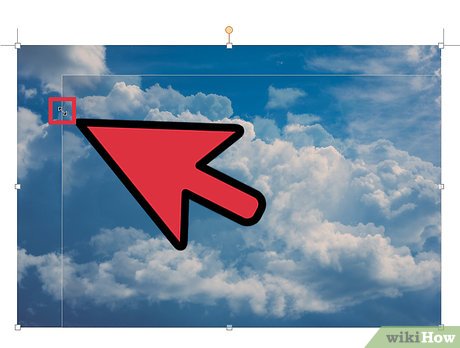 Hold the left mouse button and drag the mouse along the re-sizing direction. A shadow will appear indicating the potential change in the size of the picture.
- To re-size the picture horizontally or vertically, move the cursor to any of the four little squares in the middle of each border line of the picture. To re-size the picture along the diagonal direction, move the cursor to any of the four little squares at the four corners of the picture and the cursor will transform into a double-sided arrow.
-
 Release the left mouse button when you are satisfied with the change.
Method 2 of 2:
Re-size picture by the dialog box
-
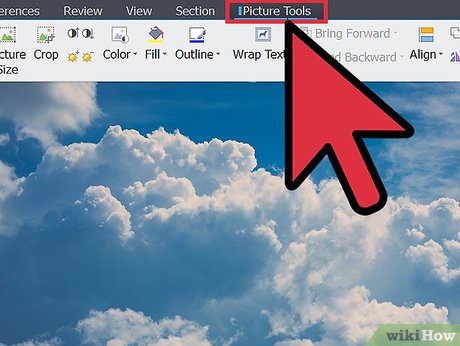 Click the picture that you want to re-size. Open the Picture Tools tab.
 -
 Click the Settings option in the end of the tab. Choose the Format Object option and open the Format AutoShape dialog box.
 -
 Select the Size tab. In the Size and Rotate section, enter the exact height, width, and rotation. If you select the Lock aspect ratio check box, you can set the height and width not in proportion with the original picture size.
 -
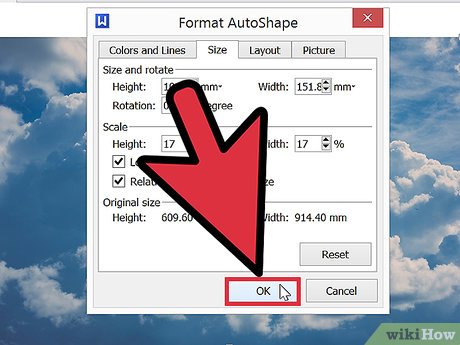 Click the OK button when finished.
Was this article helpful?
Your feedback helps us improve.
Related Articles
 WPS Office - Free Alternative to Microsoft Office6 minutes read
 Application software can replace Microsoft Office3 minutes read
 Get familiar with the OpenOffice editing program4 minutes read
 10 tips when using LibreOffice Writer8 minutes read
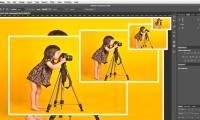 How to resize images properly in Photoshop9 minutes read
 The trick is to use OpenOffice to create a dictionary3 minutes read
Reader Comments 0
Sign in with email or Google to join the discussion.