Table of Contents
This updated guide examines How to Rename Virtual Desktop in Windows 10 and organizes the essential facts, background, and practical takeaways in clear American English.
Virtual desktops exist to help you visually separate and identify various tasks on your PC. They can also be useful when presenting - allowing you to prepare demos on various desktops.
For how to use virtual desktop, please refer to the article: How to use virtual desktop on Windows 10?
Starting with Windows 10 build 18963, you can now rename your different virtual desktops to help enhance the separation between workspaces.
Today, this change is applied to 50% of Insider users in Fast Ring and Microsoft will expand its deployment in the near future, after evaluating experience quality.
This tutorial will show you how to rename virtual desktops for accounts in Windows 10.
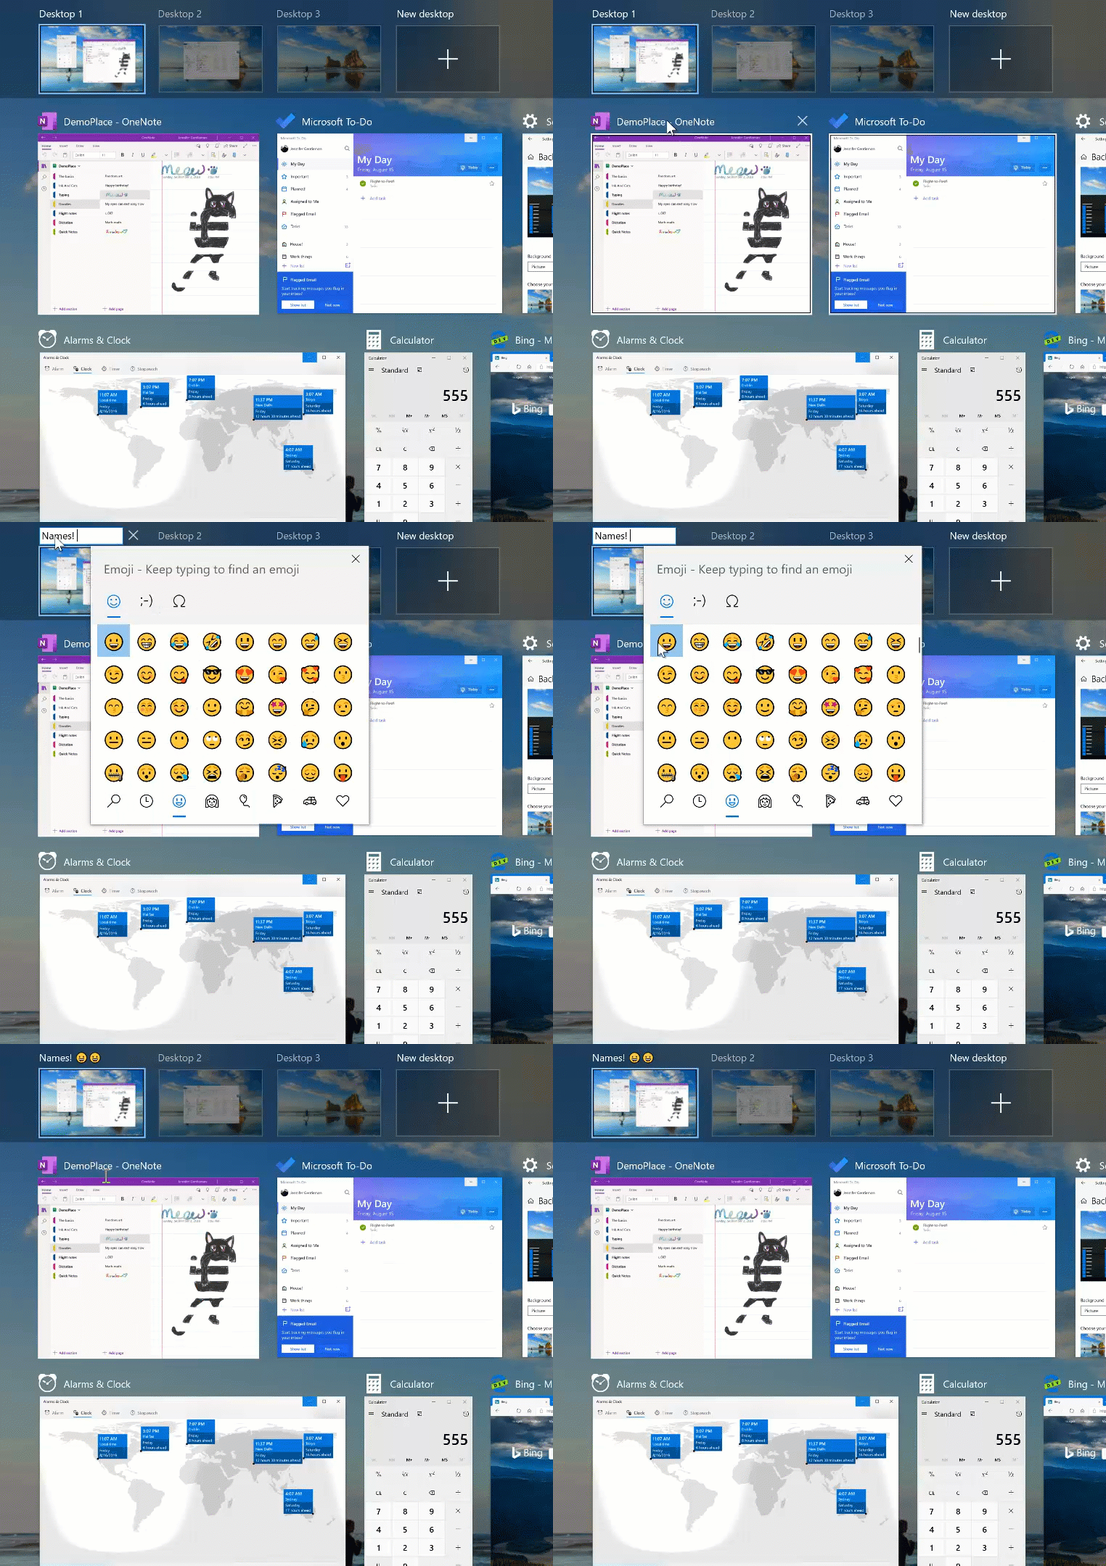
Here's how:
1. Open Task View (Win+Tab).
2. Follow step 3 or step 4 below to choose how you want to rename the virtual desktop.
3. Click the name of the virtual desktop and rename the desktop to whatever you want.
Or:
4. Right-click or hold and hold the virtual desktop thumbnail, click Rename in the context menu, and rename the desktop to whatever you want.
FAQ
What is How to Rename Virtual Desktop in Windows 10 about?
It provides a structured overview of windows 10, explains the main context, and highlights practical takeaways for readers.
Why does this topic matter?
Understanding the main concepts helps readers evaluate the issue, avoid common mistakes, and make better-informed decisions.
How should readers use this information?
Use the guidance as a practical starting point, confirm details that may have changed, and follow current product, safety, or security recommendations.
Related Articles
 How to Use Virtual Desktop on Windows 10?7 minutes read
 How to Rename Hyper-v Virtual Machines Using Powershell and6 minutes read
 Already Able to Test Windows 11 on Azure Virtual Desktop3 minutes read
 How to Use Virtual Desktop on Windows 116 minutes read
 How to Open a File or an Application on a Virtual Windows 106 minutes read
 How to Use Windows Virtual Desktop Effectively8 minutes read
Reader Comments 0
Sign in with email or Google to join the discussion.