How to quickly edit backlighting in Photoshop
Backlit photos lose important details, making faces and landscapes look blurry. Photoshop provides many tools such as Screen Mode, Layer Mask to help restore dark areas and balance light effectively..
Dark photos due to backlighting can be edited using Screen Mode, Layer Mask in Photoshop. This method helps restore photo details without losing authenticity.
How to edit backlight with Photoshop
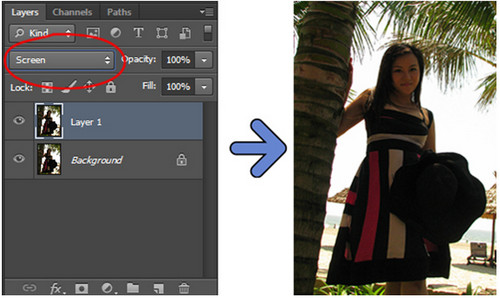
Step 1 : Open the image file you want to edit. Press Ctrl + J to duplicate your image, select the blending mode as Screen as shown:
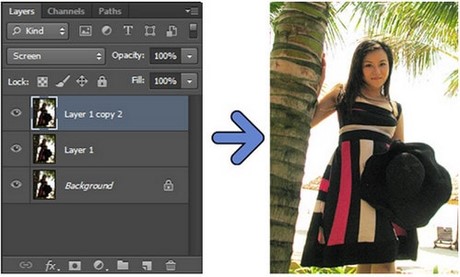
Step 2 : If the photo is still dark, continue pressing Ctrl + J to duplicate that layer many times until you are satisfied:
Step 3 : Click on the Mask iconon the layer frame and use a soft brush tool with a black background color to paint overexposed areas of the photo that you want to mask:

Step 4 : If you are still not satisfied, you can set Layer Mask for the layers below and do the same as Step 3 , here is the result:

And here is the final result:

After applying the backlight correction steps in Photoshop, the photo will have more balanced brightness and clearer details. If you use Photoshop CC 2020, you can combine Adjustment Layers and Camera Raw to fine-tune the lighting more effectively.