How to Install Adobe Creative Cloud Applications
Haven't installed any Adobe CC applications yet or only have one or two applications installed? One of the benefits of Adobe CC is the ability to install any Adobe application at any time. This article will walk you through the process of...
Table of Contents
Method 1 of 2:
From the Website
-
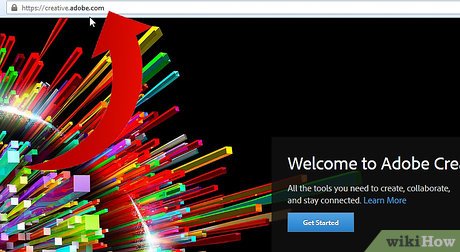 Visit the Adobe Creative Cloud website. Once you have signed in using your Adobe ID, you will see all of apps from which to choose from. Clicking an app will give you a description and feature overview to help you decide which to install.
 -
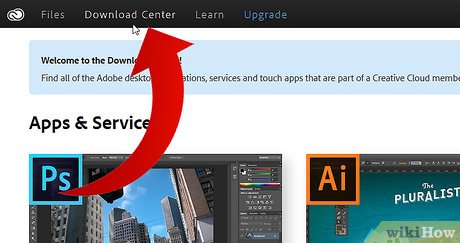 Open the Download Center by clicking the link at the top of the Creative Cloud website.
 -
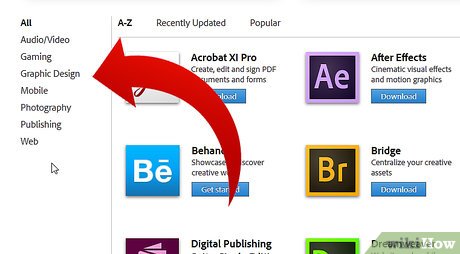 Look to the left of your screen for a list of categories. Choose a category group that best applies to the app that you are searching for.
 -
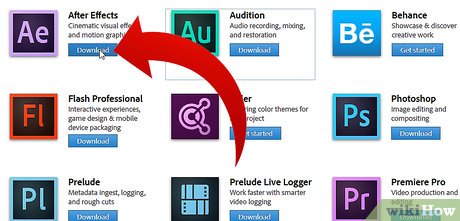 Click on Download below the app you wish to install. This will take you to the Creative Cloud desktop application where the installation will begin and where you can manage your existing applications.
Method 2 of 2:
Using the Desktop Application
-
 Launch Adobe Creative Cloud from your start menu or system tray on Windows or from the Applications folder on Mac OS X.
 -
 At the top of the Home screen locate the "Apps" button.
 -
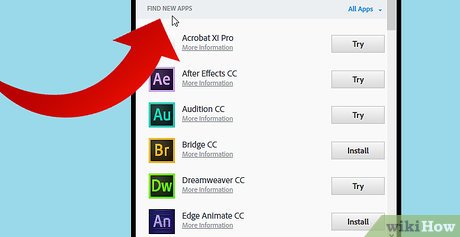 Scroll past the "Your Apps" section to the "Find New Apps" section. Here you can click "More Information" to learn about the offerings or install any of the apps.
 -
 Once you have selected an application click the "Install" button on the right which will begin downloading the application to your computer.
Was this article helpful?
Your feedback helps us improve.
Related Articles
 How to delete Adobe Creative Cloud when installing Photoshop4 minutes read
 Adobe raises prices and makes unfortunate changes to its Creative Cloud plans8 minutes read
 Why not choose Adobe Creative Cloud in 2024?7 minutes read
 Adobe Creative Cloud has been integrated directly for Powerpoint and Word2 minutes read
 Adobe Creative Cloud Express launched: Software to support rapid graphic creation3 minutes read
 How does Adobe Creative Cloud work?6 minutes read
Reader Comments 0
Sign in with email or Google to join the discussion.