Table of Contents
Overview
This guide explains how to ghost uefi-gpt standard tib file for computer, laptop in clear, practical terms. It covers the key concepts, recommended steps, common limitations, and useful checks so you can make a better-informed decision.
Previously, the. GHO ghost file was very popular, and people often created. GHO files to perform ghosting on computers running on the LEGACY standard using familiar software such as Norton Ghost, Onekey Ghost. However, now with the popularity of the UEFI standard, the. TIB file has become much more popular and widely used.
Acronis True Image software is used by many technicians or ghosters to create UEFI and LEGACY standard ghost files in an straightforward and fast way. In addition to creating ghost versions, this software is also used to extract these tib ghost files.
Tools to prepare
- Check your computer according to UEFI or Legacy standard, GPT or MBR hard drive.
- If the computer is Legacy, the hard drive should be in MBR format; if it is UEFI, the hard drive should be in GPT format.
- Partition the hard drive as you wish.
- TIB ghost file. This file is located on a different drive than the drive you intend to ghost.
- USB boot with Windows 10 PE and Acronis TrueImage tool.
Ghost computer with TIB file, using Acronis True Image software
After you open Acronis True Image software, you start doing the following steps:
+ Step 1: Select the Home tab => in the Recover section => click on My Disks as shown below.

+ Step 2: In this step, select the path to the partition containing the ghost file. Here we will use the ghost file in *. TIB format => then click OK to continue.

+ Step 3: Click Next to continue…
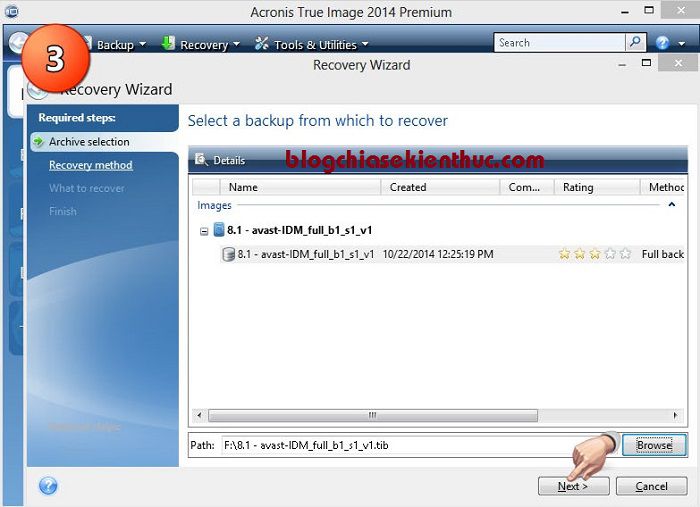
+ Step 4: Select Recover whole disk and partition in the Recover Method section

+ Step 5: In this step, select all partitions, except 'MBR and Track 0'.
If you do not uncheck this part, all data on the hard drive will evaporate and don't come back and blame me for not reminding you before => Then click Next to continue!
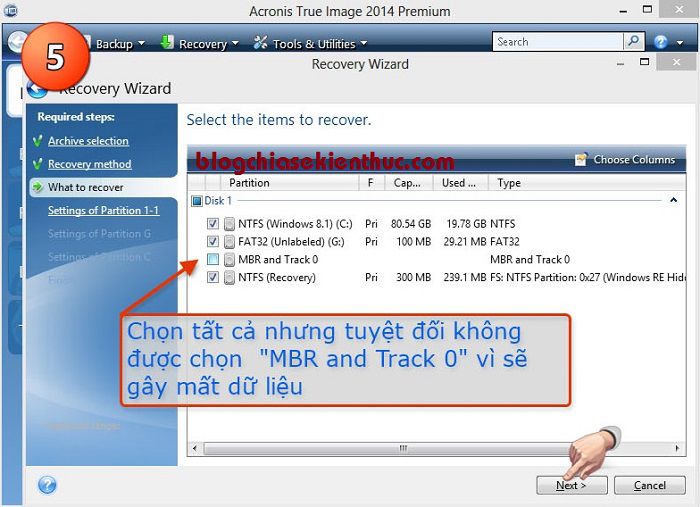
+ Step 6: In the Settings of Partition 1-1 section => click on New location to select the partition to extract the ghost file.
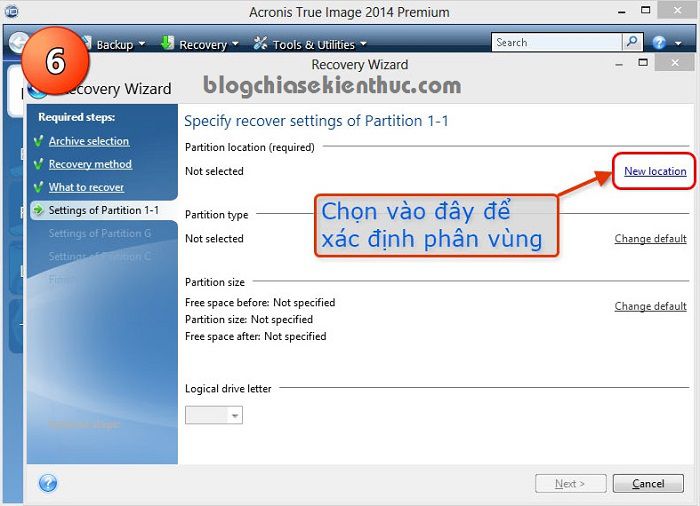
+ Step 7: A window will appear, select the Unallocated partition that you prepared earlier => then click Accept to proceed.
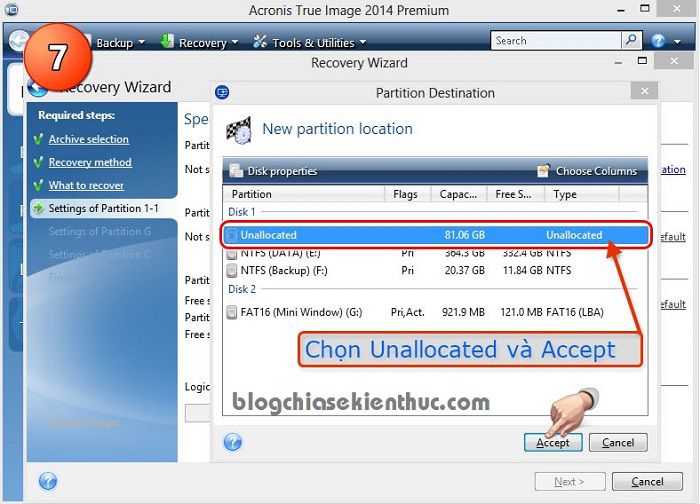
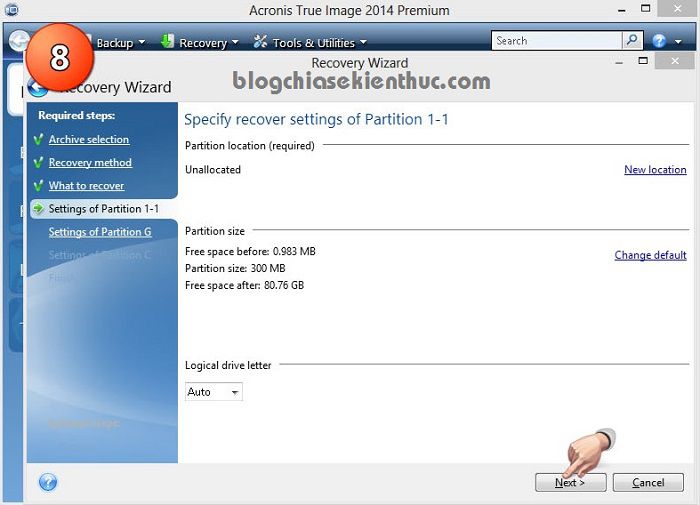
+ Step 8: After selecting the partition, click Next to continue.
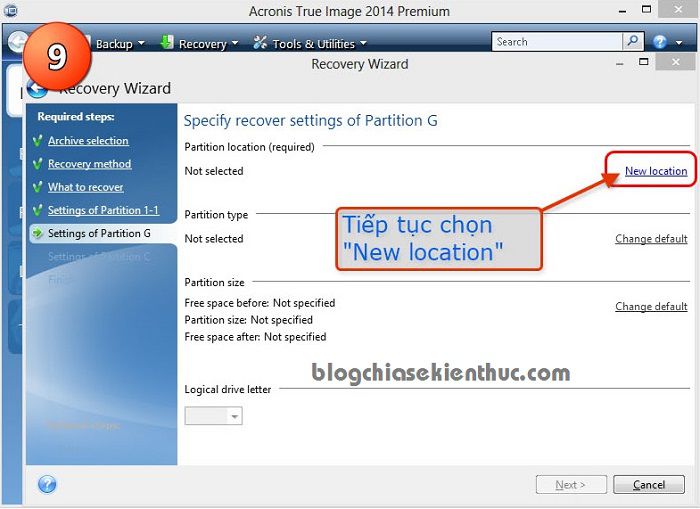
+ Step 9: Do the same as above, at the interface of Settings of Partition G => click on New location as shown below.
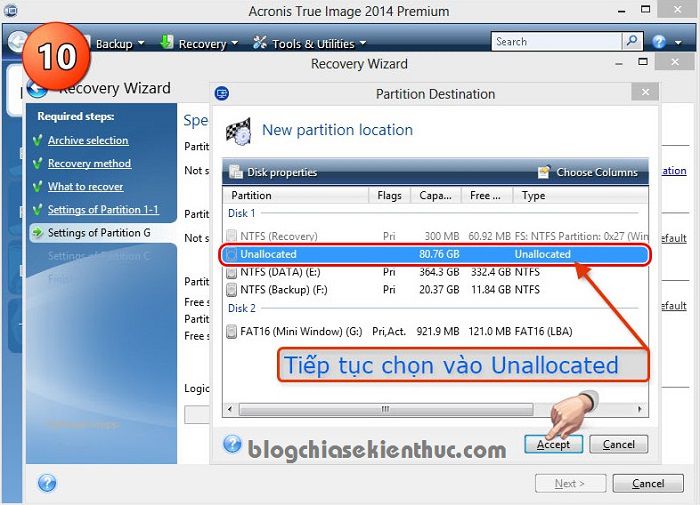
+ Step 10: A window appears, you continue to select the Unallocated partition => then click Accept to accept.
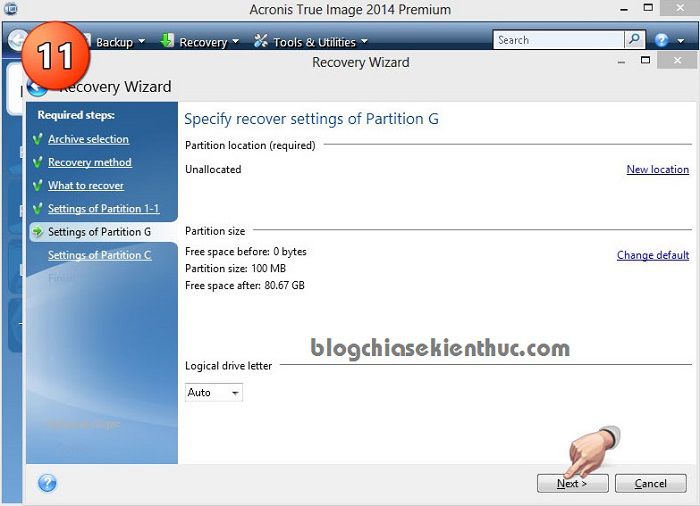
+ Step 11: Click Next to continue.
+ Step 12: Go to the interface of Settings of Partition C => you also select New location.
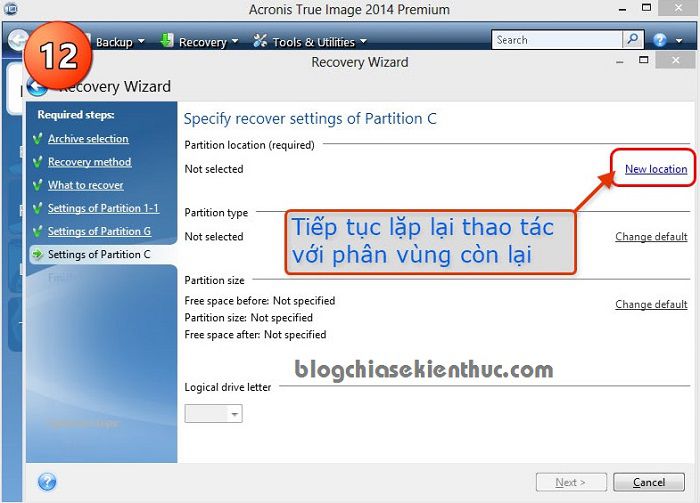
+ Step 13: Continue to select the Unallocated partition => and press Accept.
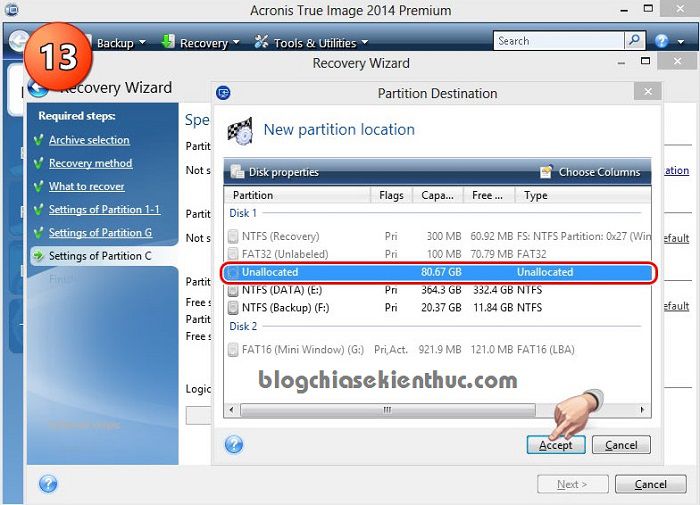
+ Step 14: Click Next to continue.
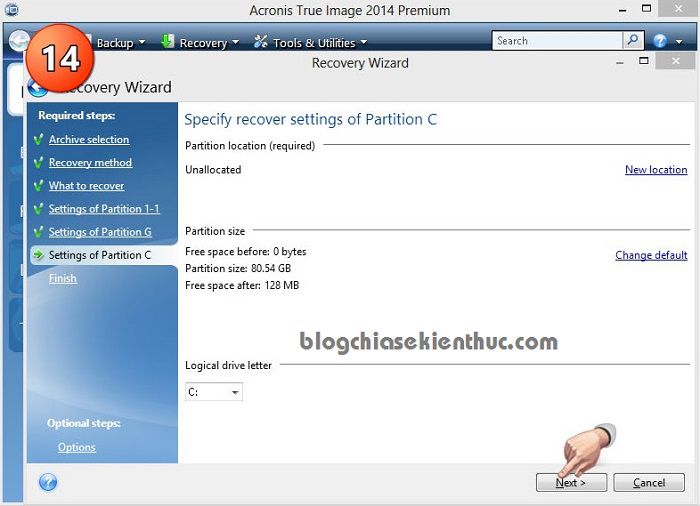
+ Step 15: Done. Click go to start extracting the ghost file to the selected partition.
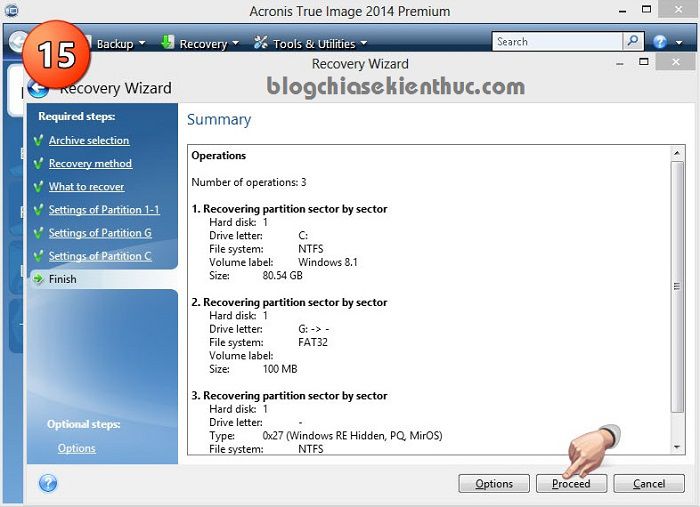
+ Step 16: Now just sit and wait
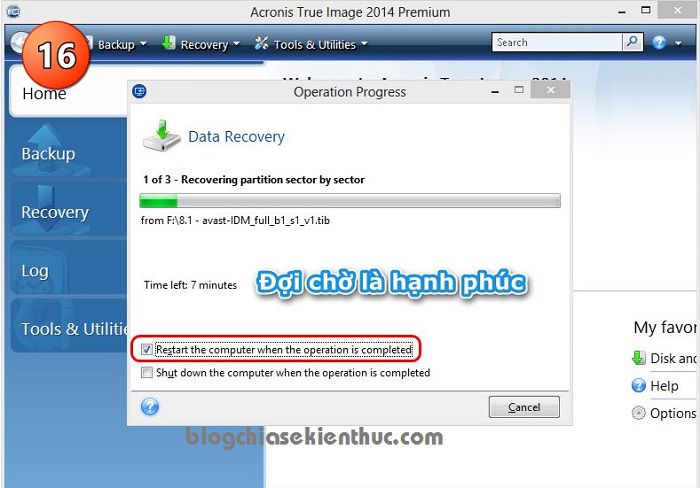
So I have given you very detailed instructions on how to ghost your computer using TIB files in UEFI - GPT standard with Acronis True Image software.
The steps are very detailed, there is no missing step so I think everyone can do it easily. Hope the article will be useful to you, wish you success!
Key Takeaways
Use the guidance above as a practical reference for ghost uefi-gpt standard tib file for computer, laptop. Check compatibility, follow the steps carefully, and verify important details with official documentation when software, security, accounts, health, or purchases are involved.
FAQ
How do I ghost uefi-gpt standard tib file for computer, laptop?
Follow the steps in this guide in order, confirm each setting before continuing, and save, restart, or reconnect the device when the instructions require it.
What should I check before I begin?
Confirm the correct device, account access, software version, compatibility, and a current backup whenever the process could affect files, settings, or security.
What should I do if the process does not work?
Repeat the steps carefully, check for model or version differences, install available updates, and consult the manufacturer's official support documentation.
Related Articles
 What Is a TIB File? How to Ghost a Computer with a Standard6 minutes read
 How to Create and Extract Ghost in UEFI Standard and Standard GPT Hard6 minutes read
 How to Ghost Computer with File ** .Tib UEFI Standard4 minutes read
 How to Create USB BOOT Standard UEFI - GPT Standard5 minutes read
 What Is Uefi: Concept of Uefi Standard in Computers5 minutes read
 Create UEFI Standard USB Boot with DLC Boot6 minutes read
Reader Comments 0
Sign in with email or Google to join the discussion.