Table of Contents
Overview
This guide explains how to fix laptop camera not showing image in clear, practical terms. It covers the key concepts, recommended steps, common limitations, and useful checks so you can make a better-informed decision.
It seems that 100% of popular laptops on the market today have cameras. From thin and light office laptops to rugged gaming laptops, they all have a camera in the front for online learning, remote video calling or even live streaming games. If your laptop camera does not display when turned on, it is usually due to a driver error, incorrect camera model installation. If you do not know how to fix the error of the laptop camera not displaying images, see the instructions below from this guide
Launch the Windows Hardware Repair Automatic Application
If before, your camera was still working normally, first try running Windows's hardware troubleshooting program: Hardware troubleshooter. This is a tool that helps us automatically diagnose errors encountered on PCs and laptops and then automatically repair them. If you are not very familiar with hardware or technology devices, this is a simple but sometimes extremely effective way to save.
To use this feature, do the following:
Click Start or the Window key, type troubleshooting in the search box and press Enter.
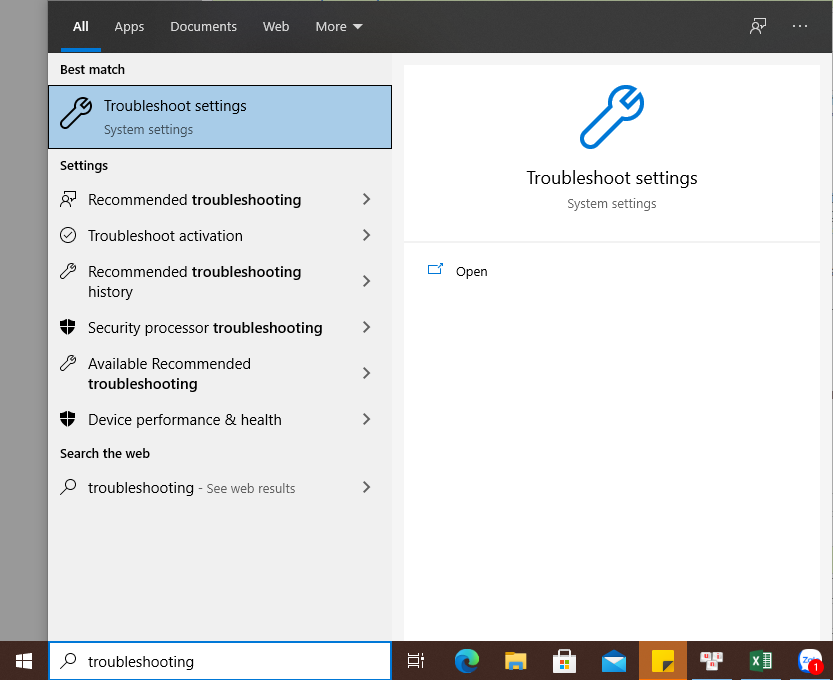
In the Troubleshooting window, select the Camera application or select Search and Indexing to let Windows automatically find and fix errors.

Click Run the troubleshooter to begin.

Check Camera access permissions again
With the current alarming situation of user information being stolen by hackers, if you have not used it for a long time and when you turn it on, the laptop camera does not work, it is very likely that your laptop camera has been temporarily disabled by a security application or Windows Defender itself to avoid being spied on by suspicious applications. If you cannot open the camera on your laptop and receive a notification from the application: We Can't Find Your Camera, try the following:
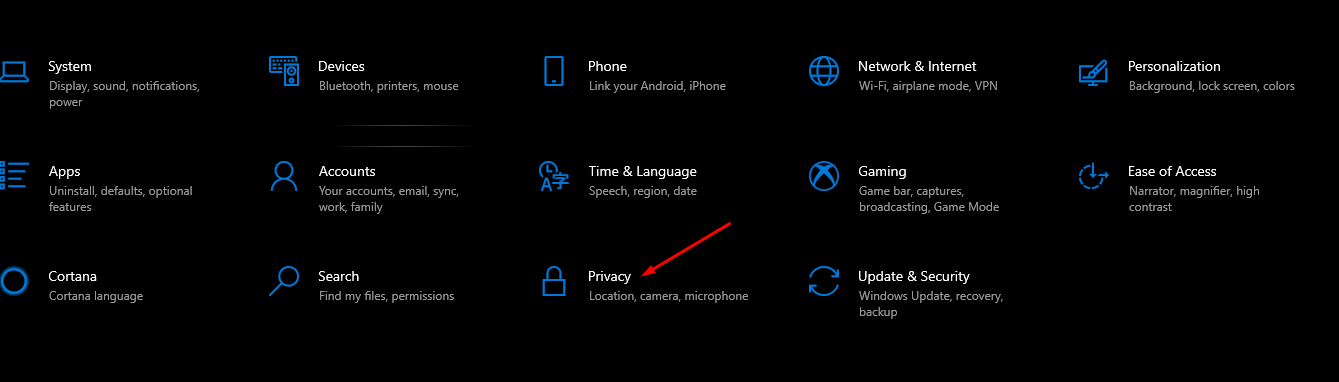
Go to Settings on Windows or use the shortcut Window + I
Click on Privacy
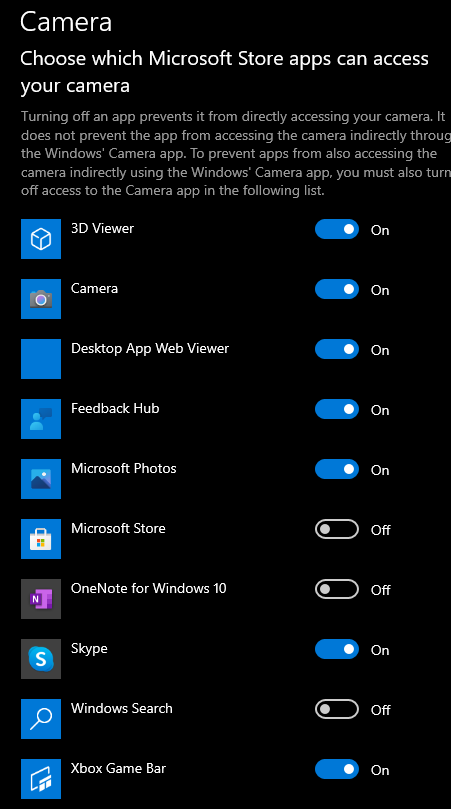
Select Camera > In the line Allow app to access your camera, switch to On mode.

Note: Check in the application section to see if the software you are using is allowed to access the Camera! If not, switch to On mode.
Reset Camera
In addition, to fix the error of not being able to open the Camera on your Laptop, you can also reset the Camera and check if this error still exists. To do this, do the following:
- Select Start click on Settings and select System, then click on Apps & Features.
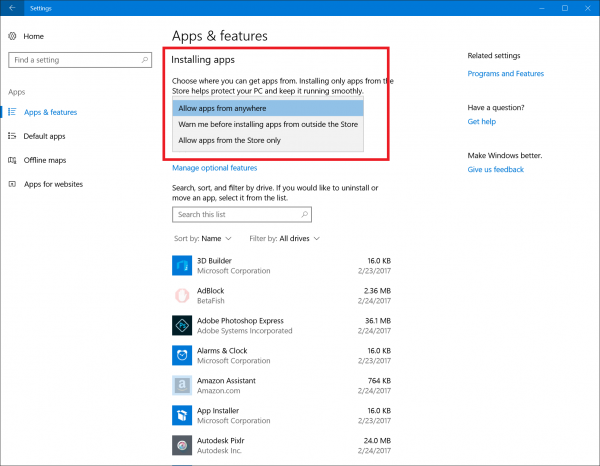
- In Apps & Features, find and click on the Camera option that has been integrated into the system to open the application.
- Click on Advanced options.
- Click Reset.

Above are simple ways to handle when your laptop camera does not show images that this guide wants to share with you. If you have done all the above methods but the laptop camera still does not work, it is possible that the hardware is damaged. At this time, you need to bring it to the warranty center for technicians to check. Good luck!
Key Takeaways
Use the guidance above as a practical reference for fix laptop camera not showing image. Check compatibility, follow the steps carefully, and verify important details with official documentation when software, security, accounts, health, or purchases are involved.
FAQ
How do I fix laptop camera not showing image?
Follow the steps in this guide in order, confirm each setting before continuing, and save, restart, or reconnect the device when the instructions require it.
What should I check before I begin?
Confirm the correct device, account access, software version, compatibility, and a current backup whenever the process could affect files, settings, or security.
What should I do if the process does not work?
Repeat the steps carefully, check for model or version differences, install available updates, and consult the manufacturer's official support documentation.
Related Articles
 Explaining the Reason Why Laptop Camera Does Not Show Image7 minutes read
 How to Fix Laptop Camera Left and Right Reversed Win 107 minutes read
 Why Can't My Laptop Open the Camera? Steps to Turn on the6 minutes read
 How to Turn on the Camera on Windows 7,8,10 Laptops8 minutes read
 How to Connect the Camera to the Computer4 minutes read
 It's Time You Should Cover the Phone's Front Camera and This Is4 minutes read
Reader Comments 0
Sign in with email or Google to join the discussion.