Table of Contents
Learning how to edit videos on YouTube is easier when the steps are completed in the correct order. Use this guide to prepare, make the changes, and verify the result.
YouTube is the most popular video entertainment channel today. In addition to users creating their own YouTube channel to upload videos, we can edit videos right away on YouTube's editor. The live video editor on YouTube is very diverse, we can cut videos, edit audio in videos, add blurring effects, add tags in YouTube videos. Thus users do not need to install additional video editing software on their computers, or use online video editing tools, if the need to edit your video at the basic level is not too advanced. The steps below explain how to edit videos on YouTube.
- How to play live video on YouTube?
- How to create 360 videos and upload to YouTube
- How to download videos, playlists on YouTube and more than 2000 other websties
- 3 ways to download MP3 from YouTube online
Video tutorial on editing videos on YouTube
Step 1:
After logging in to your personal YouTube account, click The avatar Then Select My Channel .
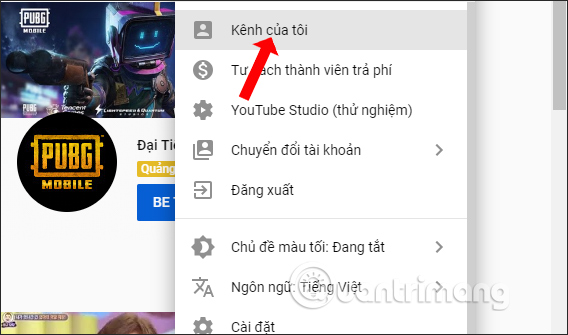
Step 2:
Display all the videos that we have uploaded to the YouTube channel, click the video you want to edit and then click The Edit video button Below.
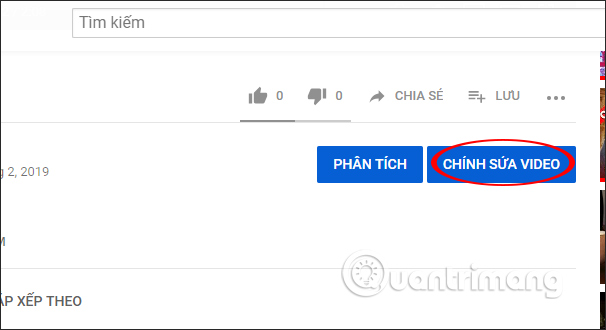
Step 3:
Display the title change interface, description for the video. This is just a basic content edit for the video.
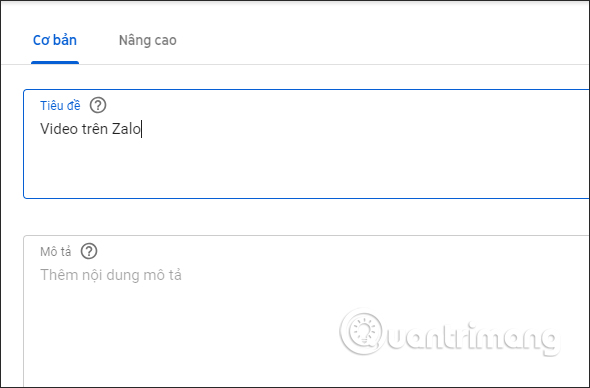
Look at the list to the left of the selected screen on the Editor .
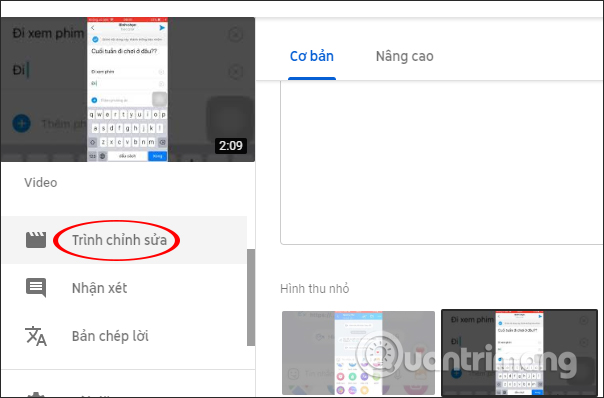
Step 4:
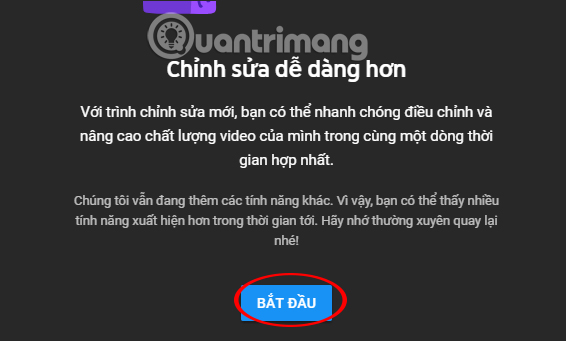
Next you will be notified of the video editor directly on YouTube, press Start to use .
Step 1:
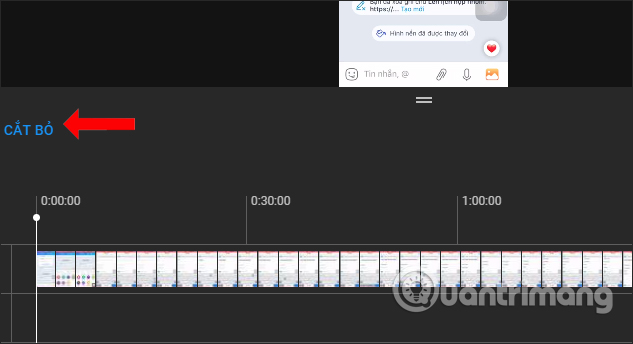
Display videos with each separate timeline on the video. To cut the video users Clicks on Cut .
Step 2:
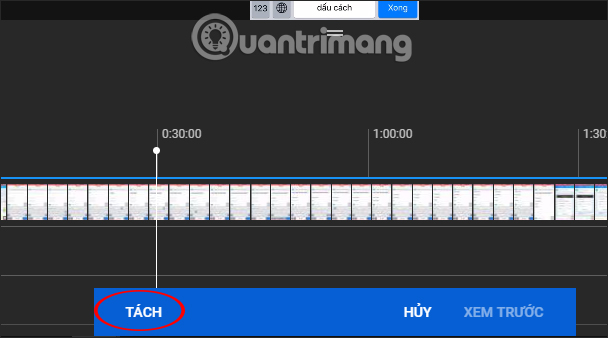
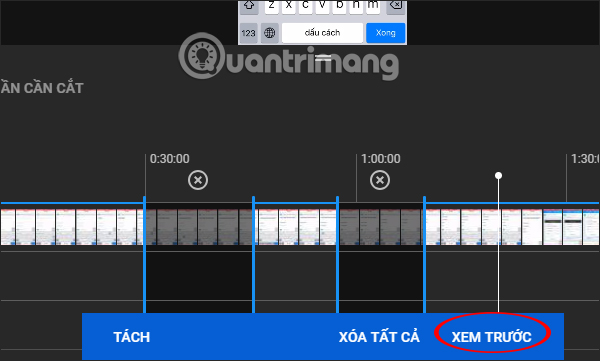
We select to The beginning Of the video we want to cut and then click The Split button Below to select.
Then show a white 2-way arrow to users to Create the video area you want to cut , by dragging the 2-way arrow towards the right to the end of the video you want to cut.
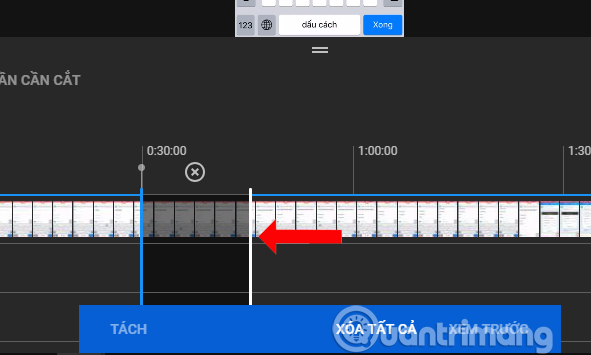
When needed to cut multiple videos, then click at the beginning of another video then press the Split button, then also create the area you want to cut. The blurred sections are sections that want to be cut off. Click The Preview button To preview the video when cutting the video.
Step 1:
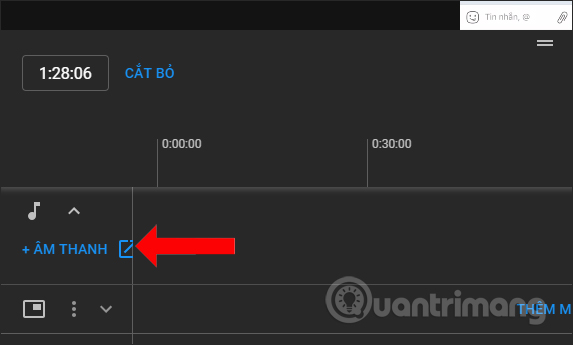
Also this interface you click The music note icon And then click Audio To insert music into the video.
Step 2:
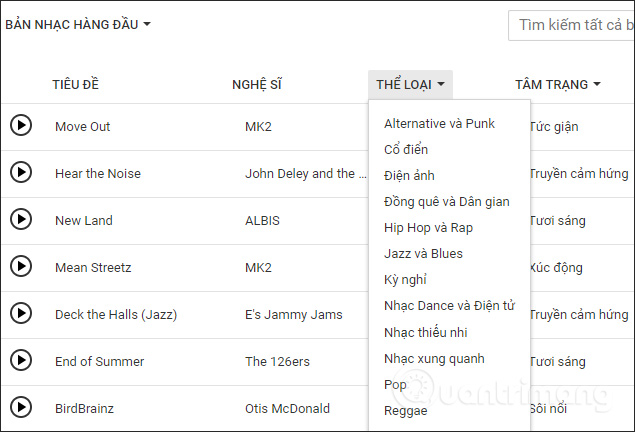
You will then be transferred to another interface. Here users are provided with YouTube music tracks to avoid copyright issues. Press the Play button to listen to the previous song. Here users can Categorize songs By different genres.
Step 3:
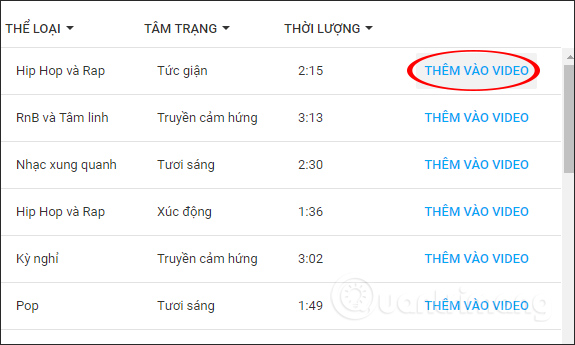
To add a song to the video, click Add to video . YouTube automatically aligns song time with video time.
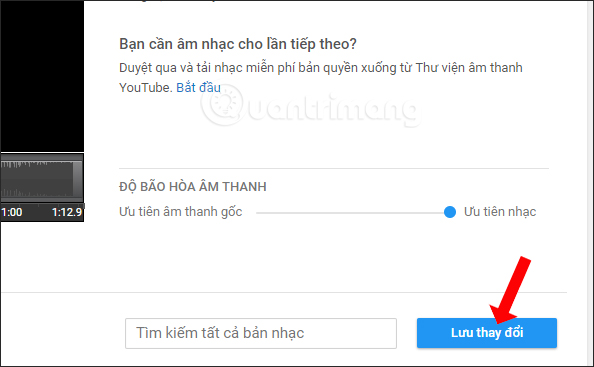
Looking up at the video frame will see the preview before joining the music into the video. We can edit the sound through The Saturation sound section Right next to it. If you switch the circle button to the Original Sound Priority, then the added music will be reduced to increase the original sound in the video. If you switch the circle button to Music priority, the new sound will be louder and drown out the original sound.
When added, click The Save changes button Below.
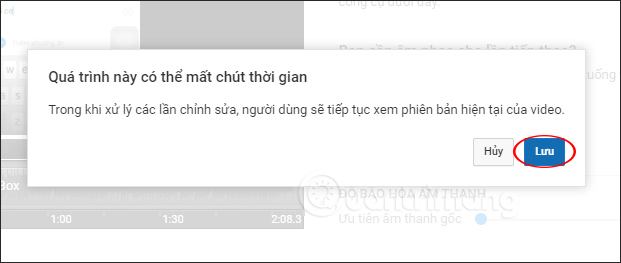
YouTube will notify users of the video processing process and need to wait a while to complete, click Save And wait for YouTube to process to transition to another editor.
Step 1:
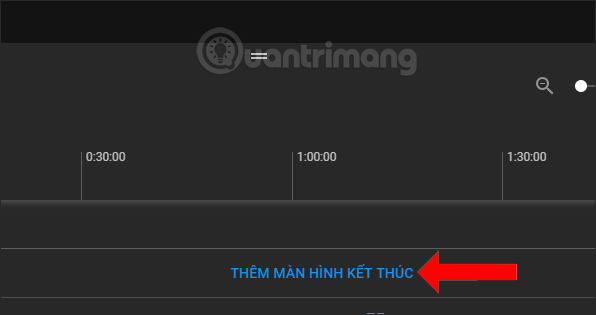
Go back to the video editing interface on YouTube and click the Add screen to end .
Step 2:
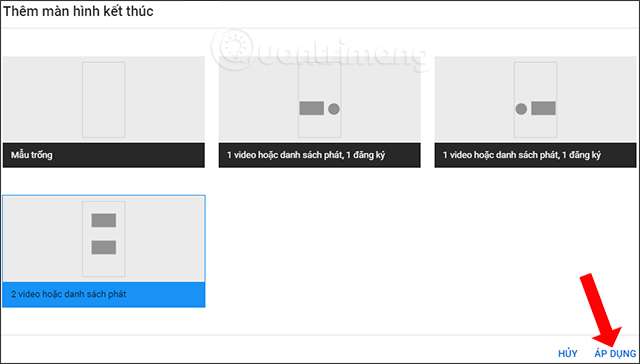
This will display the type of video ending screen as shown below. click The ending screen type And then click The Apply button Below.
Step 3:
Next we look down at the Add screen end section to Adjust the screen display time to end . Adjust the vertical blue line to adjust the screen display time to end.
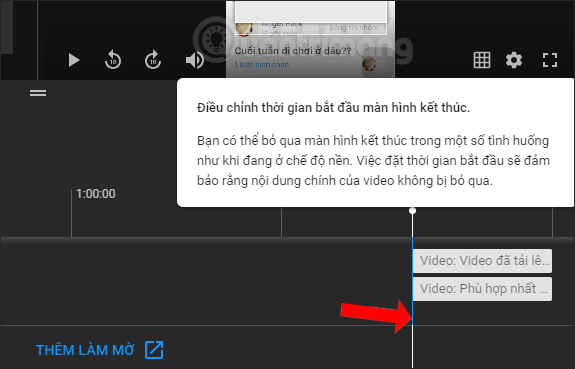
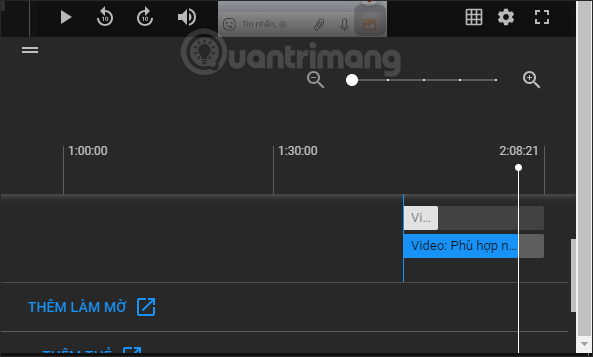
Users can also Adjust the screen playback time to end By extending the video frame as shown below. You should preview the video to check how the content shows up when the video ends.
Step 4:
Look up above to select video Element including video, Playlist, Register, Channel to display at the end screen.
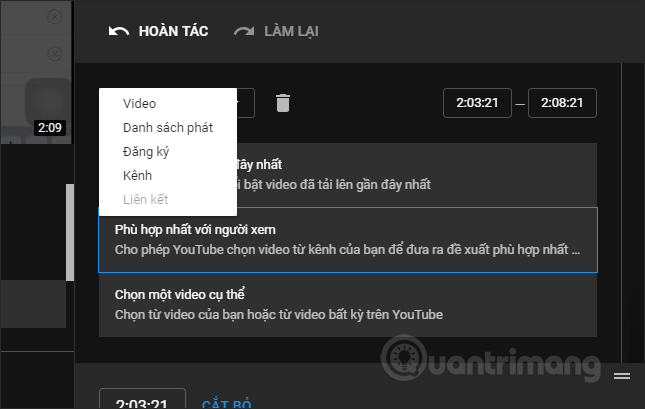
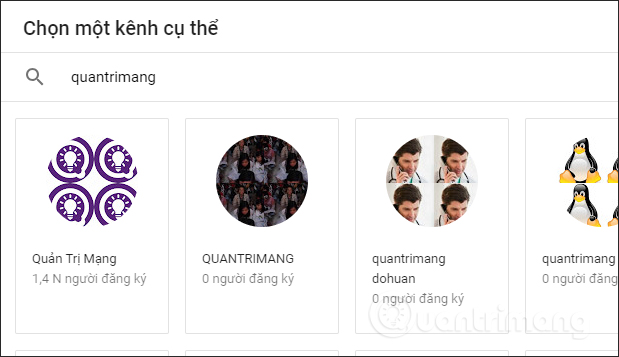
If it's a video, select the videos uploaded to YouTube, if it is Playlist, enter the name of the list you want to find to show the results, Sign up will be your YouTube channel name, Channel is a YouTube channel.
This selection depends on what purpose you want to display when the slideshow video is about to end.
Step 1:
Click The Add blur section To select the effect for the video.
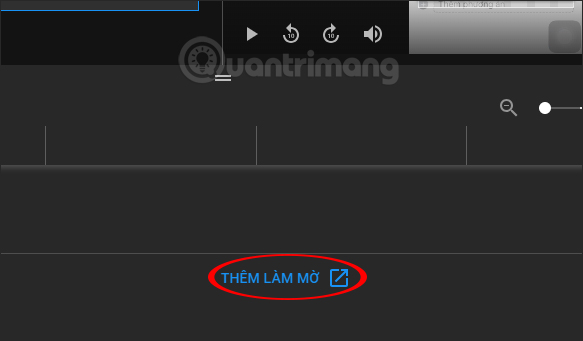
Step 2:
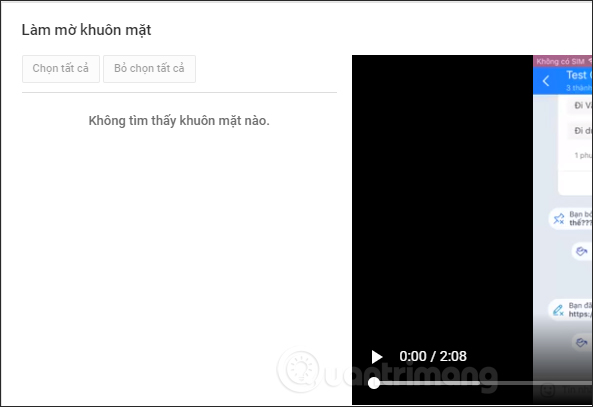
We are transferred to a separate interface. In this section there is the option of Face Blurring and Custom Blur. When pressing Face blur , YouTube handles video processing to identify faces in the video. If no face will receive the message as below.
Step 3:
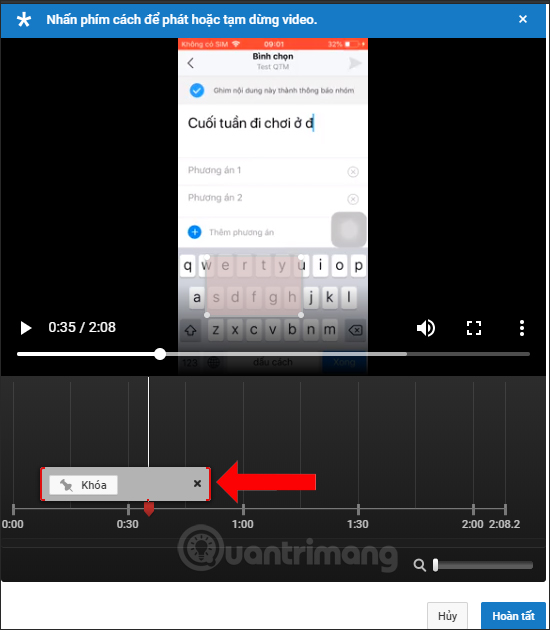
Click Custom dimming To show the new interface. Here you click the video you want to blur. Pink frame on the video to adjust the blur area. Frame horizontal time below to adjust the time to blur the object. Finally Click Finish . Also Click Save To save the changes and also need to wait for YouTube to finish processing.
This is a new feature for video editing. You can add tags to add interactivity to the video. Tags will take viewers to a specific URL, displaying images and titles depending on the type of card.
Step 1:
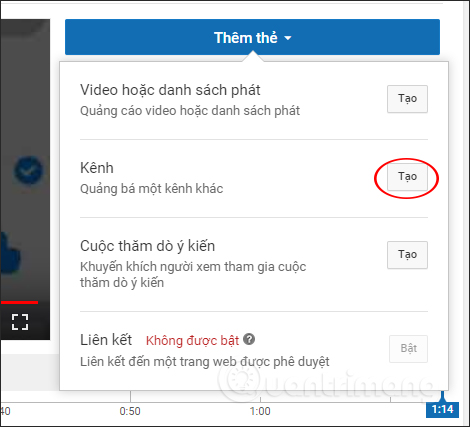
In the edit interface click Add card .
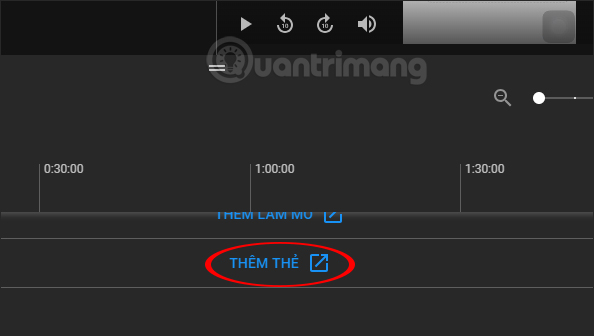
Step 2:
We are transferred to the new interface. Here click Add card then Select the card type you want to add . For Links, users need to become a YouTube Partner to link to approved external websites. Click The Create button .
Step 3:
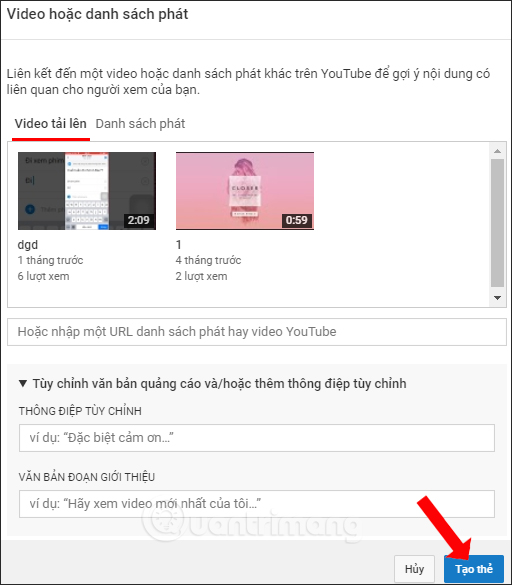
Each type of card requires users to enter different content. When finished, press The Create tab button Below.
Step 4:
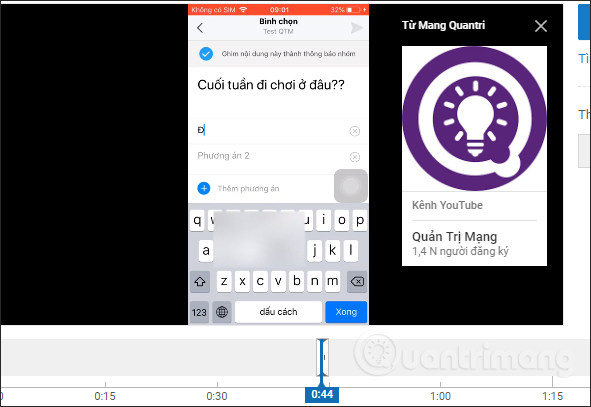
At the card view you can Move the card To the video you want. The tag appears as An i symbol Proposal . When clicked, the content of the card appears.
Step 5:
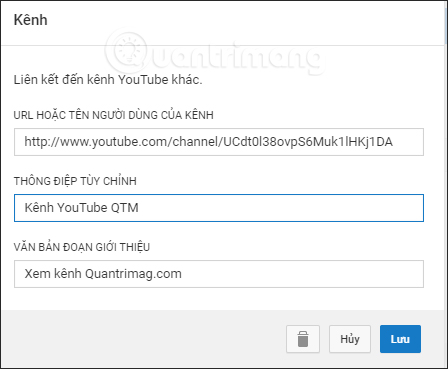
Besides the number of cards you have used, you can use many different name tags. To Change the card Click The pen icon .
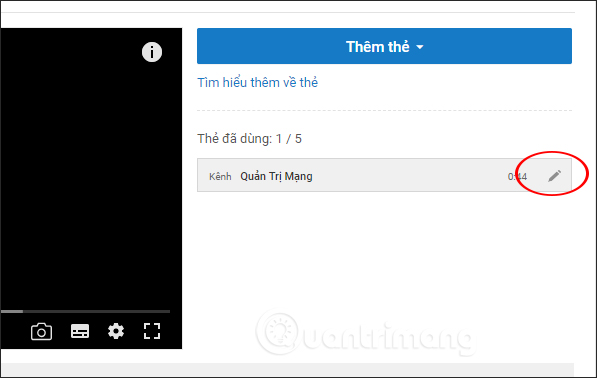
Here you can change the card content and delete the card when needed. The changes are automatically saved.
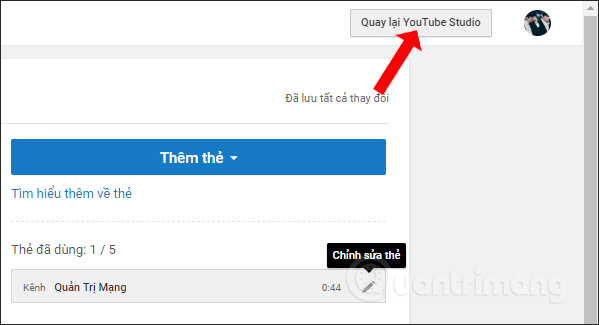
Click Back to YouTube Studio to edit interface.
Step 5:
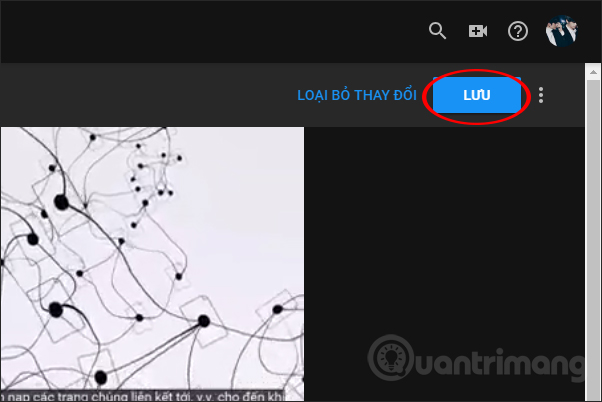
After you have completed all the video changes, click The Save button At the top.
Above are detailed steps to edit videos on YouTube. Keep in mind that in each editing section, click Save to save the changes and then continue the next edit.
I wish you all success!
FAQ
What should I prepare before I edit videos on YouTube?
Review the requirements in the guide, confirm that your device or software is compatible, and save important work before changing settings related to edit videos on YouTube.
Why might edit videos on YouTube not work as expected?
The most common causes are incompatible versions, missing permissions, incorrect settings, or an interrupted internet connection. Recheck each step and restart the app or device when appropriate.
Can beginners follow these edit videos on YouTube steps?
Yes. Follow the steps in order, avoid skipping confirmation screens, and compare your interface with the screenshots because labels may differ slightly between versions.
Related Articles
 How to Edit YouTube Videos10 minutes read
 Instructions for Deleting a Video on YouTube3 minutes read
 Useful Tips with URL YouTube You May Not Know7 minutes read
 Top 15 Most Viewed YouTube Videos5 minutes read
 Youtube Ban: Youtube Extends the Ban on Uploaded Videos2 minutes read
 Upload Videos to YouTube, How to Upload Videos to YouTube from the6 minutes read
Reader Comments 0
Sign in with email or Google to join the discussion.