Table of Contents
Grok's video generator creates short clips, but you can combine several clips into a longer sequence. The main challenge is continuity: a character's face, clothing, proportions, and surroundings can change between generations.
A practical way to reduce those changes is to use a clear frame from each completed clip as the reference image for the next scene. This improves continuity but does not guarantee a perfect match, so plan time for retries and editing.
1. Plan the story as short scenes
Write a simple script divided into shots that can each stand on their own. Keep the number of characters, locations, and costume changes limited. A five-scene story in one location is easier to keep consistent than a story that moves through many places.
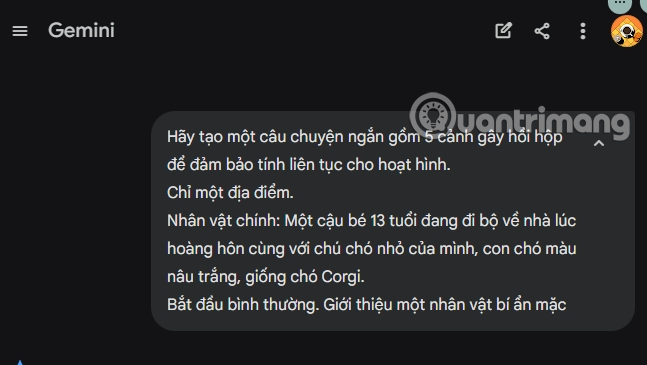
For each character, create a fixed description covering approximate age, hairstyle, facial features, clothing, and accessories. Repeat the same essential wording in every scene prompt.
An example planning request is:
Write a five-scene suspense story set at one old bus stop beside a cornfield at sunset. The main character is a 13-year-old boy wearing the same hoodie and backpack in every scene, accompanied by a small brown dog. For each scene, describe the action, framing, lighting, and the final frame that should lead into the next shot.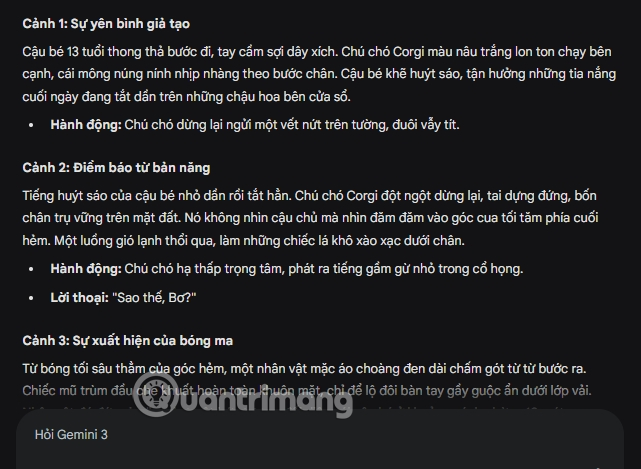
2. Create a reference image
Open Imagine in Grok and generate a landscape reference image using the complete character description. If you already have a suitable image that you are allowed to use, upload it instead.
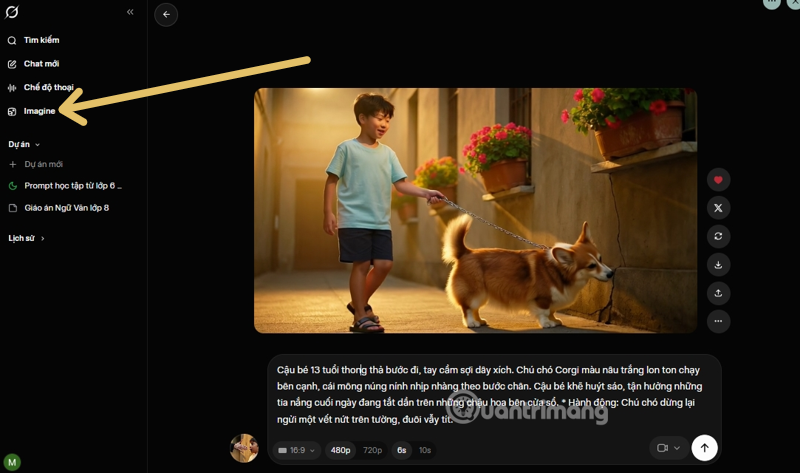
Set the aspect ratio before generating. Use 16:9 for a typical landscape video and keep that ratio for every scene.
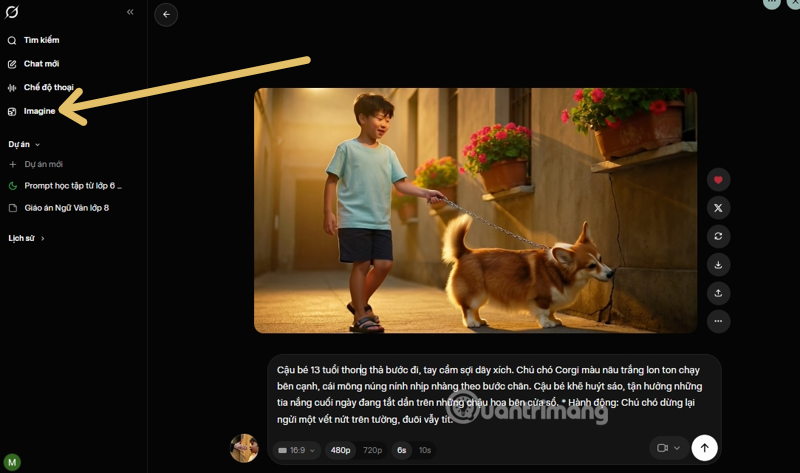
Choose the image with the clearest face, distinctive clothing, and a composition that leaves room for the planned action. Save it as the starting reference.
3. Write one video prompt per scene
Each prompt should specify the character's action, environment, lighting, framing, and camera movement. Use precise directions such as “slow dolly in” or “gentle pan left” only when the movement supports the scene.
Keep continuity details identical. Avoid introducing a different clothing description, color palette, time of day, or art style in later prompts unless the story requires a deliberate change.
4. Carry the final frame into the next clip
Generate the first clip from the initial reference image and scene prompt. Review the result, then move to a frame near the end where the character's face, hair, and clothing are clearly visible. Avoid motion-blurred frames or shots where the character is turned away.
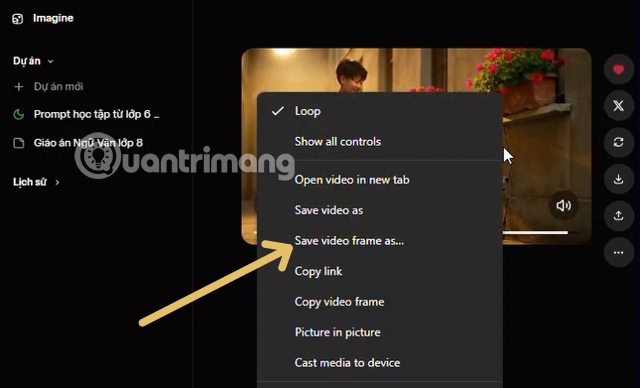
Use Save Video Frame if you want to store the image and continue later. If the interface provides Copy Video Frame, you can copy it directly for the next generation.
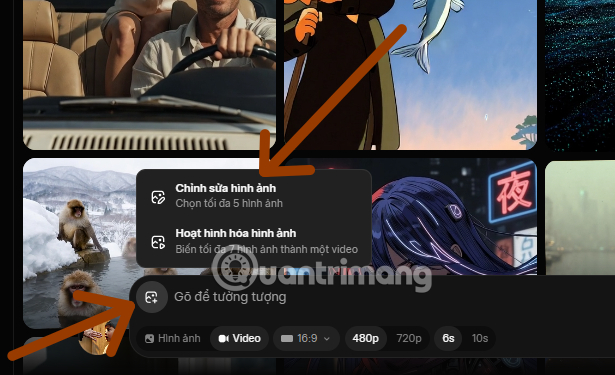
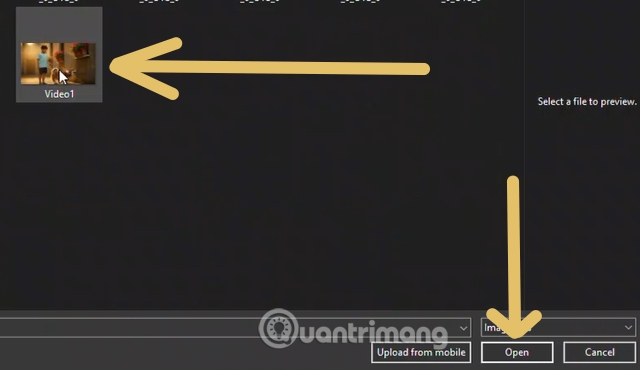
For the next scene, add or paste that frame as the reference image, enter the new scene prompt, and generate the clip.
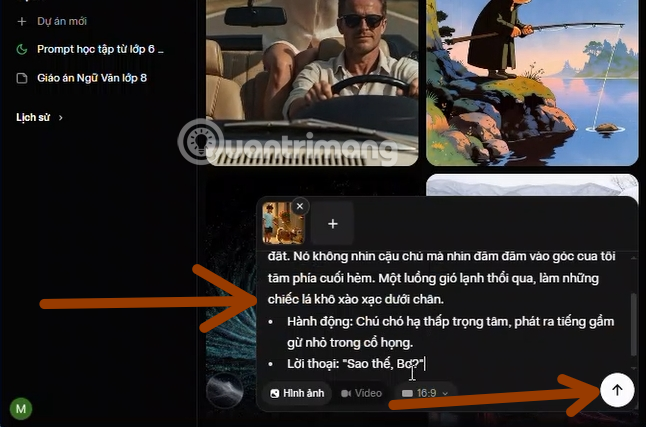
Repeat the same sequence for every shot: generate the clip, select a clean ending frame, and use it as the next reference. If the character changes noticeably, regenerate that scene before continuing; otherwise the mismatch may become more pronounced in later clips.
5. Assemble and polish the video
- Import all generated clips into CapCut or another video editor in story order.
- Trim unusable frames at the start and end of each clip.
- Align the cuts so the subject's position and movement flow between scenes.
- Add narration, dialogue, music, or sound effects only after the visual timing is stable.
- Use transitions sparingly. A short fade can hide a small continuity change, but it cannot repair a completely different character.
- Review the full sequence for visual jumps, misspelled text, and unwanted generated details before export.
Limits to expect
Access limits, clip duration, resolution, and paid features may change, so do not assume every part of this workflow will always be free. Character consistency also depends on the model and source frame. The reference-frame method gives the generator a stronger visual anchor, but manual selection, retries, and final editing remain important.
Related Articles
 How to Create Videos on Grok AI7 minutes read
 Creating Videos from Photos Using Grok9 minutes read
 Experience the Hilarious Grok AI Chatbot on X3 minutes read
 Turn Still Photos into Videos with Grok's New Tool: How to Do It Super Easy4 minutes read
 How to Disable the Automatic Video Creation Feature in Grok6 minutes read
 How to Create Professional 16:9 Aspect Ratio Videos Using Grok Imagine5 minutes read
Reader Comments 0
Sign in with email or Google to join the discussion.