How to delete Text Box in Google Slides
Using a text box is a pretty useful trick if you want to highlight something on a slide. Overusing the Text Box can turn your presentation into a mess..
Through the text box, you can draw the viewer's attention to something, move them to different positions in the slide, as well as customize the background color to make everything look more interesting. should stand out more.
However, sometimes, overusing the Text Box can make your presentation a mess. This article will guide you to quickly remove text boxes from slides in Google Slides.
Delete the Google Slides text box
First, you launch any browser that goes to Google Slides and navigates to the slide containing the text box(s) you want to delete. Select the text box by left clicking once on it. If you want to select multiple text boxes at once, just hold down the Ctrl key (Command on Mac) and left-click each one you want. The outer border of the text box will turn blue when it is selected.
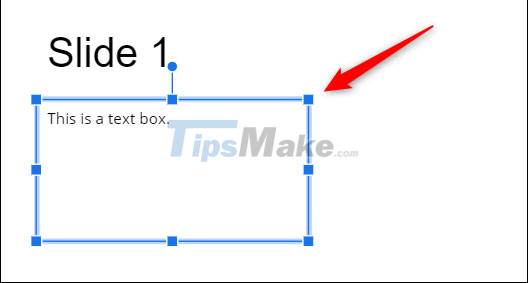
With the text box selected, simply press the Backspace (or Delete on a Mac) key to delete it. Alternatively, you can also right-click the selected text box, then select the 'Delete' option in the contextual menu that appears.

Alternatively, you can also click 'Edit' from the menu bar, then select 'Delete' from the drop-down menu.

Regardless of which method you use, the selected text box will be deleted immediately. Repeat this process on other slides as needed.
Undo deleted text box
In case you mistakenly delete one or more text boxes, you can undo them with just a few simple steps.
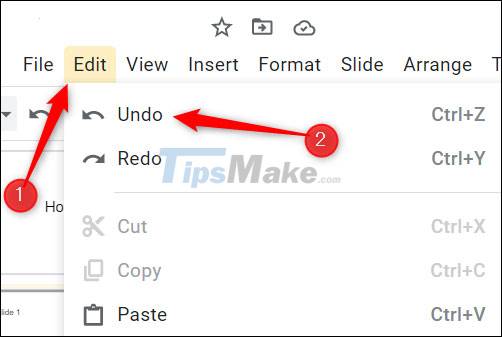
To undo the deleted text box, simply press Ctrl + Z (Command + Z on a Mac). Alternatively, you can also click 'Edit' from the menu bar, then select 'Undo'.
This undoes a previous action, so if you cleared the textbox 20 steps ago, you need to do the undo 20 times.
Wish you have a satisfactory slide!