How to create wall paintings in Photoshop
With images available, you can turn into wall paintings right in Photoshop..
From a regular image, we can use a lot of Photoshop tools to create more effects for images. For example, users can convert photos into Graffiti wall paintings, a type of painting loved by many young people. We can design Photoshop wall paintings right away, from the available subject image to integrate into any brick wall picture and use editing tools. The following article will show you how to create wall paintings in Photoshop.
- How to combine photos in Photoshop from 2 different images
- 3 tips to improve low-resolution image quality
- How to use Photoshop CS5 - Part 5: Photo editing
Guide to create Graffiti paintings in Photoshop
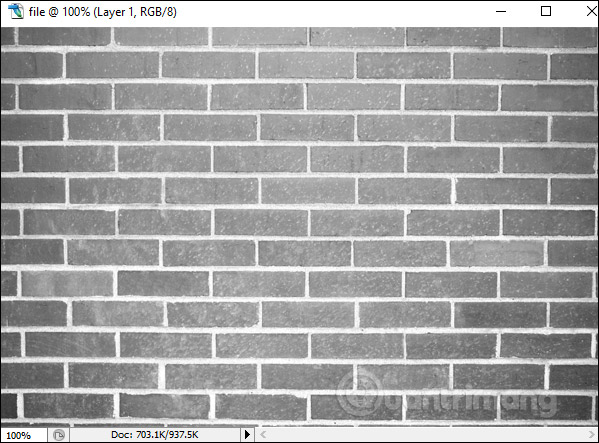
First of all create wall paintings you need to download the brick wall image to your computer. Then deal with the subject image separating the image from the background. How to perform the reference in the article Instructions to separate photos from the background in Photoshop.
Step 1:
In Photoshop, we stitched the subject image into the brick wall image , then adjusted the subject size to the brick wall accordingly.
Step 2:
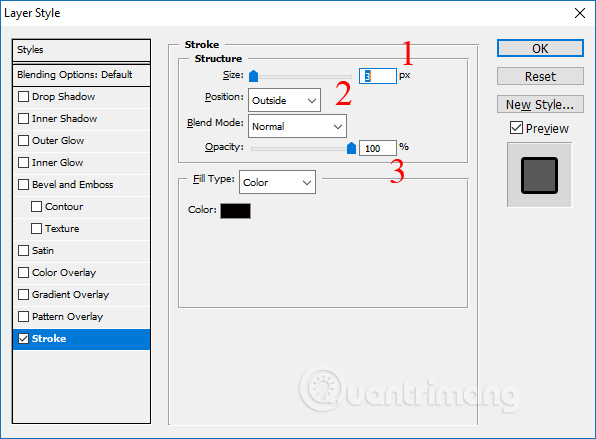
Next, double click on the subject layer to open the Layer Style.

Show new interface. Here, click the Stroke item and set the options. With Size to between 2-10 depending on the intensity surrounding the subject we want to set. Position to Outside and Opacity to 100%. Click OK to save.
Step 3:
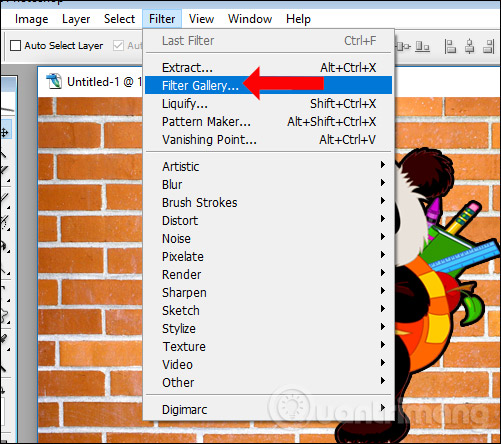
Users click on Filter and select Filter Gallery . as shown.
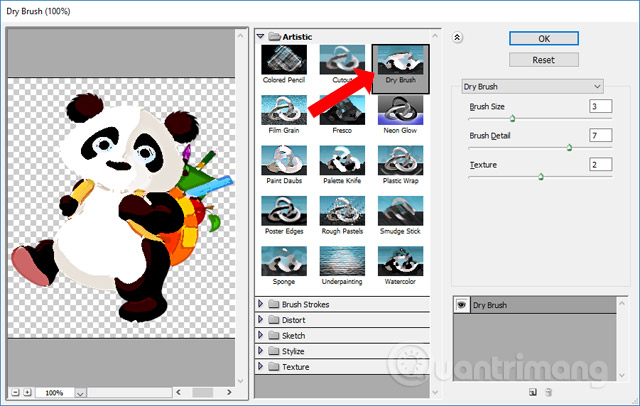
Displaying the Dry Brush dialog, we click on the Artistic folder . Then look at the interface next to align 3 parameters to create a drawing, rough brush like Graffiti painting style. Click OK.
Step 4:
Go back to the layer selection layer Overlay mode .
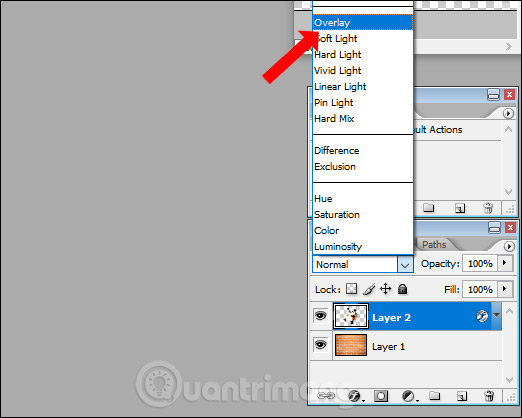
Then the subject image will sink down to the brick wall image and add effects like the image below.
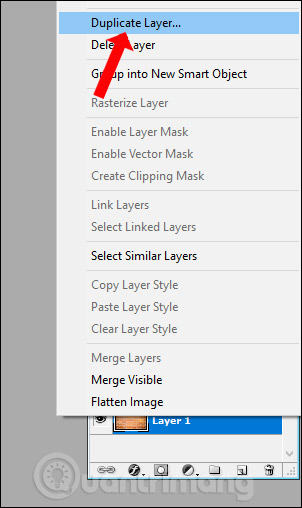
Step 5:
Continue to right click on the brick wall layer and select Duplicate Layer to proceed to create the PSD image workpiece.
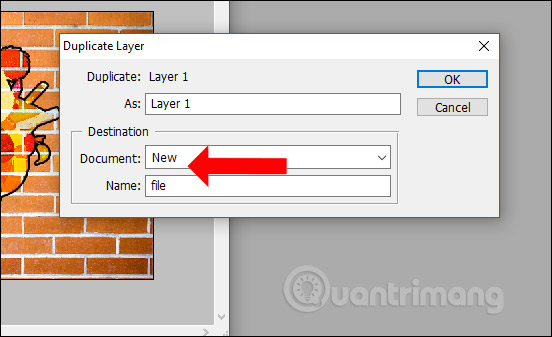
In the Duplicate Layer dialog box, we enter the Document as New and Name the image. Click OK.
Step 6:
Display a new brick wall layer. Press Ctrl + Shift + U to turn the image into black and white.
Click on the Filter item then click Blur and select Gaussian Blur .

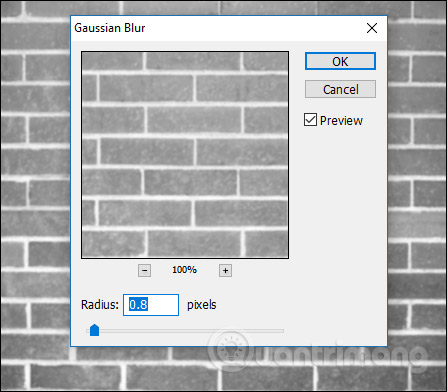
Step 7:
In the new Gaussian Blur dialog box displayed, adjust the Radius to a moderate blur level and click OK. The more you adjust, the more blur will increase.
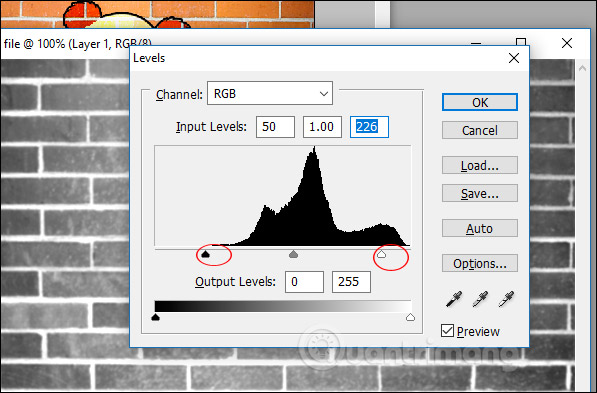
Step 8:
We continue to press Ctrl + L. In the Levels interface, we align the contrast by moving the 2 outer ends. Click OK to save.
Step 9:
Users click on File to select Save As or press Ctrl + Shift + S to save this image.
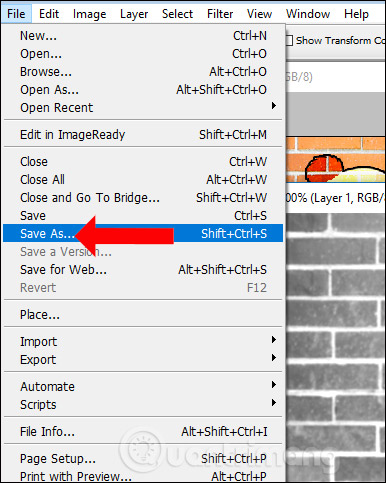
We name the file and choose the PSD format to save the file.

Step 10:
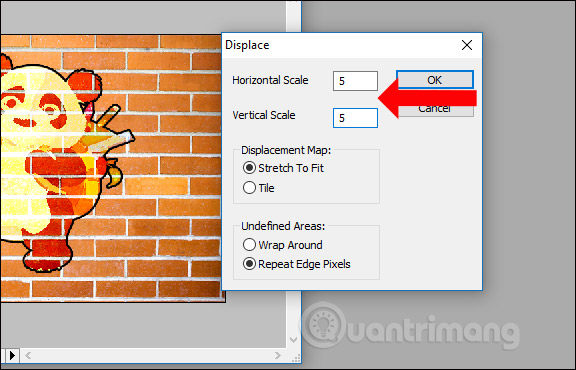
Continue to click on the subject layer and select Filter , select Distort and then click on Displace .
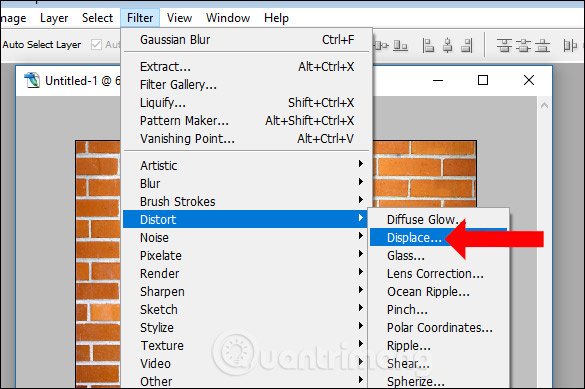
In the Displace dialog box, set the Horizontal Scale and Vertical Scale to 5 and click OK to agree.
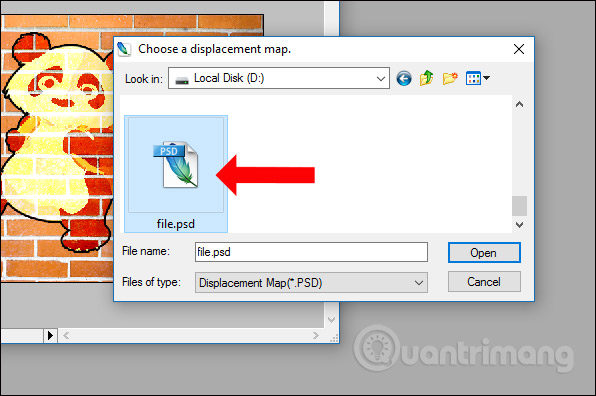
Display the folder for users to click on the newly saved image file.
Step 11:
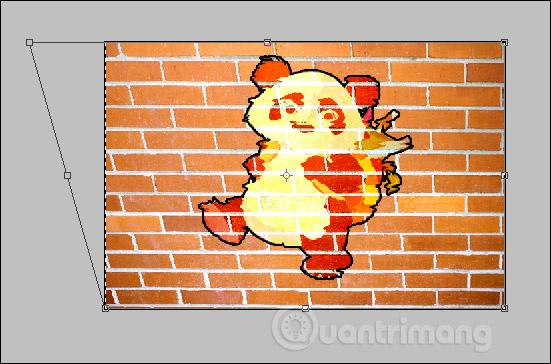
Continue clicking on the brick wall layer then press Ctrl + A and Ctrl + T. Then right-click on the image and select Distort .
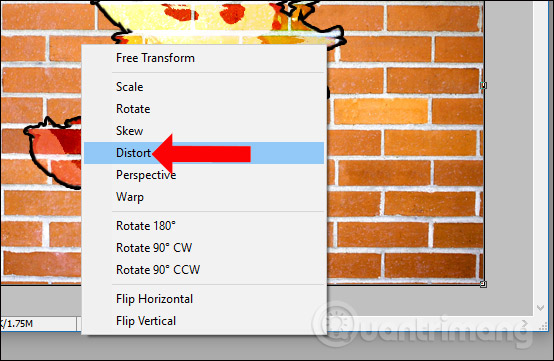
This will display the frame around the image.Stretch the image to create a cross effect for the wall and press Enter.
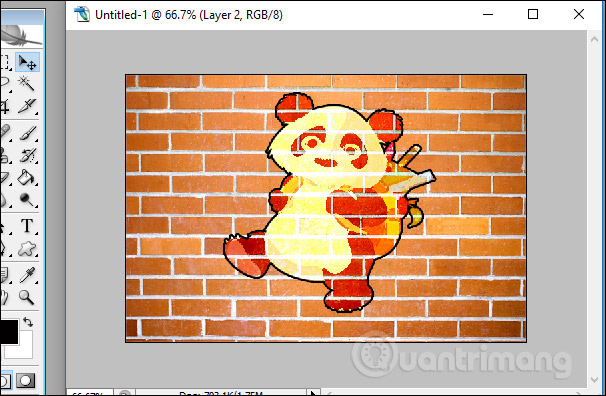
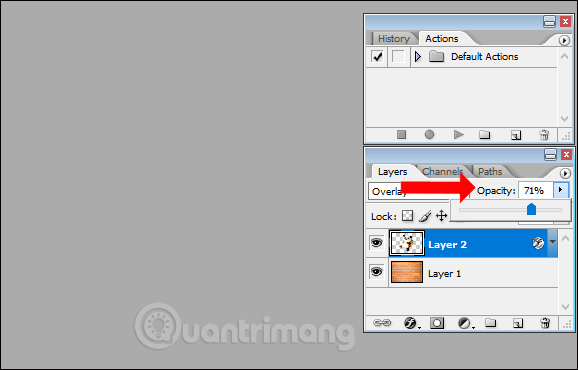
In case the subject image is too bold, click on the subject layer and reduce the Opacity to moderate.
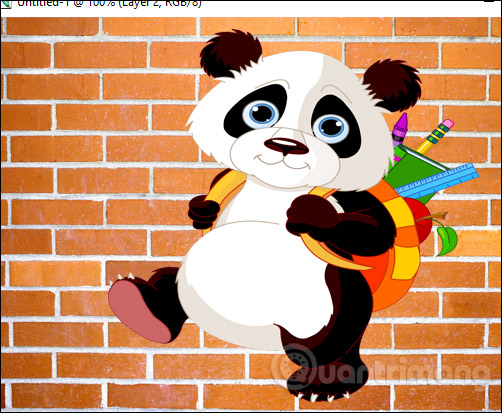
As a result we get Graffiti wall paintings as shown below.
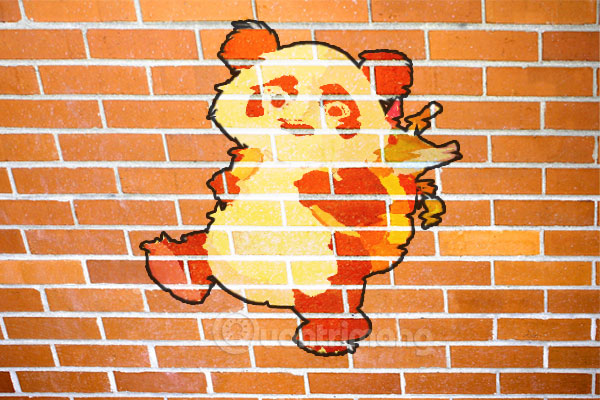
Isn't it weird looking ?! Besides we have to use photo editing application, or specialized photo editing software to create Graffiti wall paintings, now you can use Photoshop right away.
See more:
- How to integrate images into text on Photoshop
- 15 common problems in Photoshop and basic remedies
- How to design a simple logo in Photoshop
I wish you all success!