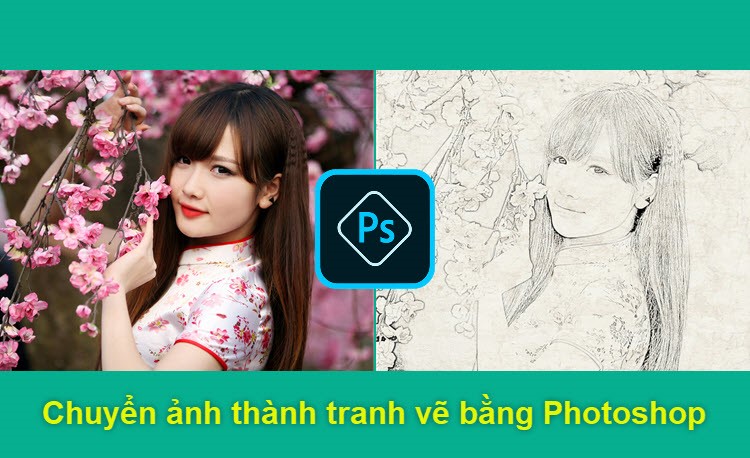
How to turn photos into paintings using Photoshop
Turning photos into paintings is a pretty cool trick in photoshop, it helps turn a photo into a hand-drawn picture just like the real thing. In this article, TipsMake.com will guide you step by step in detail to turn photos into paintings at a glance..
Turning photos into paintings is a pretty cool trick in photoshop, it helps turn a photo into a hand-drawn picture just like the real thing. In this article, TipsMake.com will guide you step by step in detail to turn photos into paintings at a glance. Invite you to follow!
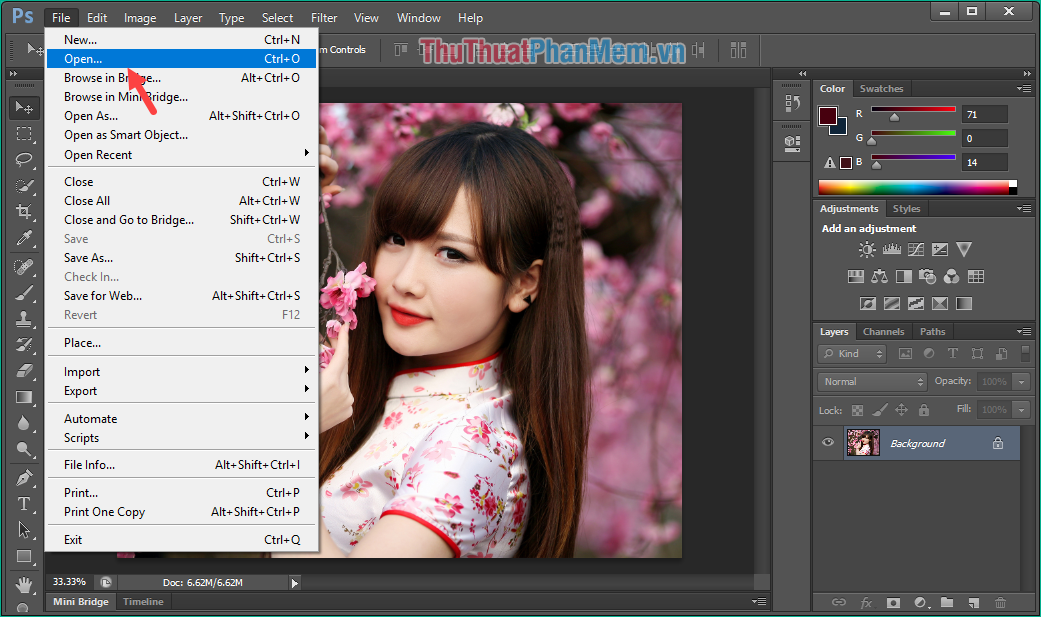
Step 1: Open the picture you need to turn into a picture by selecting File -> Open and then selecting the image in the folder.
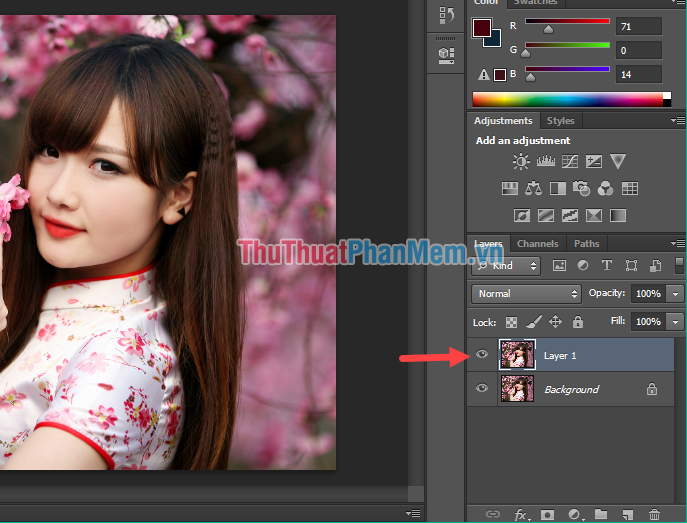
Step 2: Press Ctrl + J key to duplicate the original layer and we get a new layer named Layer 1 .
Step 3 : Choose Image -> Adjustments -> Desaturate or press Ctrl + Shift + U to turn the image into a black and white photo.
 / p>
/ p>
Step 4: Press Ctrl + J again to duplicate the layer and we will get a new layer called Layer 1 .

Step 5 : Select Image -> Adjustment -> Invert or press Ctrl + I to create a negative image.

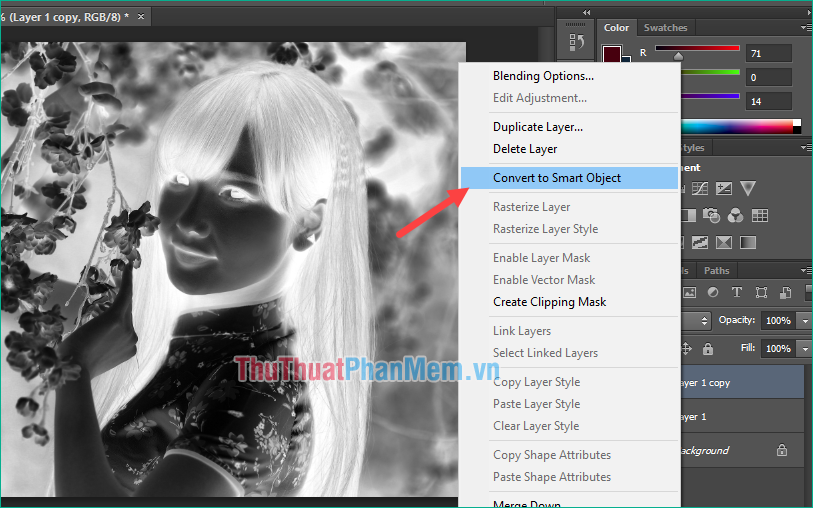
Step 6: Right-click on Layer 1 copy and choose Convert to Smart Object to convert Layer 1 Copy into Smart Object, this will help the image from losing quality after applying the filters.
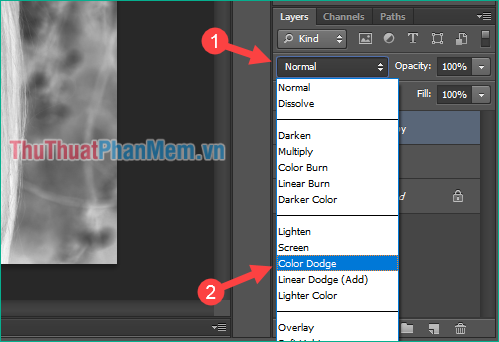
Step 7 : Change the color shift mode from Normal to Color Dodge , this time you will see the image as white.
Step 8: Select Filter -> Blur -> Gaussian Blur
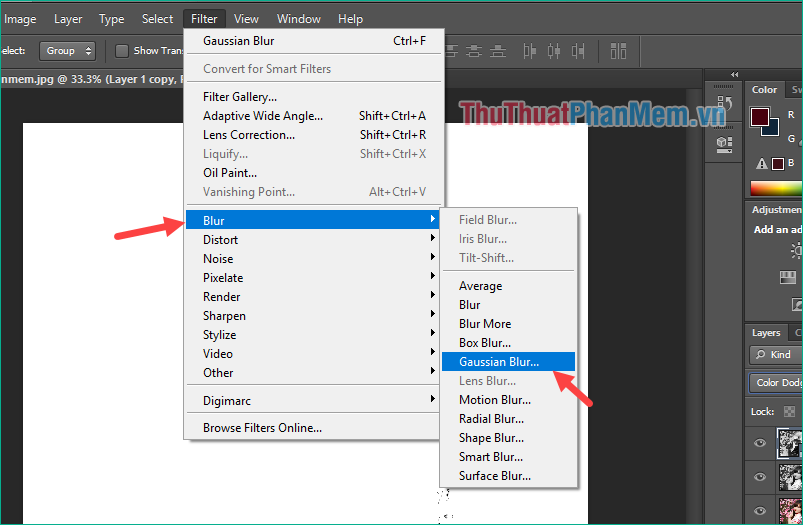
Step 9: Now you will see the picture has become clearer and similar to the picture painted by hand. Please adjust the Radius parameters in the following small window for clear image lines and not too fake. When you have satisfied you click OK .

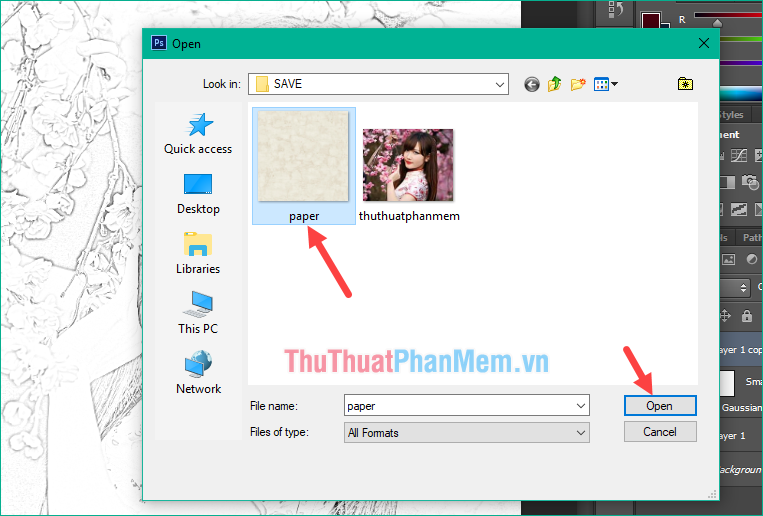
Step 10: To make the image more realistic and like drawing on paper, find a picture of some paper. Press Ctrl + O to open up the paper image.
Step 11 : Use the Move tool and move the photo to the girl we are editing.
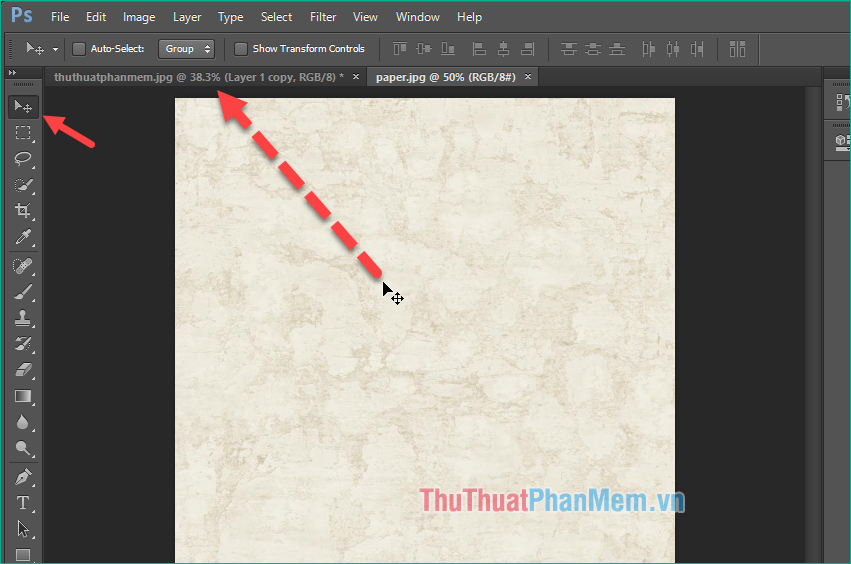
Step 12: Press Ctrl + T to resize the paper so that it covers the picture of the girl.

Step 13 : Change the color selection mode from Normal to Multiply.
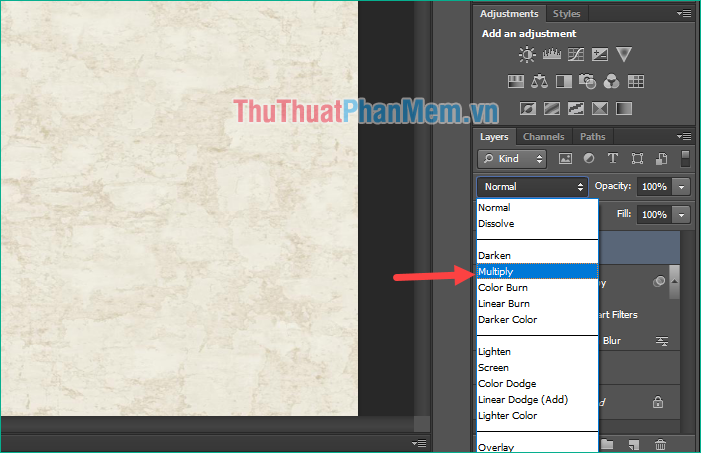
Step 14: Now you will see the image of the girl and the paper completely mixed together, adjust the Fill settings so that the selection is satisfactory.

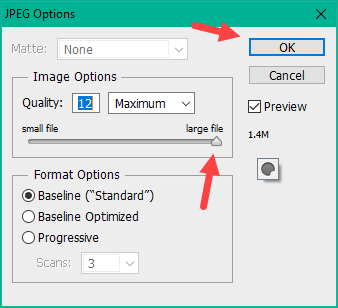
Step 15 : Finally we press Ctrl + S to save the image.
Here we save the image in JPEG format then name the image and click Save .

A small window appears, the quality section you just select Maximum to have the best image quality and click OK.
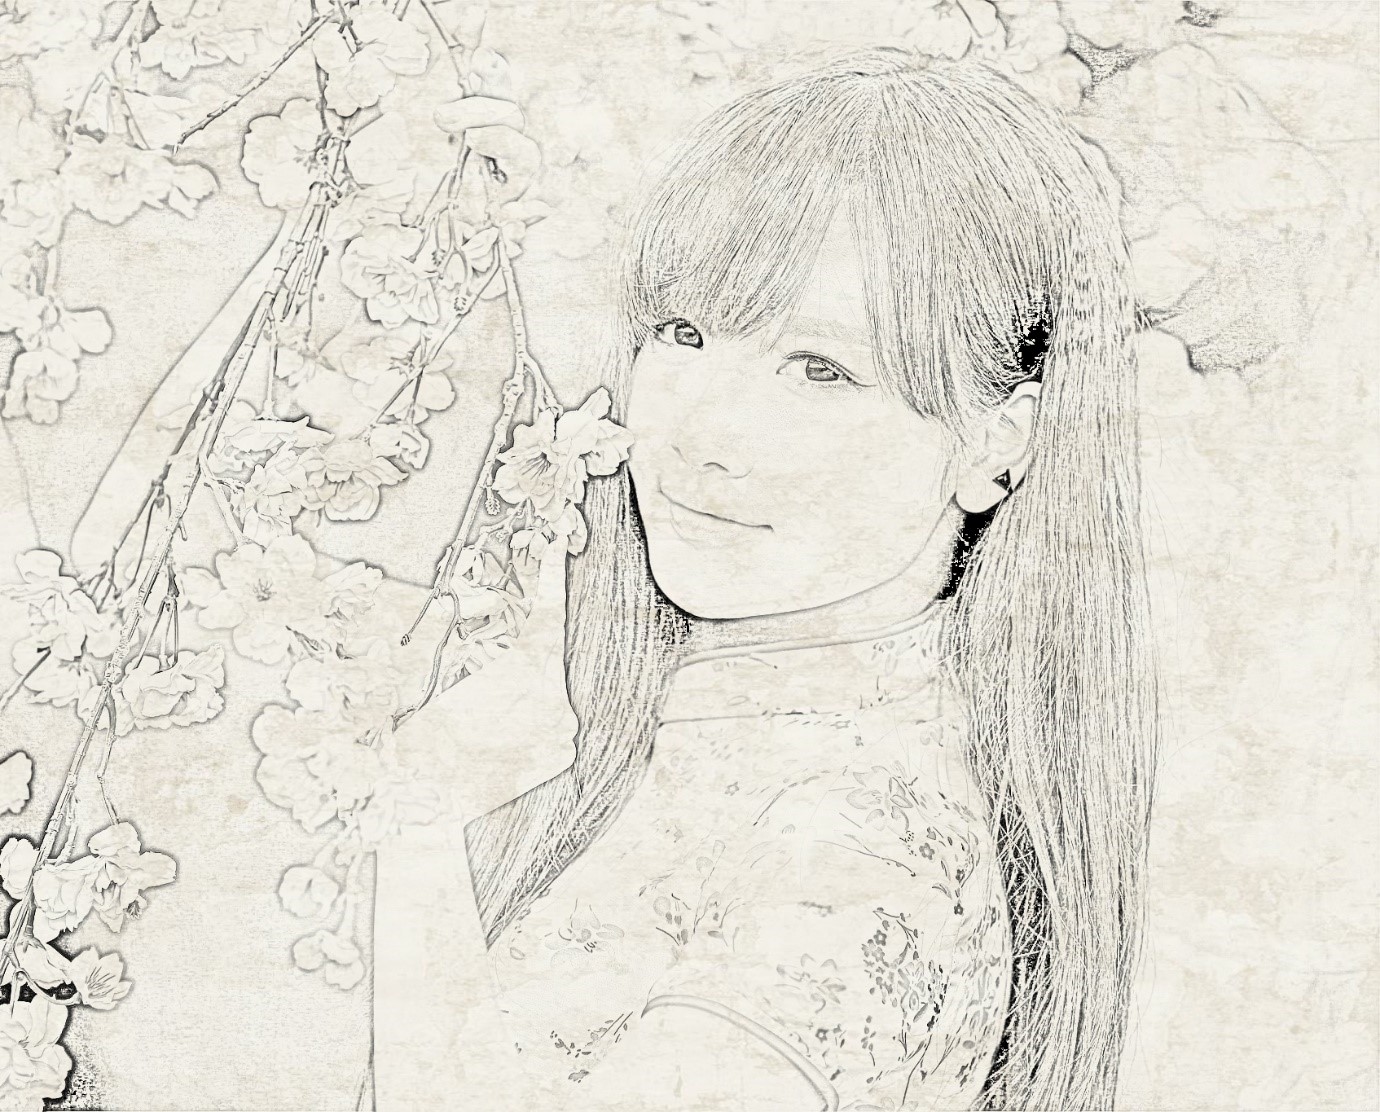
And here is our result after turning the shot into a picture:
Thank you for watching this article, wish you success!