Tutorial for creating 3D photo effects in Photoshop (Part 1)
Did you know that in Photoshop there are 3D photo editing effects that make your photos more vivid. The following article The network administrator will show you how to create 3D effects in Photoshop.
Table of Contents
In the technology era is increasingly modern as today, many applications and photo editing software are more and more. Especially after 3D technology appeared, the number of applications increased. One of those applications is Photoshop. Did you know that in Photoshop there are 3D photo editing effects that make your photos more vivid. The following article The network administrator will show you how to create 3D effects in Photoshop.
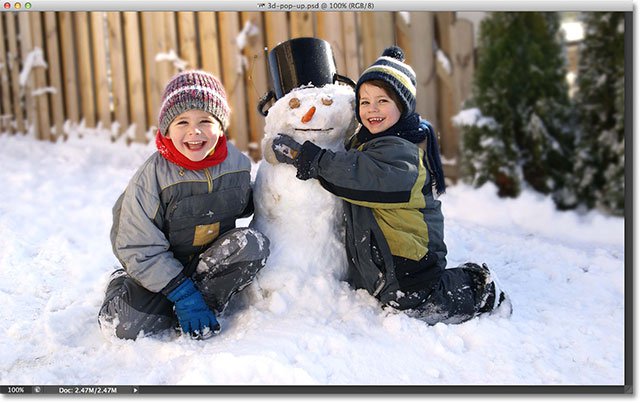
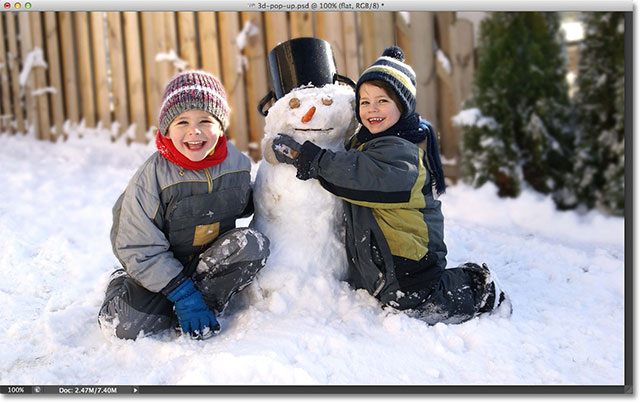
Photos before creating 3D effects:
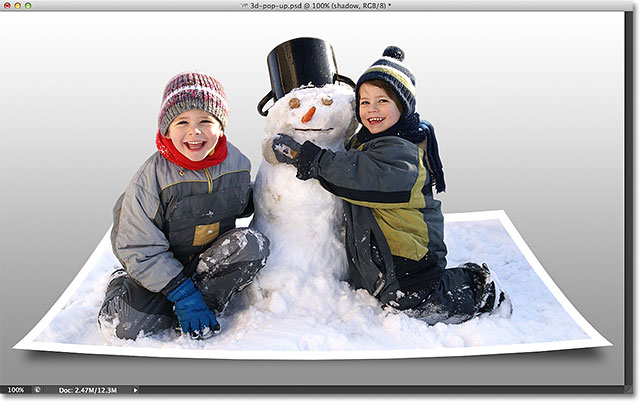
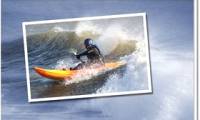
After creating 3D effect:

Step 1: Duplicate the Background
First open Photoshop and import the image you want to edit. On the Layer Panel you will see the image you just imported in the Background.

Then continue to duplicate the layer . Press Ctrl + J (for Windows) and Command + J (for Mac) to duplicate.
The copies you just created are Photoshop that sets the default name to "Layer 1" above the background in the Layer Panel .
However, the default names provided by Photoshop are not useful, so you need to rename those duplicate layers .
Right-click directly on Layer 1 (Click on the text) select Layer Properties and revise the name to ' Flat'.

Similar to the copy 1 layer, the steps are the same as above but named 'Pop up'.
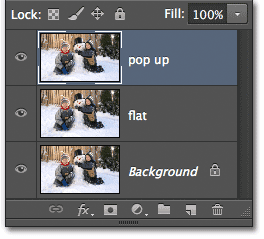
Press Enter (for Windows) or Return (for Mac) to accept name changes.
Step 2: Hide the 2 layers you just created
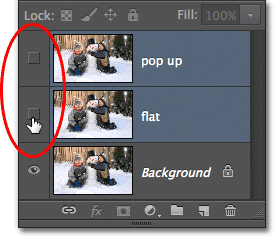
Click on the eye icon on the left hand side of the "Flat" Layer and the " Popup" Layer to hide these two layers.
Step 3: Select Layer Background
Click on the Background Layer icon to select it.
Step 4:
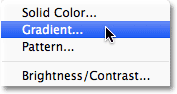
Click on the New Fill or Adjustment Layer icon below the Layer Panel.
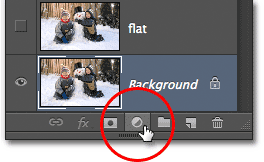
Then select Gradient.
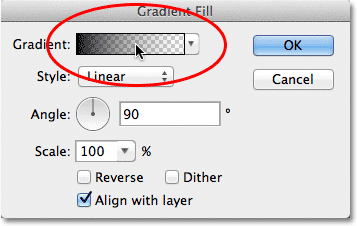
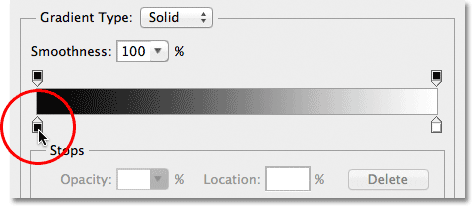
Step 5: Select black and white gradient
Open the Gradient Fill dialog box. Click on the Gradient bar located at the top of the dialog to edit the color.
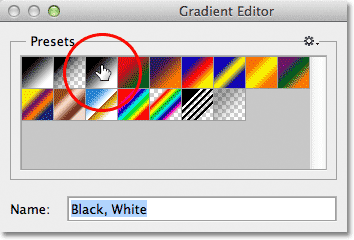
After opening the Gradient Editor dialog box , select the color as the circle in the image below.
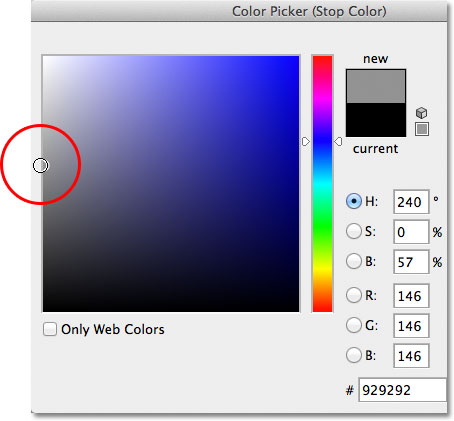
Step 6:
After you have finished selecting the black and white gradient , edit to change the color again. Double click on the part as shown below to edit the color.
Open Color Picker in Photoshop to change the black color in the Gradient to another color. Black makes the Background dark, so you should choose a lighter color.
After you've selected the color, click OK to exit the Color Picker window, then click OK to exit the Gradient Editor window, finally click OK to exit the Gradient Fill dialog box .
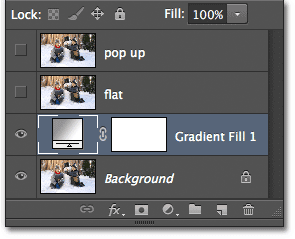
On the Layer Panel, the new Layer Gradient Fill is just above the Background Layer and below the Flat and Popup Layer.
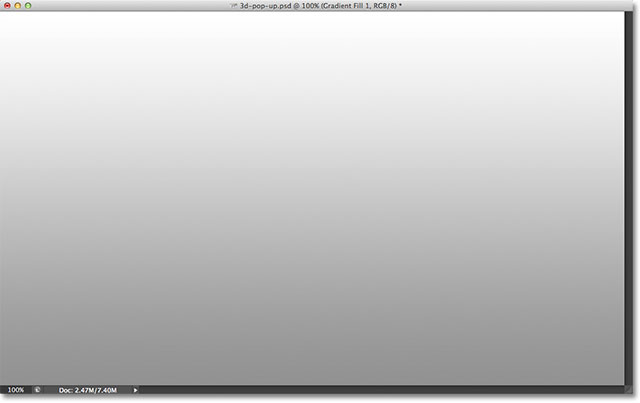
The new Gradient Fill layer looks like the image below.
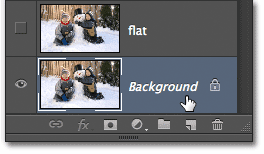
Step 7: Select and open "Flat" Layer
Click on the "Flat" Layer on the Layer Panel to select it, then click on the eye icon to allow it to appear in the window.
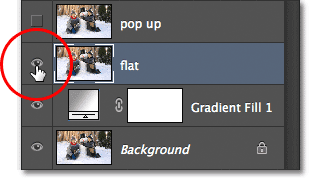
The "Flat" layer will mask the previous Gradient Fill layer you just created.
Further reference: 14 simple steps to create a snow effect for the photo
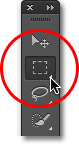
Step 8: Select the Rectangular Marquee Tool
Select the Rectangular Marquee Tool on the Panle Tool or the fastest way is to press the M key on the keyboard.
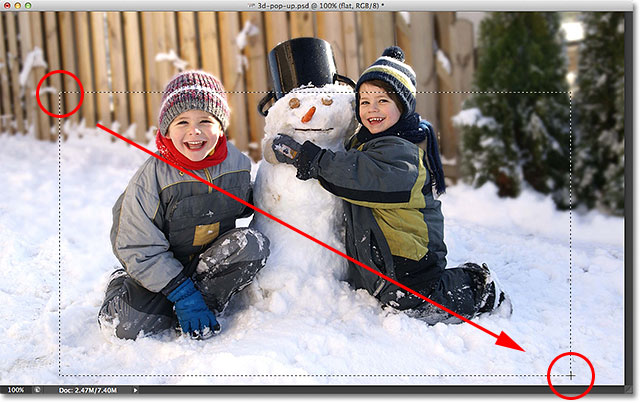
Step 9:
With the Rectangular Marquee Tool that you just selected, click and drag as shown below.
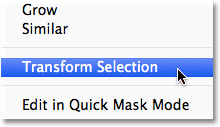
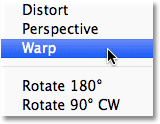
Step 10: Select the Transform Selection statement
On the Menu bar select Select, then choose Transform Selection, or alternatively press Ctrl + T.
See more Video tutorials:
Check out the next steps in Part 2.
Good luck!
Was this article helpful?
Your feedback helps us improve.
Related Articles
 Tutorial for creating 3D photo effects in Photoshop (Part 2)5 minutes read
 Tutorial for creating 3D photo effects in Photoshop (Part 3)5 minutes read
 How to use Photoshop CS5 - Part 26: Create a lightning effect9 minutes read
 How to create stunning 3D pop-out effects in Photoshop8 minutes read
 How to use Photoshop CS5 - Part 20: Create images of fists through the screen10 minutes read
 How to use Photoshop CS5 - Part 18: Create nested photo effects6 minutes read
Reader Comments 0
Sign in with email or Google to join the discussion.