Table of Contents
This updated guide explains how to Create Photo Albums with PowerPoint through clear steps, practical examples, and important checks that help prevent common errors.
To create a photo album with a simple implementation, you can use Microsoft PowerPoint directly in Microsoft Office to create your own photo album.
this guide will guide you how to create photo albums with PowerPoint.
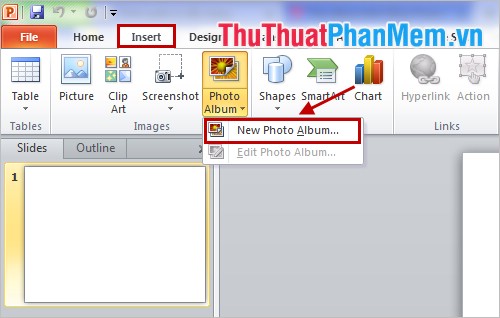
Step 1: Launch PowerPoint, select Insert -> Photo Album -> New Photo Album .
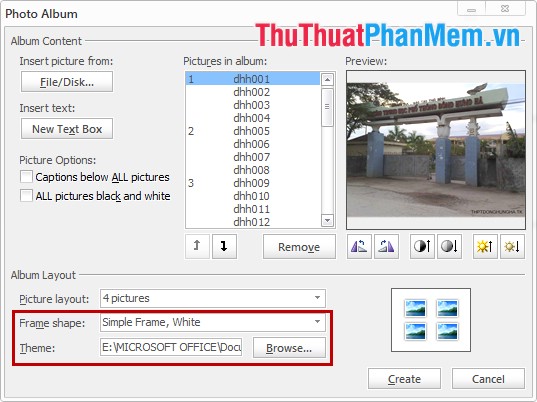
Step 2: Interface Edit Photo Album appears, first press File / Disk and select the file containing the photos you may need to create the album.

You can rotate the image and adjust the brightness by using the icons under the preview image.

Select All pictures black and white if you may need to convert all photos in the album to black and white.

You can move the image position in the album with the up arrow, down arrow icons. Remove photos from albums with Remove .

In Picture layout, you choose the number of images on a slide.

You choose effects for images in Frame shape and choose the background for the album in the Theme section.
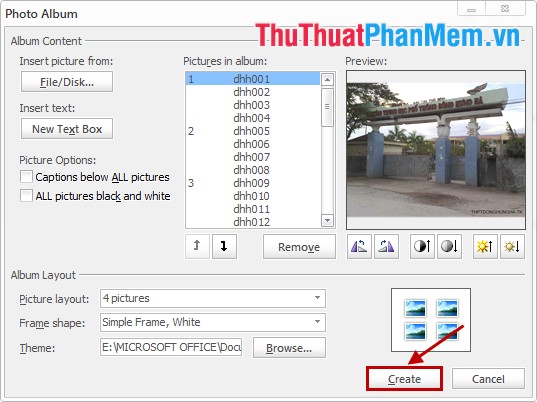
Step 3: Click Create to create the album.
The result will be as follows:

So with 3 very simple steps, you quickly create a simple photo album with PowerPoint. You do not need to waste time with other sophisticated photo album creation software. Good luck!
FAQ
What is the easiest way to Create Photo Albums with PowerPoint?
Start with the requirements in this guide, then follow each step in order. Check the result after every major change so problems are easier to identify.
Can beginners follow these instructions?
Yes. The process is organized into practical steps, and you can repeat any step before moving forward.
What should I check if the method does not work?
Confirm your software or device version, permissions, settings, file format, and internet connection when the task depends on online services.
Related Articles
 How to Create Photo Album in PowerPoint3 minutes read
 How to Create PowerPoint Photo Album with Effects5 minutes read
 How to Create Photo Albums on iPhone to Help You Easily Manage: Complete Guide4 minutes read
 Instructions to Download All Photo Albums on Facebook7 minutes read
 Create Beautiful Photo Effects in PowerPoint4 minutes read
 How to Download All Photo Albums on Facebook to Android Phones6 minutes read
Reader Comments 0
Sign in with email or Google to join the discussion.