How to create and share iCloud photo album on iPhone or iPad
With iOS 12, you can create iCloud photo album and share it with friends and relatives on iPhone and iPad. Besides providing safe storage for beautiful photos, it is also a great tool to help you connect with people!
With iOS 12, you can create iCloud photo album and share it with friends and relatives on iPhone and iPad. Besides providing safe storage for beautiful photos, it is also a great tool to help you connect with people!
Photos app adds iCloud album creation feature to share with family and friends. So if you have memorable pictures and compelling videos, you can create an album to safely store and share it with everyone.
To get started, you need to enable the 'Shared Album' feature for your iOS device. To do so, go to Settings> Photos> then turn on the switch next to Shared Album.
Step 1. Open the Photos app> select the photo or video you want to share> click on the share icon.
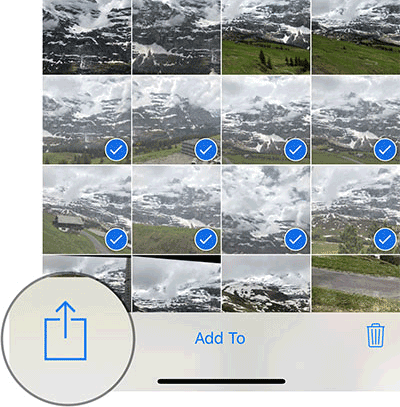
Step 2. Next, when the sharing table appears, select ' Shared Albums .'

Step 3. Click on Shared Album .
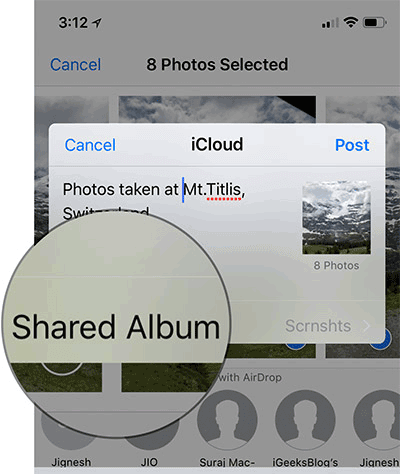
Step 4. Now, click "+" button, name the album and click Next .

If you don't want to share an album with anyone, click Next> Post .

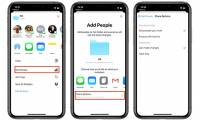
On the other hand, enter the phone number or email of the person you want to share, click Next . Now, write a message then click Post .

So you've created and shared your iCloud photo album. Next, you can access it from the Album tab and manage it the way you want. Here, you can invite friends, allow / not allow them to post photos to albums and even delete them.
See more:
- How to add photos and videos to albums shared on iPhone, iPad
- How to share photos on iPhone with Family Sharing
- How to delete, restore photos and videos on iPhone and iPad
- How to turn on iCloud Photo Sharing on iPhone, iPad, Mac and Windows
- How to synchronize messages between iPhone, iPad, macOS
Was this article helpful?
Your feedback helps us improve.
Related Articles
 How to add photos and videos to albums shared on iPhone, iPad4 minutes read
 How to turn on iCloud Photo Sharing on iPhone, iPad, Mac and Windows3 minutes read
 How to share photos on iPhone with Family Sharing3 minutes read
 How to share iCloud folder on iPhone and iPad3 minutes read
 How to lock hidden photo albums on iPhone3 minutes read
 How to share photos with temporary iCloud links on iPhone and iPad4 minutes read
Reader Comments 0
Sign in with email or Google to join the discussion.