How to create PowerPoint photo album with effects
In order to create photo album for presentation on computer, we will often think of using professional photo editing software, such as Photoshop, Piscasa, GIM, etc. However, if your request is to create photo album effect Simple, it can be done right on PowerPoint.
On the PowerPoint versions, photo album creation is available, and users do not need any other support tools. PowerPoint albums can add beautiful effects, create professional-looking photo slides. The following article will guide you how to create a photo album on PowerPoint.
- How to insert images below the word on PowerPoint
- How to insert text into images in PowerPoint
- How to add borders to PowerPoint slides
How to create PowerPoint photo album with effects
Step 1:
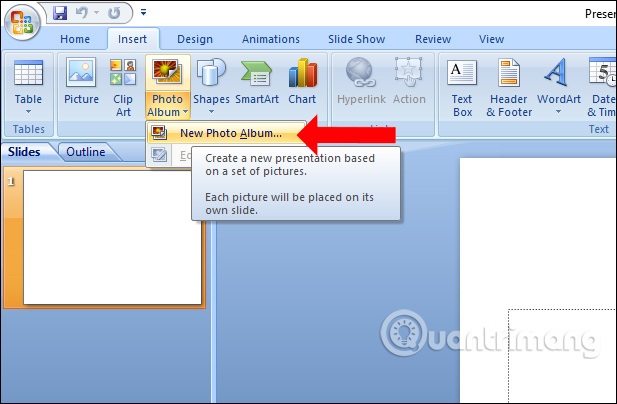
In the PowerPoint interface, users click on the Insert tab on the toolbar and select Photo Album , choose New Photo Album .
Step 2:
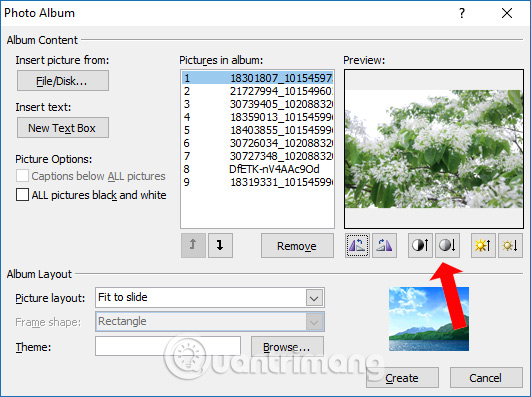
In the new Photo Album interface, click File / Disk to upload the image from the computer. Then click on the images you want to create the album and then click the Insert button below to import photos into PowerPoint.

Step 4:
Immediately after that, the selected images will appear on the Photo Album interface. Click on the name of each image to view the content. Note that the Picture layout section selects Fit to slide so that images with the appropriate size fit the slide, make the slide look more beautiful and more professional.
If you want to delete the image, click the Remove button. More versions of Office 2010 will have the option to change the image position by clicking on the image and then pressing the up or down arrows.

Step 5:
Besides, there will be customizations such as rotating images, changing the brightness of images, the contrast of images. When you have finished editing, click the Create button below to create.
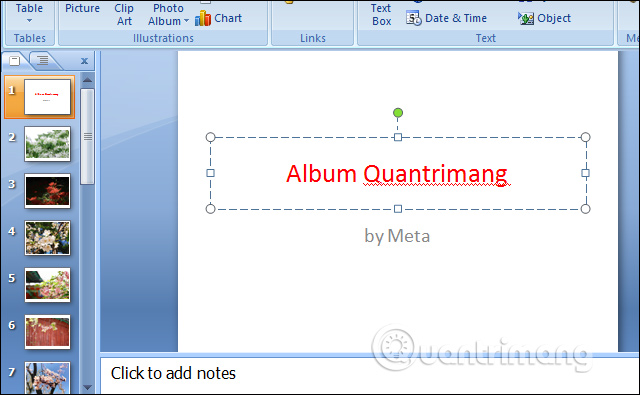
Below is the result of creating photo albums on PowerPoint slides. The first slide will be used to represent the album name, the designer. You can enter to replace content. The remaining slides contain images on the album and are on each separate slide.
Step 6:
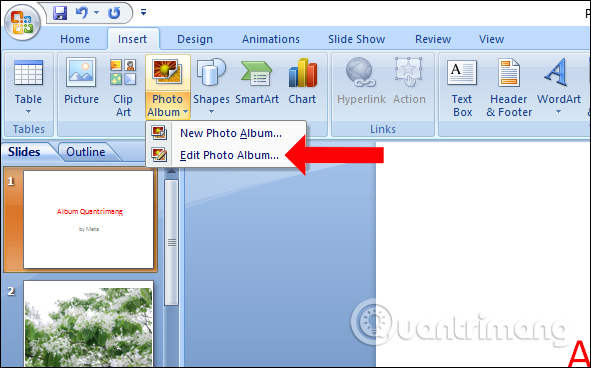
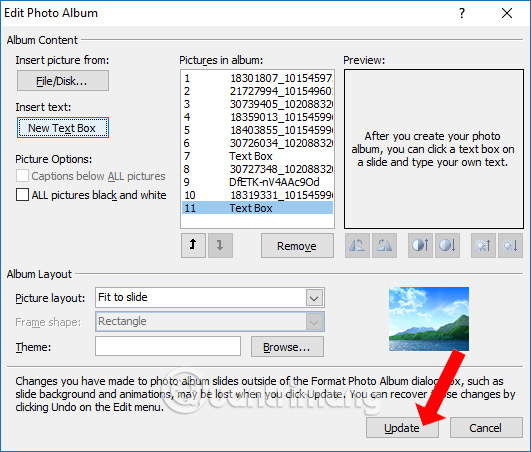
In case you want to edit the created photo album, also click Insert, select Photo Album and choose Edit Photo Album .
The Photo Album dialog will also be displayed again. We can insert images, insert content writing slides, . depending on editing needs. Click Update to update the content.
Step 7:
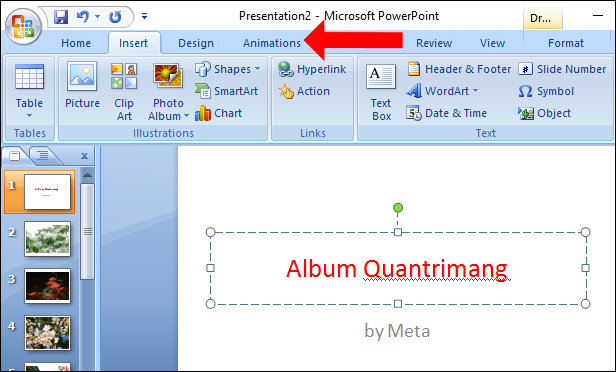
Users can then add image transition effects. Click on the image you want to insert the animation effect and then click on the Animations tab above.
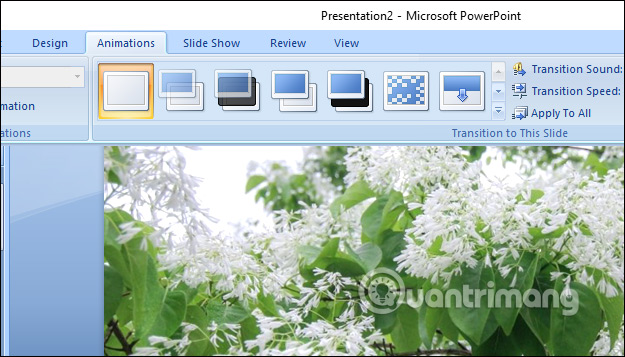
Here users can select effects for images.
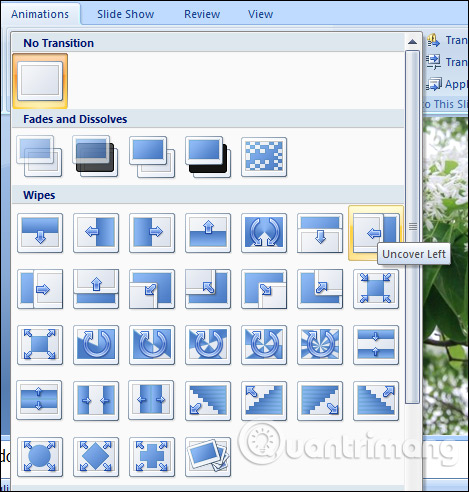
You can click on the arrow icon to display additional motion effects for the image. We apply effects to the remaining images in the slide and then press F5 to view the entire photo album inserting the effect.
So you've created a PowerPoint photo album with effects like when you slide a slide. Although the tools for image editing are at the basic level of brightness, contrast, but in return the PowerPoint motion effects are nice and professional.
See more:
- Slide presentation effects
- How to create motion effects on PowerPoint
- Beautiful PowerPoint wallpapers for impressive presentation slides
I wish you all success!