How to create Photo Album in PowerPoint

The following article introduces you in detail how to create Photo Albums in PowerPoint.

You don't need to use any specialized software, with PowerPoint 2013 you can easily create your own Album .

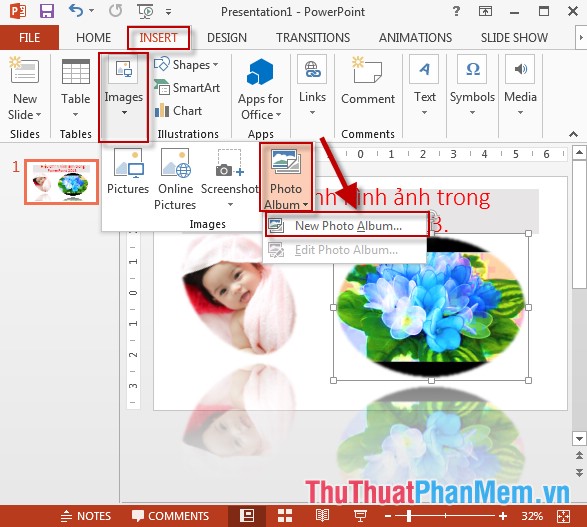
Step 1: Go to the Insert tab -> Images -> Photo Album -> New Photo Album .

How to create Photo Album in PowerPoint Picture 1

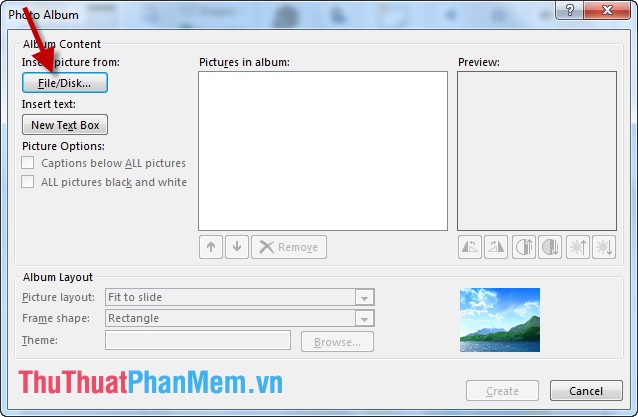
Step 2: A dialog box appears, click File / Disk to select the path to the image to create Album:

How to create Photo Album in PowerPoint Picture 2

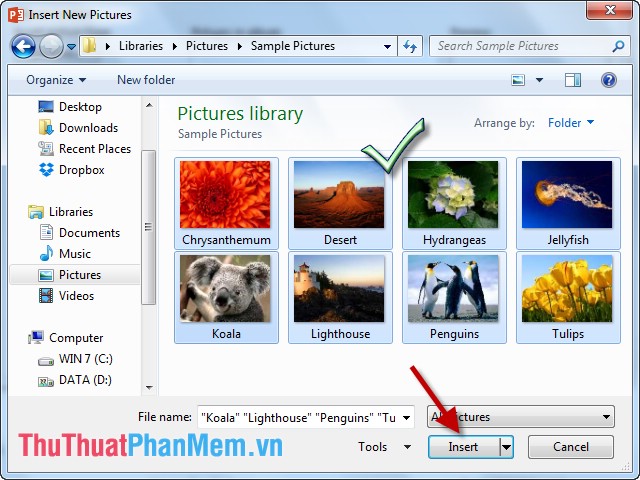
Step 3: The Insert New Pictures dialog box appears -> select the image you want to create Album -> click Insert:

How to create Photo Album in PowerPoint Picture 3

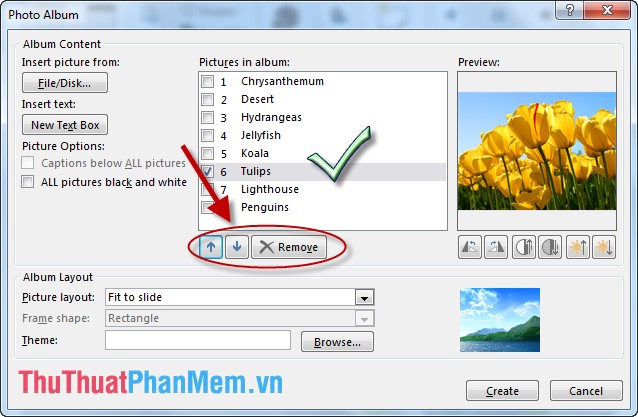
Step 4: The selected image is assigned in the dialog box -> want to change the position of the image -> tick the image to be changed -> use the down and up arrows to move the image as desired, If you want to delete the image from the Album, click Remove:

How to create Photo Album in PowerPoint Picture 4

Step 5: Check all images selected Fit to Slide to all images size to fit Slide:

How to create Photo Album in PowerPoint Picture 5

Step 6: Change the brightness of the image by clicking the icon on the right:

How to create Photo Album in PowerPoint Picture 6

Step 7: Change the direction and angle of the image by clicking the icon on the right:

How to create Photo Album in PowerPoint Picture 7

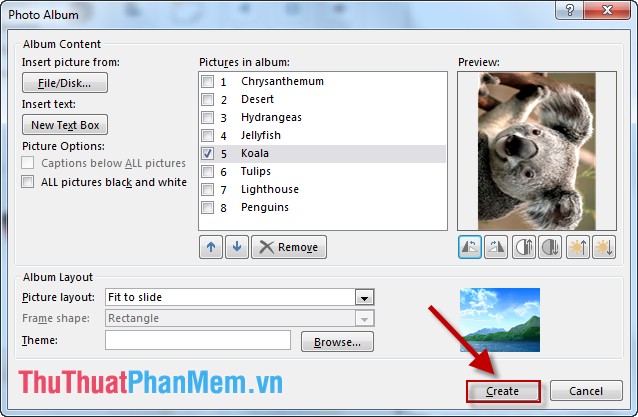
Step 8: After you have finished editing -> click Create to create Album:

How to create Photo Album in PowerPoint Picture 8

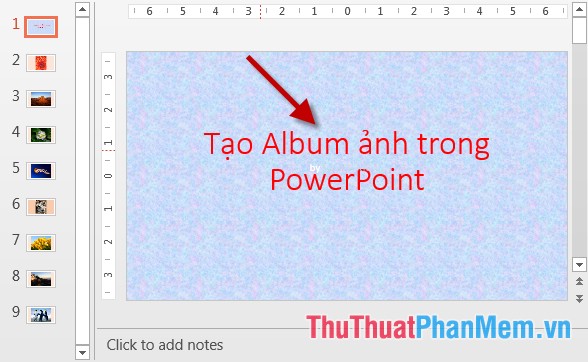
Step 9: The first slide shows the name of the Album -> enter the content for the Album name , the remaining slides contain photos on the album and each photo / 1 slide:

How to create Photo Album in PowerPoint Picture 9

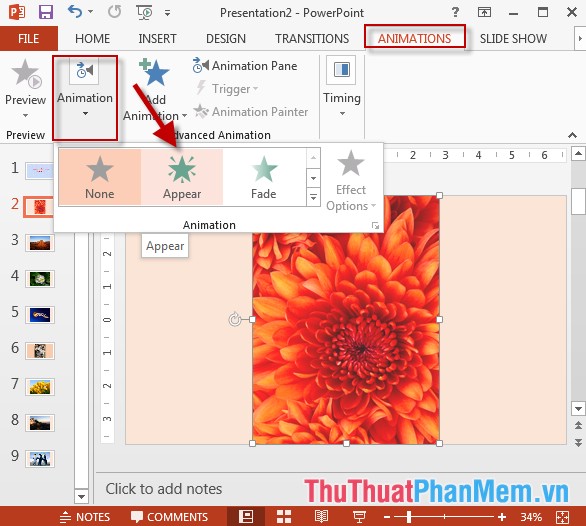
- In addition, you can choose to add effects to photos in Album by clicking Animations -> Animation -> choosing effects:

How to create Photo Album in PowerPoint Picture 10

- Finally press F5 to view all the Albums you have created:

How to create Photo Album in PowerPoint Picture 11

Above is a detailed guide on how to create Photo Albums in PowerPoint.

Good luck!

4 ★ | 1 Vote

May be interested

  • Insert images into Slide in PowerPointPhoto of Insert images into Slide in PowerPoint
    introduce how to insert images from outside into a slide in powerpoint. 1. insert images available in the computer. step 1: go to the insert - images - pictures tab.
  • Edit, create effects for images in PowerPointPhoto of Edit, create effects for images in PowerPoint
    introduce how to edit images in powerpoint. 1. change the position and size of the image. - rotate images in different positions - click on the image with a circle containing an arrow - hold and hold the mouse button and adjust it to the angle you want
  • Add tables to slides in PowerPointPhoto of Add tables to slides in PowerPoint
    introduce how to add tables to slides in powerpoint. 1. create a table - go to insert - table tab - select the number of rows and columns to create as shown: or you can click insert table to enter the desired number of columns and rows.
  • Add graphs to slides in PowerPointPhoto of Add graphs to slides in PowerPoint
    introduce how to add graphs to slides in powerpoint. 1. create a chart. step 1: go to the insert - chart tab: step 2: a dialog box appears to select the type of chart you want to create - click ok
  • Add a tree diagram (Smart Art) to a Slide in PowerPointPhoto of Add a tree diagram (Smart Art) to a Slide in PowerPoint
    introduce how to add a smart art diagram to a slide in powerpoint. 1. create a tree diagram. step 1: go to the insert tab - smartart: step 2: a dialog box appears select the type of tree diagram you want to create - click ok
  • Insert Audio audio file into Slide in PowerPointPhoto of Insert Audio audio file into Slide in PowerPoint
    introduce how to insert an audio audio file into a slide in powerpoint. 1. insert audio into slide. step 1: go to the insert - audio tab - include the following options: - online audio: select the audio files to search online. - audio of my pc: select files â