Table of Contents
This guide explains how to create gif images from videos with workflow on iPhone using a clear, step-by-step process. It also highlights the settings and checks that can help you avoid common errors.
The app for creating animations on Android and iOS is now very rich, and you can easily find the right application for your device. With iOS devices, the Workflow application is an appropriate choice for creating animated images from available videos.
The Workflow application will allow users to create their own workflows, automate tasks such as finding the lyrics of the song, export the web page that is being viewed into a PDF file, and combine multiple images into documents. or create gif images from videos available on the device. With only 1 free application, we can do many different actions, without having to add other supporting applications. The steps below explain how to create gif images from videos on Workflow.
- Things to know and how to use the Workflow application
- How to create an animation on iPhone using Boostr
- How to create animations with Beneton Movie GIF
How to create animations from videos using Workflow
- Download the iOS Workflow app
Step 1:
You download the app according to the link above and then start the app. In the first interface, it will introduce Workflow usage, features, press the Arrow To skip and click Go to My Workflows .


Step 2:
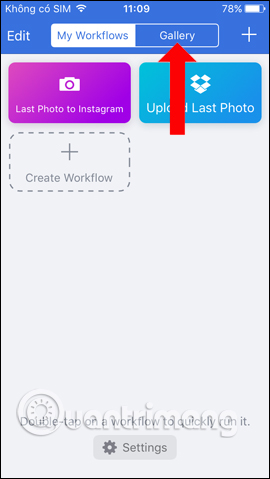
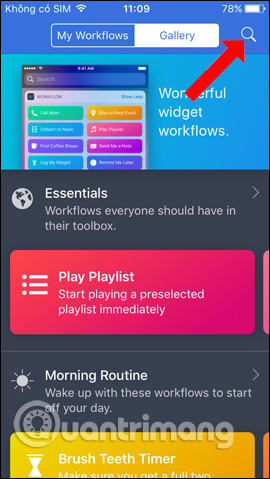
Switch to the main interface of Workflow, click The Gallery item Above. New interface appears, click The magnifying glass icon To search for tasks on the app.
Step 3:
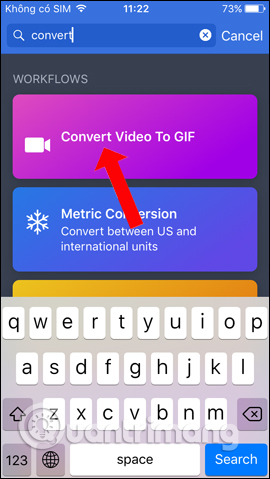
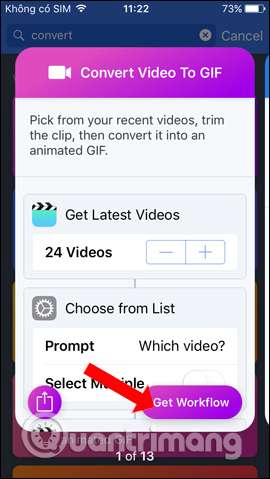
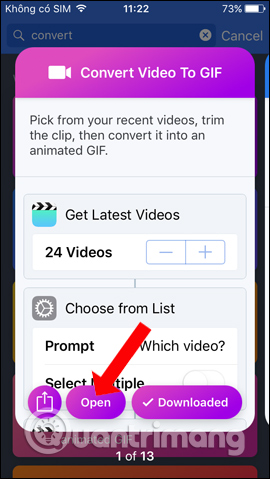
You enter The converted keyword And will see the task Convert video to Gif To use. Switch to the new interface and click Get Workflow , then click Open To use.
Step 4:
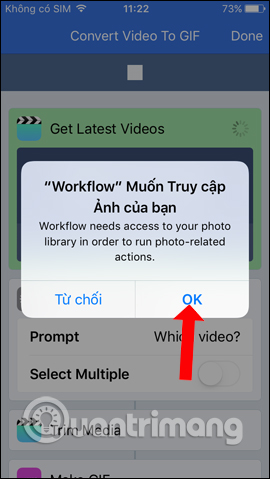
In the next interface, read The play button At the top to run the GIF creation script from video. The Workflow application will need users to allow Access to the Device's Library , click OK .

Step 5:
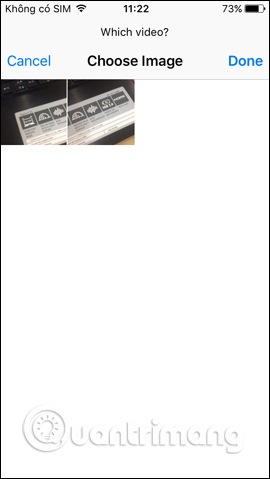
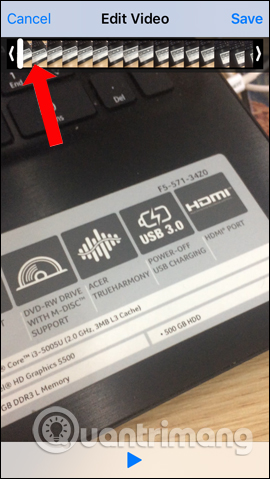
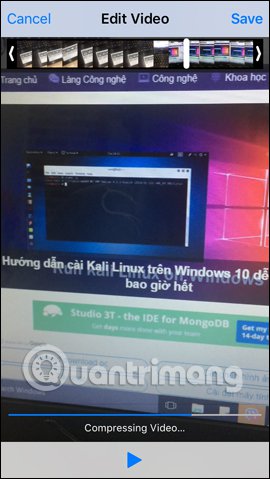
A video album appears on the device, Select the video you want to create an animation . In the video interface, users can press the play button below to play the video and Select the area to be animated .
Step 6:
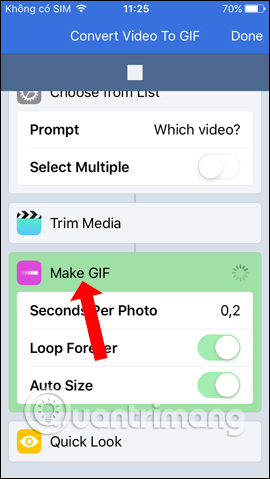
Click the area you want to make the animation and wait for the app to proceed with the animation process from the video. Go back to the task interface you will see Make GIF Section being done.
Step 7:
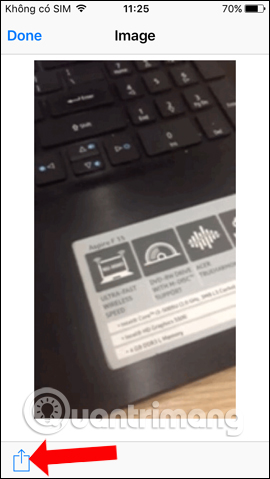
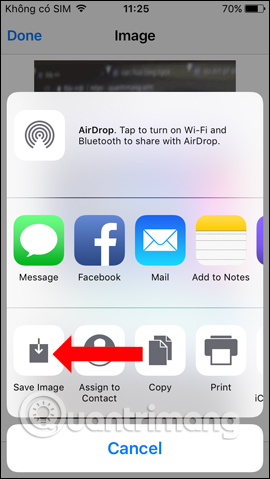
Once you've created a successful gif image, you will see the animation interface as shown below. click The Share icon In the bottom left corner of the interface. App appear on the device to share photos like Facebook, Twitter, Messenger,. Or you can click Save Image To save the animation to iPhone and then finish.
So you've finished animating the video with the Workflow app on iPhone. Not only does it provide gifs, Workflow also gives users the option to create other tasks, which can be done immediately without installing additional applications.
- Movement turns static image into animation, have you tried it?
- How to create online animations using Gickr
- How to create animations with Instagiffer on computer
I wish you all success!
FAQ
What should I prepare before I create gif images from videos with workflow on iPhone?
Review the requirements in the guide, confirm that your device or software is compatible, and save important work before changing settings related to create gif images from videos with workflow on iPhone.
Why might create gif images from videos with workflow on iPhone not work as expected?
The most common causes are incompatible versions, missing permissions, incorrect settings, or an interrupted internet connection. Recheck each step and restart the app or device when appropriate.
Can beginners follow these create gif images from videos with workflow on iPhone steps?
Yes. Follow the steps in order, avoid skipping confirmation screens, and compare your interface with the screenshots because labels may differ slightly between versions.
Related Articles
 How to Use Artflo AI for Image and Video Workflows12 minutes read
 How to Create Video Images on iPhone Using Magisto7 minutes read
 Instructions for Creating GIF Images on YouTube Do Not Need Software7 minutes read
 How to Convert Animoji to Animated GIF on iPhone and iPad4 minutes read
 The Essentials and Basic Uses of Apple's New Free App5 minutes read
 How to Duplicate, Create Copies of Images and Videos on iPhone Phones4 minutes read
Reader Comments 0
Sign in with email or Google to join the discussion.