How to clean up your desktop using Power Automate workflow
Microsoft Power Automate takes care of that for you. With just one click, all those random photos and screenshots will go into Pictures, PDFs will go straight to Documents, and old installers will go to the Recycle Bin..
The Windows desktop used to feel like a digital junk drawer. Random screenshots, app shortcuts, and PDFs piled up so much that it was almost impossible to see your carefully chosen wallpaper. No matter how many times you promised yourself you'd clean up, it always became a chore you dreaded.
Microsoft Power Automate takes care of that for you. With just one click, all those random photos and screenshots will go into Pictures, PDFs will go straight to Documents, and old installers will go to the Recycle Bin.
Power Automate makes it simple
Create powerful workflows in minutes
Essentially, Power Automate lets you build workflows that handle repetitive tasks for you. These workflows, called Flows, can range from simple file organization on your desktop to more advanced processes like syncing data between apps. All you have to do is drag and drop actions, define triggers, and connect the steps in a logical sequence.
Microsoft Power Automate comes pre-installed on most Windows PCs, so it's probably already there waiting for you. If not, you can download it for free from the Microsoft Store. With it, you can build a workflow that automatically sorts files on your desktop into folders based on their type. Once you've set it up, cleaning up your desktop will be just a click away instead of a weekly task.
Create workflows to automate desktop cleaning
Design your own one-click cleaning tool
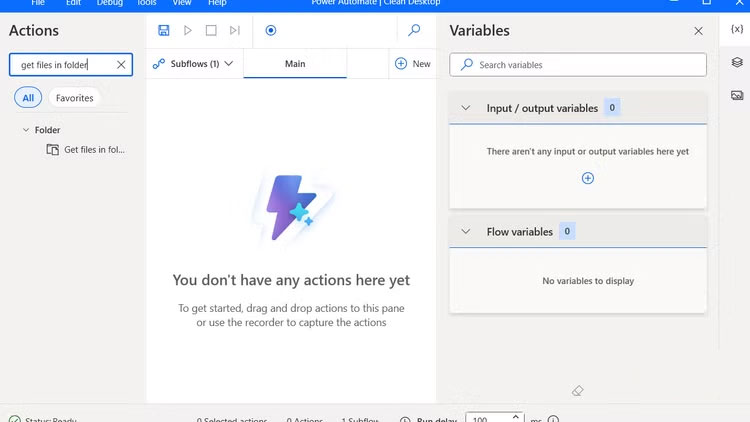
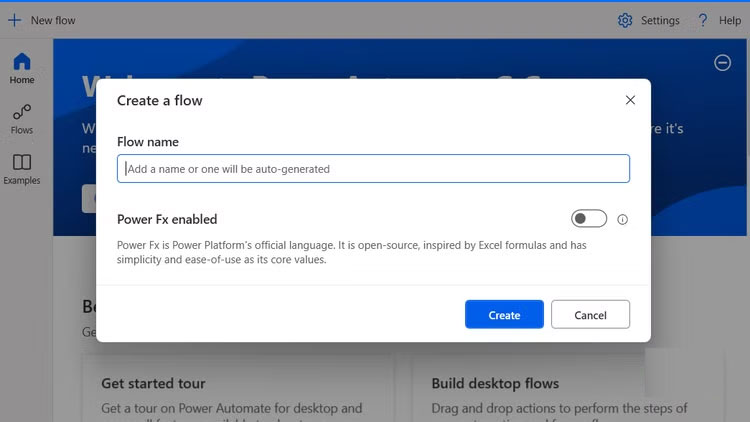
To get started, open Power Automate on your computer, click New Flow , and give it a name (for example, Clean Desktop). This will open the visual designer, where you'll add the steps that make up your automation.
The first action you need to specify is to search for files on your desktop. Search for Get files in folder in the Actions box and double-click it to add it to your flow. Then, click the Select Folder icon , select Desktop , and click Save .
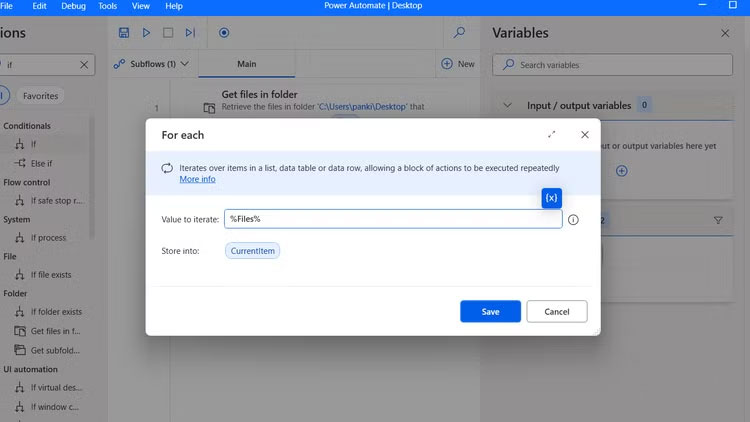
Now, it's time to set up a loop to automatically recognize files on your desktop by their extension. Type For each into the Actions box and double-click it. Then, click the blue X icon and select the suggested variable, Files .
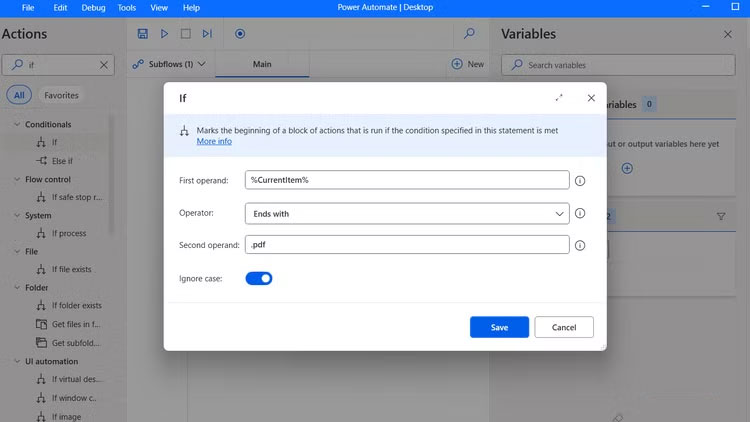
Next, search for If in the Actions box and select it under Conditionals . In the First operand field , click the blue X icon and select CurrentItem . Set Operator to Ends with , and in the Second operand box , enter the file extension you want to target (e.g., .pdf, .jpg, .exe, etc.). Make sure the Ignore case toggle is turned on , then click Save .
Repeat action for more file types
Scale the process without starting from scratch
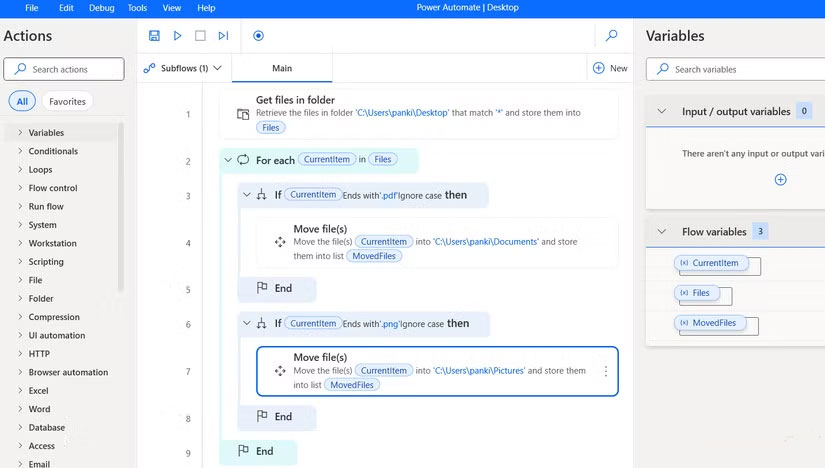
Once you have a basic process in place to move one file type, you can easily extend it to handle as many file types as you like. The advantage is that you don't have to start from scratch for each file type.
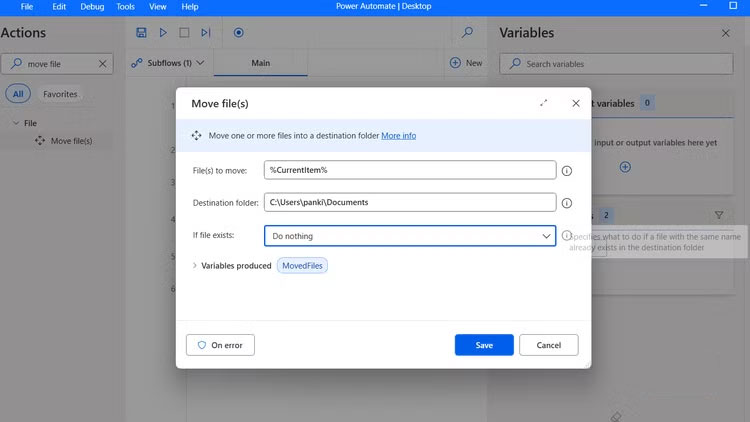
In the flow, hold down Ctrl and select the If , Move file , and End blocks . Press Ctrl + C to copy them, then press Ctrl + V to paste. When the copy appears in the visual designer, update the file type and destination folder. For example, if your first flow moved a PDF file to the Documents folder, the copied block could be adjusted to move the image to Pictures.
Repeat this process for each additional file type you want to handle, whether it's .zip, .docx, .png, or any other file that tends to clutter up your desktop.
Run automation easily
Assign keyboard shortcuts for instant cleaning
Once your flow is built, running it is the fun part. You can open Power Automate at any time and click the Play button next to the flow to run it. Within seconds, you will see the files automatically move from your desktop to the correct folder.
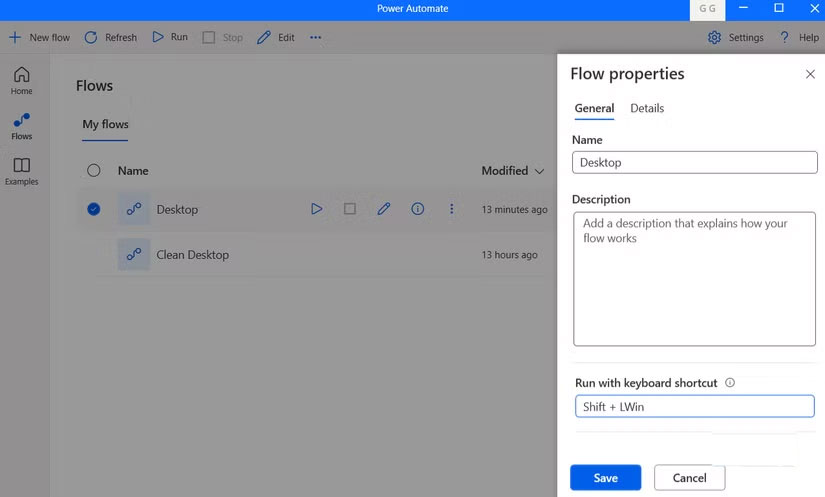
An even easier way to run a flow is to open its properties and assign a keyboard shortcut. This turns your automation into a one-key magic trick. For example, setting it to run with Ctrl + Delete allows you to instantly clean up your entire desktop whenever you want.