How to add photos and videos to albums shared on iPhone, iPad
What do you think about uploading some interesting images to Album shared on iPhone and iPad running iOS 12? It will definitely bring a lot of fun for the way you share photos with friends. With the latest iOS version, Apple provides you with a flexible album manager.
- How to activate application notifications in silence on iOS 12
Note: You must have iOS 11 and the latest macOS version to view the shared album. Besides, to add images to albums, the device needs to run iOS 12 and macOS Mojave.
To add photos and videos to a shared album in iOS 12 on an iPhone or iPad you do the following:
Check that you have enabled Shared Albums feature by visiting Settings> Photos> Shared Albums (the button is green).
Step 1. Open Photos app on iOS device.
Step 2. Select the photo you want to add, then press the share button.
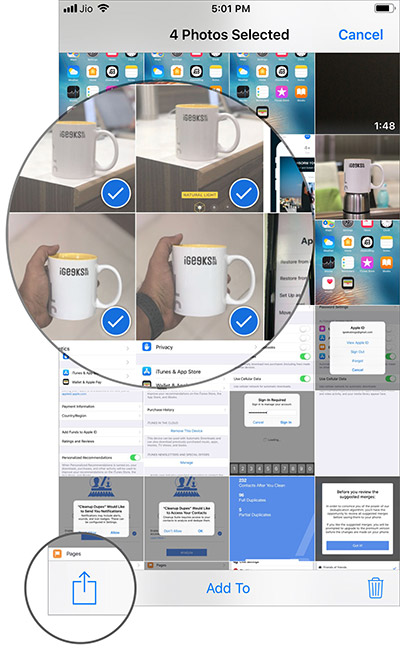
Step 3. Next, choose Shared Albums .

Step 4 . Write a comment.
Step 5 . Click Shared Album and select the album you want to add photos to.

Step 6. Click Post .
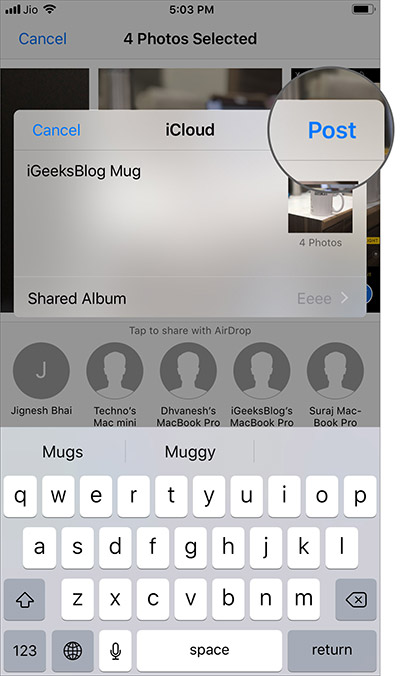
Note: To add an image to your created album, just open the album> press the '+' button> select image> click Done .
How to invite friends to add photos to your shared album:
Open the Photos app> select the Album tab and select the album you want to share.
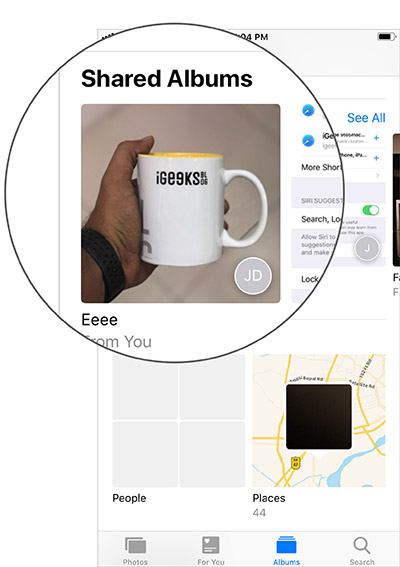
Step 2. Click People at the bottom.
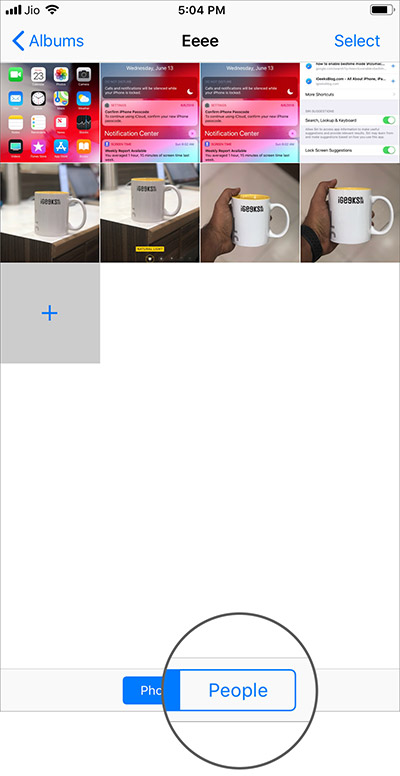
Step 3. Now, click Invite People, enter the name of the person you want to add and click Add .
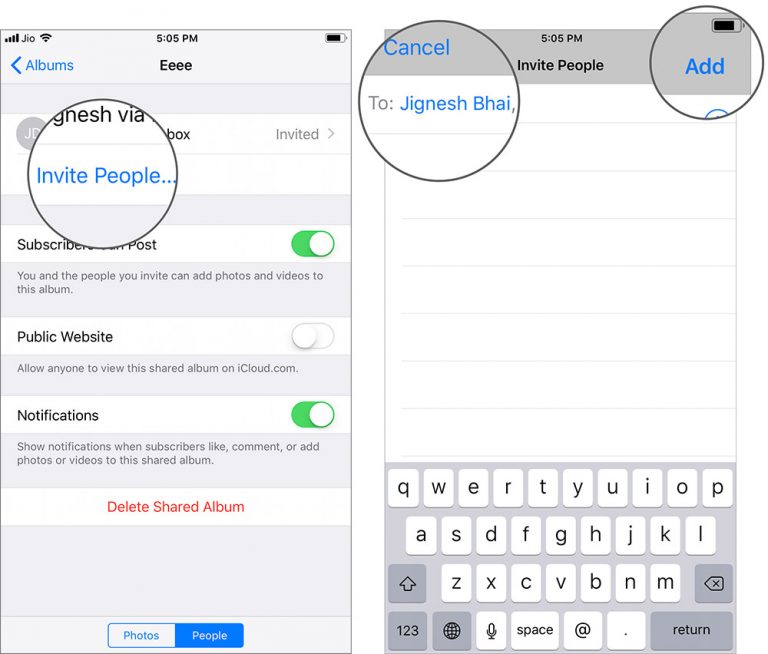
When your friend accepts the invitation, you will receive a confirmation message. In addition, you can track recent activity related to the album shared from the For You tab.
How to block someone from adding photos to a shared album
Open the Photos app> Album tab> Shared Albums> People.
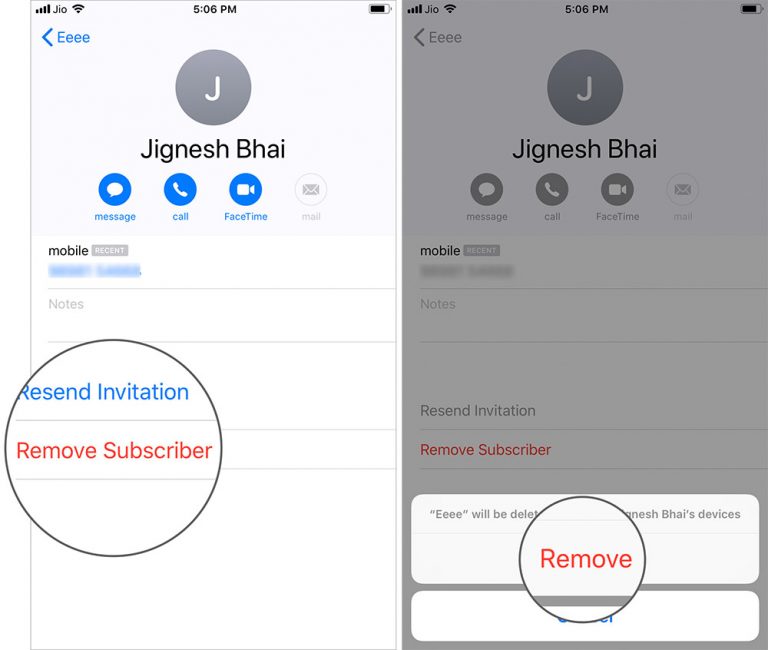
Select who you want to block album access.
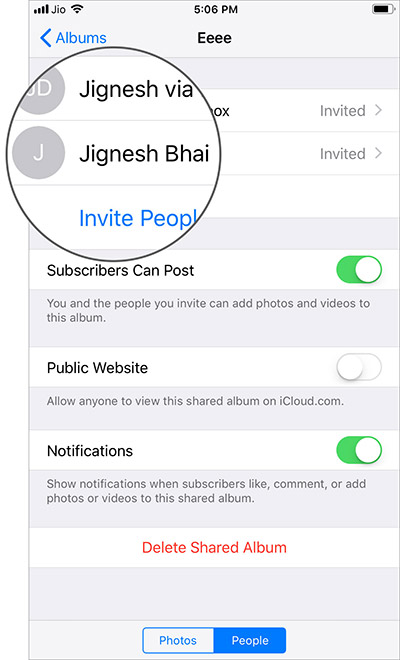
Next, click Remove Subscriber and confirm.
How to block everyone from adding photos to your shared album
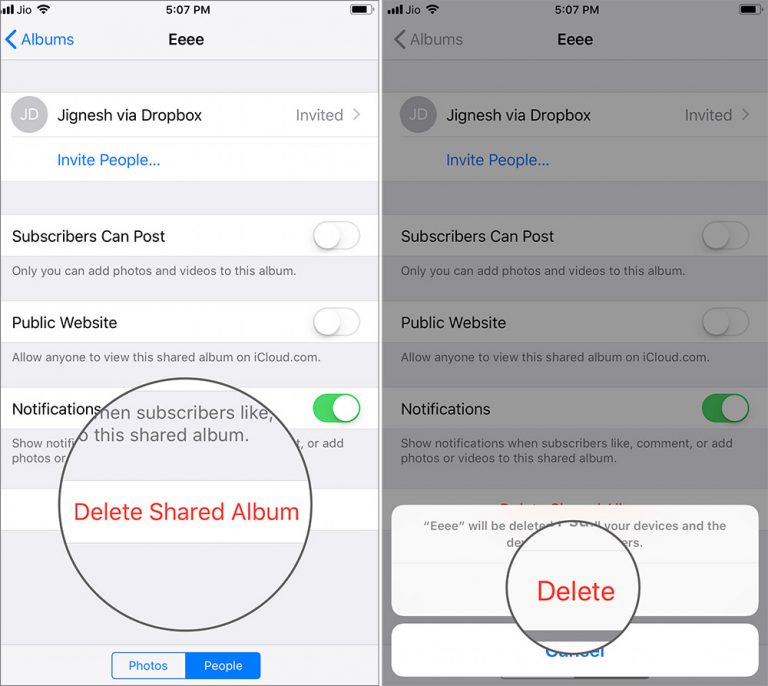
Open the Photos app> Album tab> Shared Albums> People. Turn off the option of Subscribers Can Post .
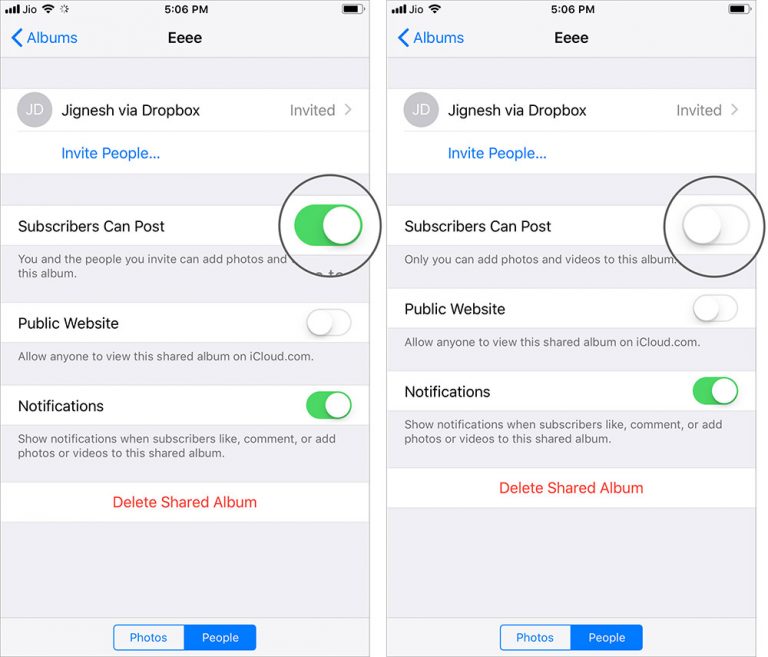
If you want to change your mind, just follow the steps above and turn on the switch at the end.
Note: If you do not want to receive notifications of likes, comments or add photos to an album, turn off the switch next to Notifications.
How to delete shared albums on iPhone and iPad
Open the Photos app> Album tab> Shared Albums> People. Click Delete Shared Album and confirm.
Explore more:
- How to take photos to remove fonts on old phones
- How to convert the font removal image into a normal photo on iPhone 7 Plus running iOS 11
- How to create and manage shared albums on Google Photos