How to create a snowman in Photoshop
Adobe Photoshop is a software application for image editing, used on Windows or macOS computers. Photoshop offers users the ability to create, enhance or edit images.
Turn photos into great works of art. Draw with a pen and brush like the real thing. Cut, combine, edit and recover images. Whatever you can imagine, you can do it in Photoshop.
Here's an easy way to create a snowman on your computer with Adobe Photoshop!
Step 1:
Open Adobe and choose the size for your canvas. Recommended size is 4 inches (10.2cm) x 6 inches (15.2cm).
Step 2:
Decide how many snowballs will make up the snowman's body. For this tutorial, we will use 3 snowballs. Select the Shape Tool and select the circle ( Ellipse Tool ).
Step 3:
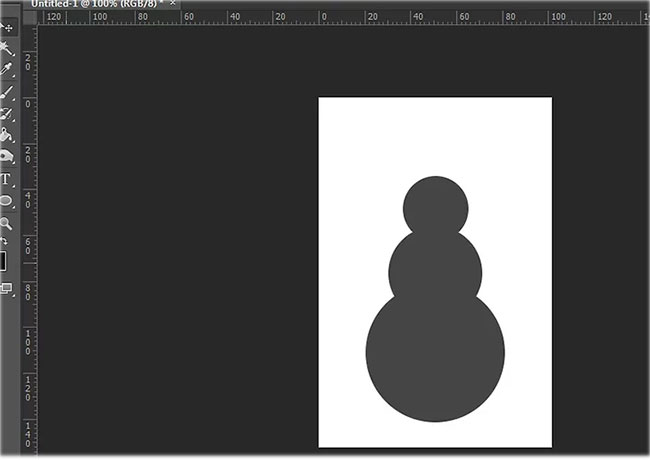
Create 3 circles of different diameters and place them vertically, overlapping in ascending dimensions like this screenshot.

Step 4:
Change the background color to whatever you want, and change the color of the three circles to white.
Step 5:
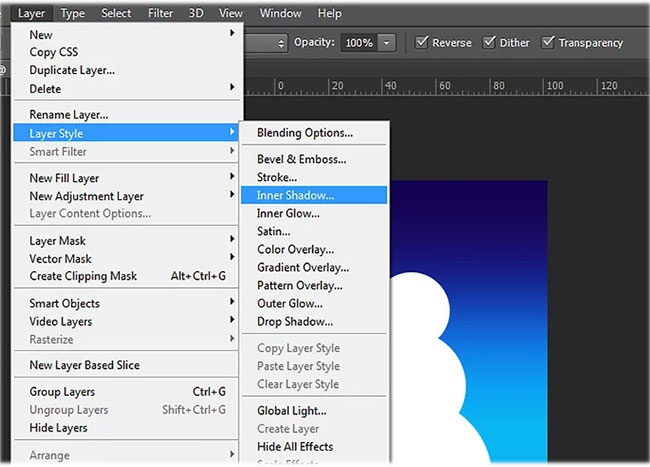
Find the "Layer Styles" tab in the top bar and scroll to "Inner Shadows".

Step 6:
Apply inner "high" shadow effect to each circle. Then, in the "Layers" section , arrange the smallest circles on the top, then the largest circle on the bottom.
Step 7:
Select each layer and go to Layer> Simplify Layer .
Step 8:

Use the pencil tool to draw features on the snowman's face.