How to convert images to text in Google Sheets
Copying data from an image into Google Sheets manually can be time-consuming, but you can extract the information into a spreadsheet in just a few simple steps using the OCR tool in Google Drive.
Table of Contents
Copying data from an image into Google Sheets manually can be time-consuming and sometimes prone to data errors. If so, you can extract the information into a spreadsheet in just a few simple steps using the OCR tool in Google Drive . Here are the detailed instructions.
Instructions for converting images to text in Google Sheets
Step 1:
First, you upload a photo of the data table to Google Drive . Then you right-click on the photo, select Open with and select Google Docs .

Step 2:
Google Docs will now open in a new tab, with the original image at the top of the document and the extracted data below. We check the content again to see if it has been extracted correctly. In general, the quality of exporting text in images using Google Drive is relatively stable.
Note, you should delete the column headers and edit them later, it will be easier, then edit the content to match the table.

Step 3:
Now you need to copy all this data, right-click and select Copy in the displayed menu. In the Google Sheets interface , we right-click on a cell, select Paste Special and select Values Only or press the key combination Ctrl + Shift + V.
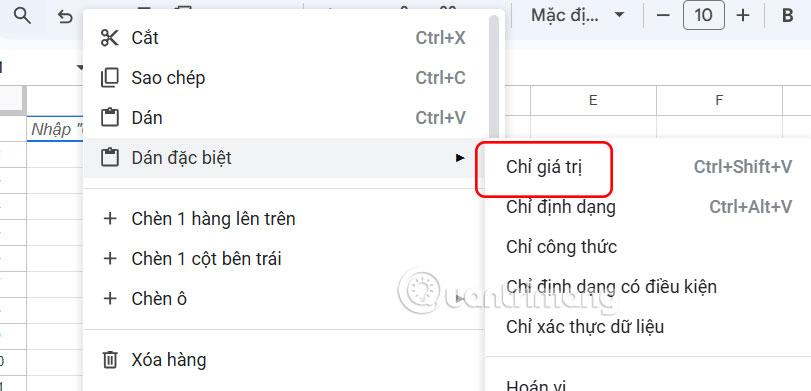
Pasting data as value only removes all formatting, including any line spacing properties automatically applied by Google Docs, so you can work with a clean data set.
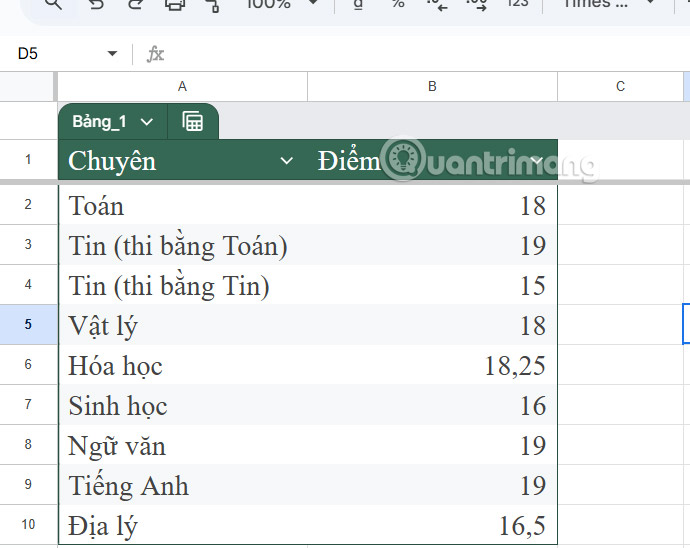
Now we get the data extracted from the image in Google Sheets as shown below.

Step 4:
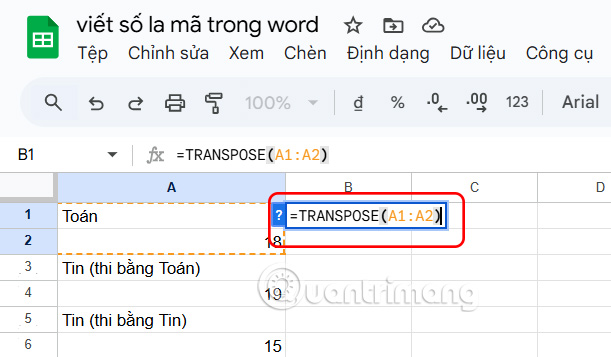
Next, we use the TRANSPOSE function to convert horizontal data into vertical data and vice versa. In this example, the subject name is in one column and the score is in another column.
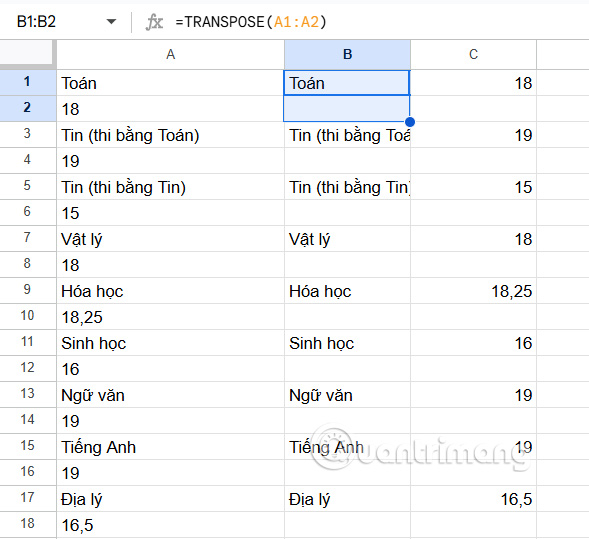
Then, select cells B1 to B2 and double-click the plus icon to copy the TRANSPOSE formula in the relevant cells in column B. The result is as shown below. Delete the first column to leave the table content.
Step 5:
Next, tap the entire table content and select Data > Clean Up Data > Remove Duplicates . This will delete the blank rows in the data table.

Step 6:
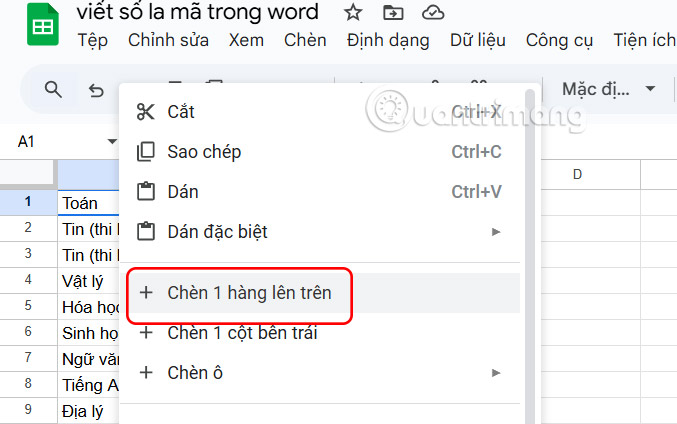
To re-insert column headers , right-click any cell in row 1, click Insert 1 row above , and then type a column header name.
Finally, highlight all the content, right-click and select Convert to table .

As a result, you have a complete data table in Google Sheets as shown below.
Was this article helpful?
Your feedback helps us improve.
Related Articles
 How to convert Google Sheets to PDF6 minutes read
 How to convert numeric dates to text on Google Sheets5 minutes read
 Guide to converting images to text using Google AI3 minutes read
 How to fix text overflow in Google Sheets2 minutes read
 Using Google Lens to convert images into words, find information easily7 minutes read
 How to strike through text in Google Sheets and Google Docs4 minutes read
Reader Comments 0
Sign in with email or Google to join the discussion.