How to use File History to back up data in Windows 11
Compared to third-party backup applications, the Windows 11 File History feature is easier to set up and use. Below is a guide on using File History to back up Windows 11 data.
Table of Contents
Compared to third-party backup applications, the Windows 11 File History feature is easier to set up and use. After configuring File History on Windows 11, you need to connect a USB drive to your computer, and Windows 11 will automatically back up files to that drive. Below is a guide on using File History to back up Windows 11 data.
What is Windows File History? How does it work?
File History was introduced in Windows 8 as a file backup option. While it still exists (and can be used) in Windows 11, it has been abandoned by Microsoft and is no longer a recommended way to back up Windows computers.
File History backs up your files by periodically copying them to an external hard drive or network share. It keeps these copies for a certain period of time, so if you accidentally delete or modify a file, you can revert to a previous version of the file. If you set up your File History drive to use an external device (such as a USB hard drive or network share on another computer), it also protects you from losing files in case your computer is lost or stolen.
Windows File History is not a comprehensive backup solution and is limited to storing files in the user's default folders. For example, in Windows 11, File History backs up specific folders (e.g., Documents, Desktop, Pictures) by default. While you can include other folders, it's easy to forget to add them when they're created, and this often creates gaps in the backup scope. This makes it one of the least popular Windows backup solutions, but it's still a useful tool when no other options are available.
Instructions on using File History to back up Windows 11 data.
Step 1:
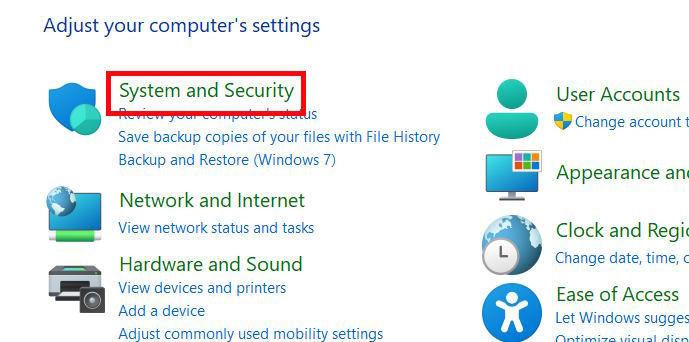
Type " Control Panel" into the search bar and then access it . Next, select System and Security to make adjustments.
Step 2:
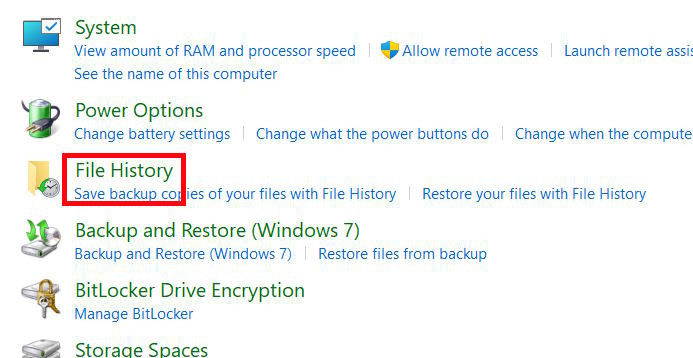
In the next interface, we click on the File History option to proceed.
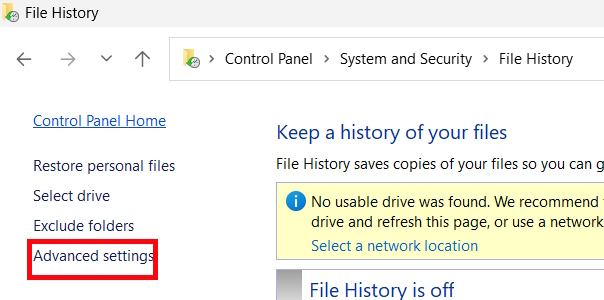
Connect your external hard drive and refresh Windows. Click on Advanced Settings in the left sidebar.
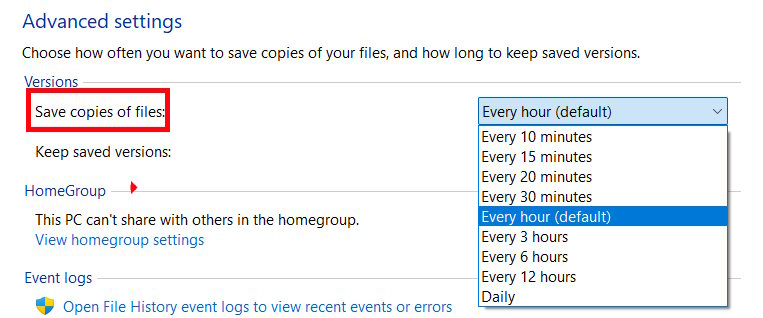
We need to set a schedule to run File History . The default is every hour, and we can change it to your desired time.
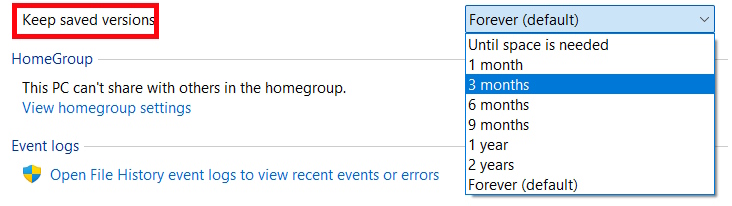
Next, under Keep saved versions , choose how long you want to keep the backups.
If you want to exclude a folder, click Exclude folders and then add the folder to exclude.

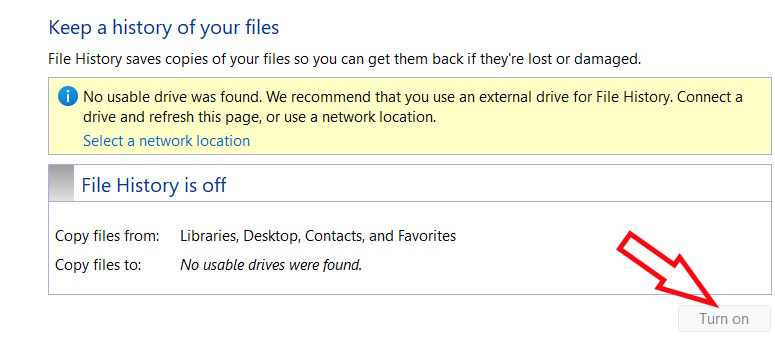
Step 3:
Finally, click Turn on to enable the File History feature.
File History only backs up files from the Library, Contacts, Desktop, and Favorites folders.
Instructions for recovering data using File History in Windows 11
You can also access the Control Panel, select System and Security, and then click File History. Next, click Restore your files with File History .

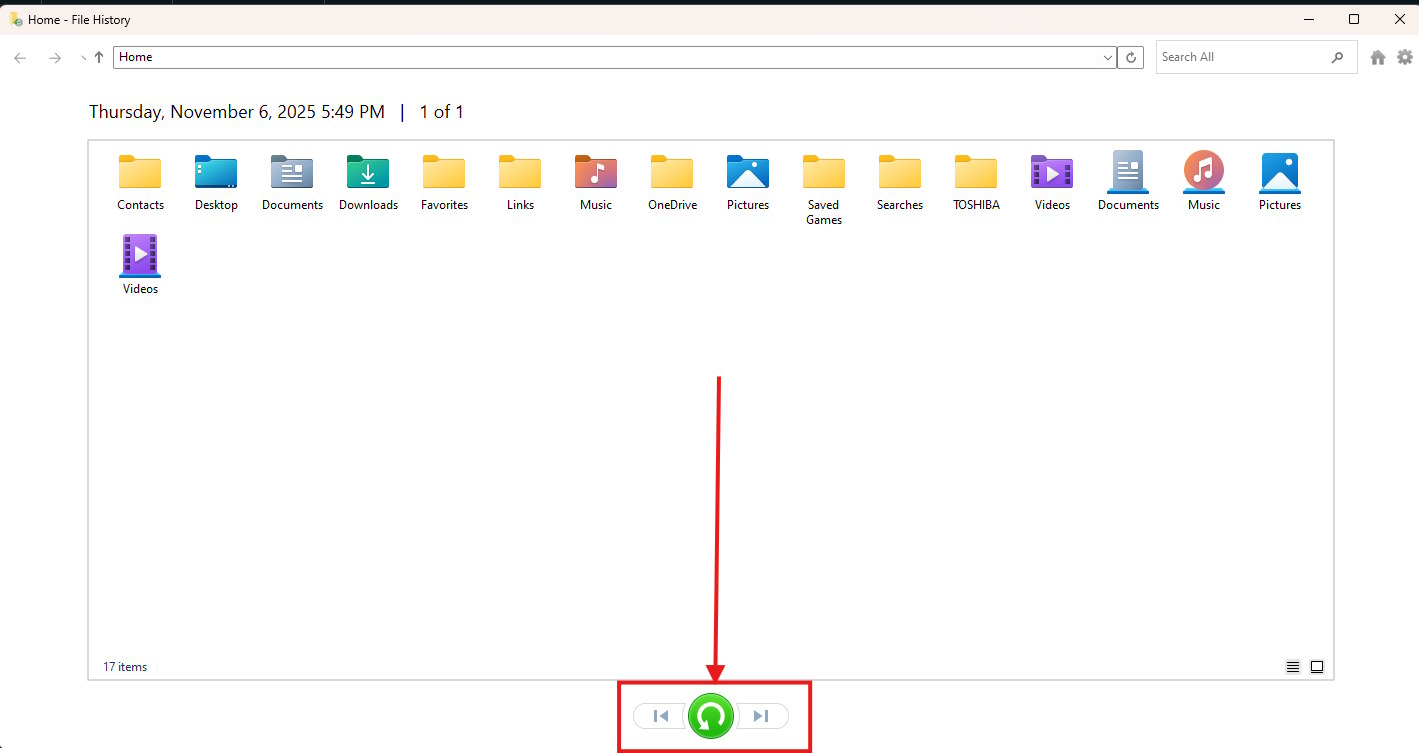
Now, select the date you want to restore using the arrow buttons at the bottom, then click the green button . This will restore all files from the backup you selected.
Instructions on how to recover files or folders using File History
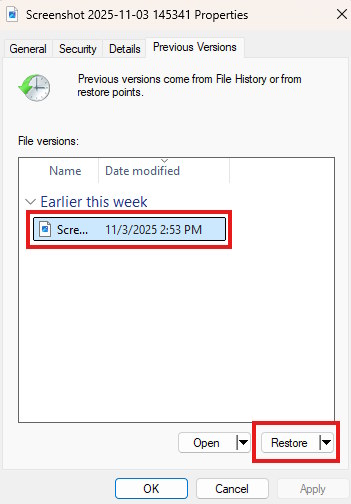
Right- click on the file you want to restore and select Properties from the list that appears. Then click on the Previous Versions tab .
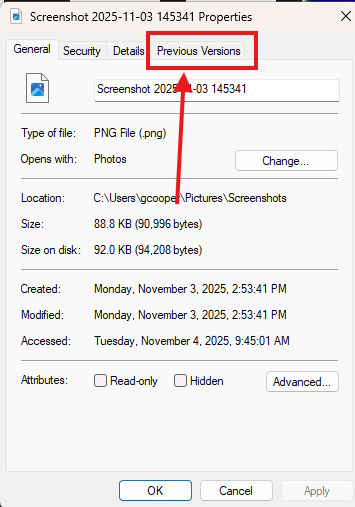
Next, select the version of the file you want to restore, and then click Restore .
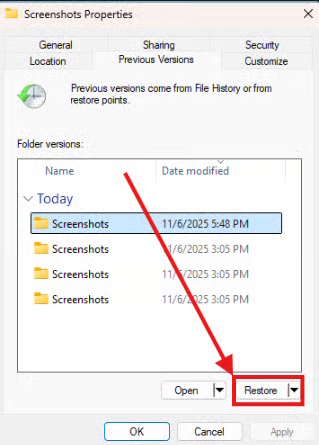
To restore your folder to a previous version, right-click the folder and select Properties . Then click the Previous Versions tab , select the version of the folder you want to restore, and click Restore .
Video tutorial on using Windows File History
Was this article helpful?
Your feedback helps us improve.
Related Articles
 Instructions for using File History to backup and restore data7 minutes read
 How to delete the old File History version in Windows 103 minutes read
 Things to keep in mind when backing up data on your computer5 minutes read
 Complete how to use all backup and restore tools on Windows 1011 minutes read
 How to backup Outlook email with File History on Windows 108 minutes read
 How to delete browsing history on iOS91 minutes read
Reader Comments 0
Sign in with email or Google to join the discussion.