Table of Contents
Learn how to use copilot in excel with clear steps.
How to use Copilot in Excel
Step 1
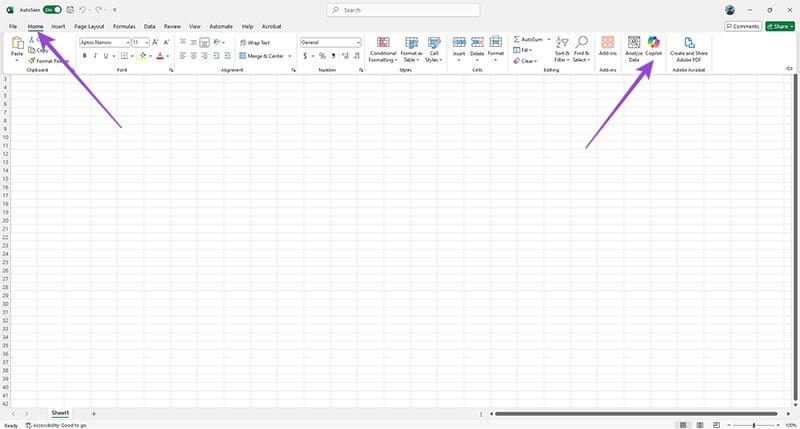
After adding Copilot to Excel, click the Copilot icon in the upper right corner to use it.
Step 2
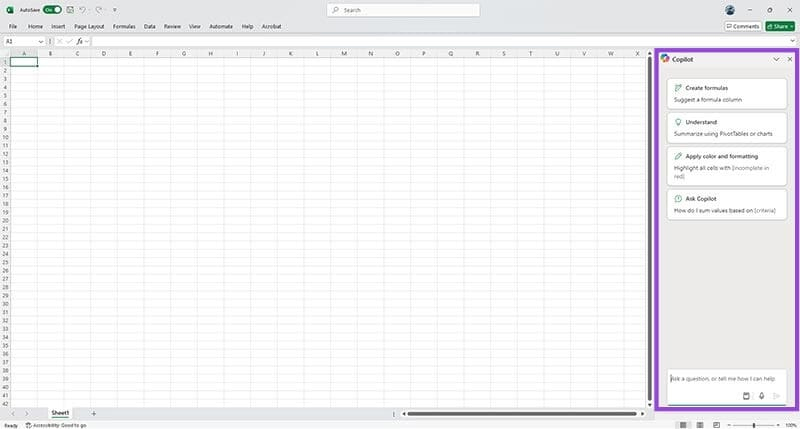
At this point, a chat window with Copilot will appear on the right side of the interface for us to use. Here, users can enter their requests for Copilot to process the data table in Excel.
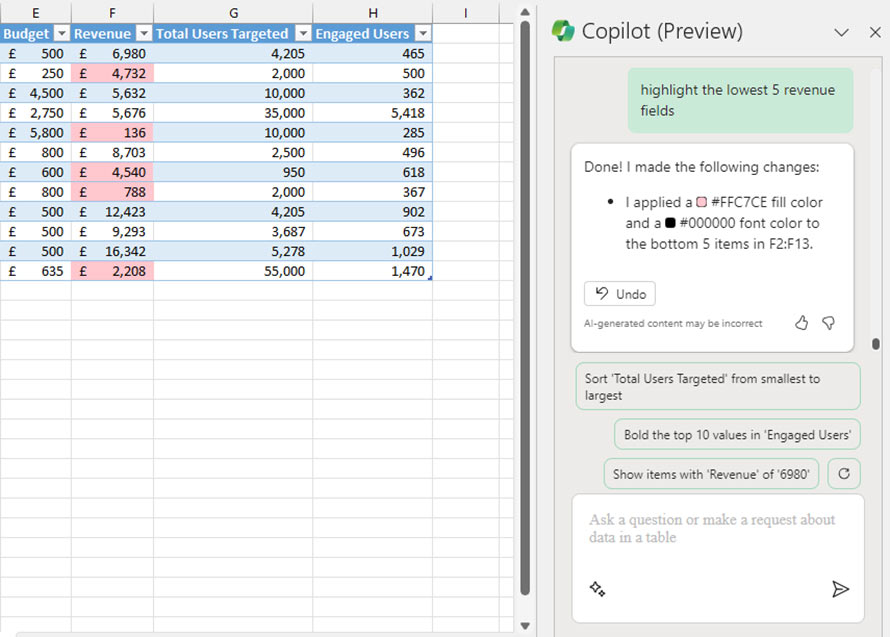
For example, if you want Copilot to filter the 5 lowest revenue values, you enter "Highlight the lowest 5 revenue fields". Copilot will then analyze the data to find the 5 lowest values. As a result, you will see those 5 values highlighted in the table.
Copilot's editing function in Excel can also help you sort and filter data. For example, if you want to sort the budget column from largest to smallest, enter "Sort the budget column largest to smallest".
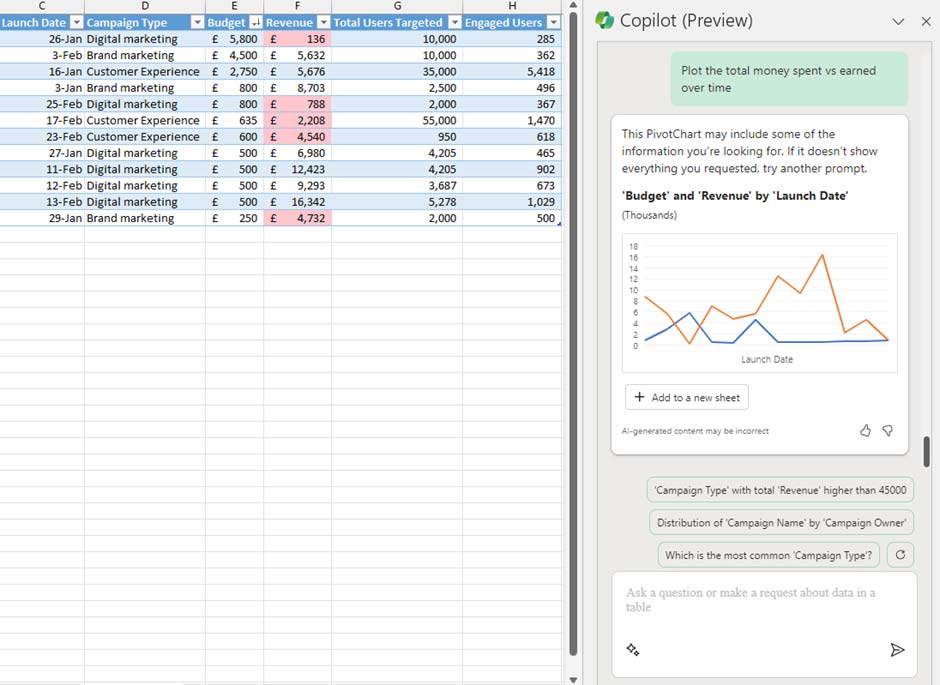
In addition to data processing, Copilot can also create charts based on your requirements. For example, if you want to create a chart comparing total expenses to earnings over time, Copilot will analyze the data, identify the date column, budget column, and revenue column. Then, Copilot will suggest a chart, and you can click "Add to new sheet" to insert the chart into your document .
Why is using Copilot in Excel better than PivotTables?
PivotTables have been Excel's default solution for data analysis for decades, and people have used them enough times to know exactly how they work. They work well, but the setup always feels inadequate for the questions you actually want to ask. Copilot's natural language queries bypass that by allowing you to type a simple question in English into Copilot and get an answer.
It's not a function or a hidden feature; it's simply a dialogue with your data.
Copilot lets you ask questions instead of having to build spreadsheets
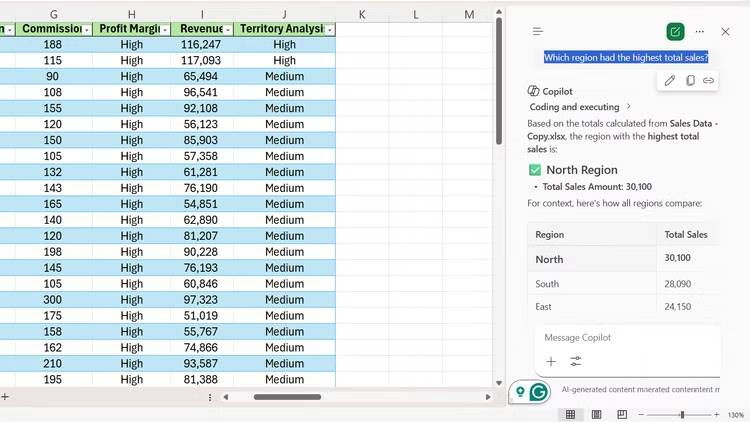
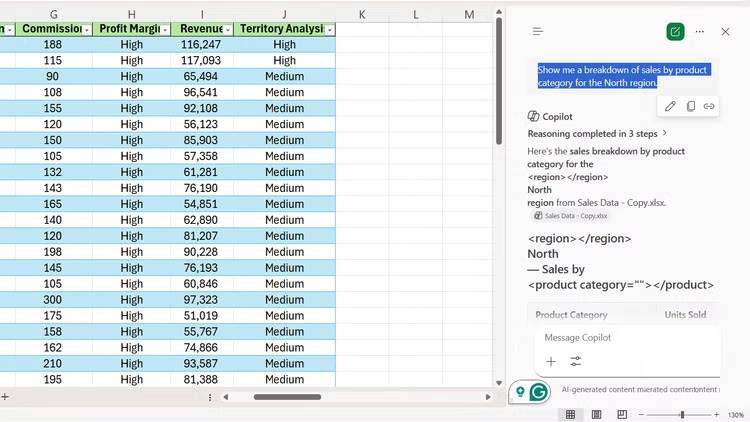
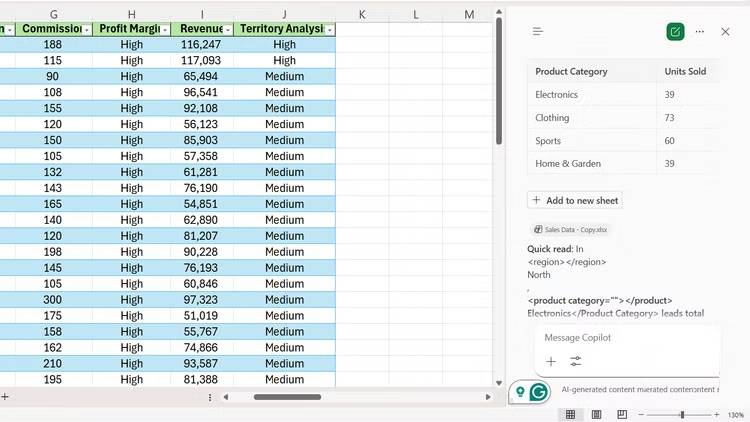
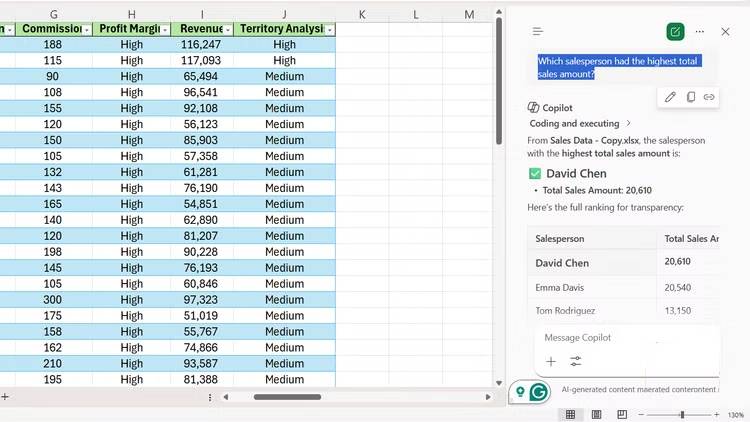
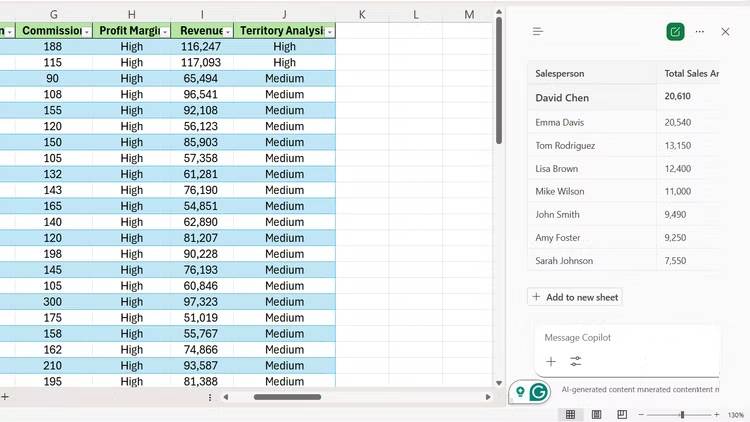
The traditional workflow for using PivotTables in sales spreadsheets goes like this: You select the data range, click Insert, choose PivotTable, decide where to place it, then drag the range to the rows, product categories to the columns, and revenue to the values. If you want to calculate the average instead of the sum, you need to right-click and change the aggregation method. That's a lot of clicks just to answer one question.
With Copilot, you just need to type:
Which region had the highest total sales?Which region has the highest total revenue?
That's it. Copilot reads the table—in this example, 32 rows of sales data spread across North, South, East, and West on 4 product categories—and returns a direct answer.
The advantage becomes clear when you need the next answer. With PivotTable, another question often means reconfiguring the layout or building a second table. In Copilot, you simply type the next question. Once you have the lead area, ask:
Show me a breakdown of sales by product category for the North region.Please show me the sales breakdown by product category for the Northern region.
Copilot responded with a clear summary table listing Electronics, Clothing, Home & Garden, and Sports, each with its corresponding total sales figures.
Do the same with individual performance. Typing "Which salesperson had the highest total sales amount?" will give you the ranked answer across all eight salespeople in the spreadsheet, with David Chen and Emma Davis tied for first place and Sarah Johnson at the bottom. That type of query typically requires grouping by Salesperson in a PivotTable and manually sorting the results.
This conversational flow makes it practical to use because you don't need to plan your analysis beforehand or decide which fields to include—you simply ask what you want to know, one question at a time. However, if a question doesn't return exactly what you need, refining it only takes a few seconds.
It handles charting and summarizing in a single step
You don't need to create a separate chart after analyzing the data.
Creating a chart in Excel the conventional way requires selecting a data range, choosing a chart type from the toolbar, and then adjusting axis labels, titles, and colors until the chart conveys your desired message. If you create a PivotTable first, you'll then create a PivotChart on top of it—adding another layer of setup to a simple visual representation.
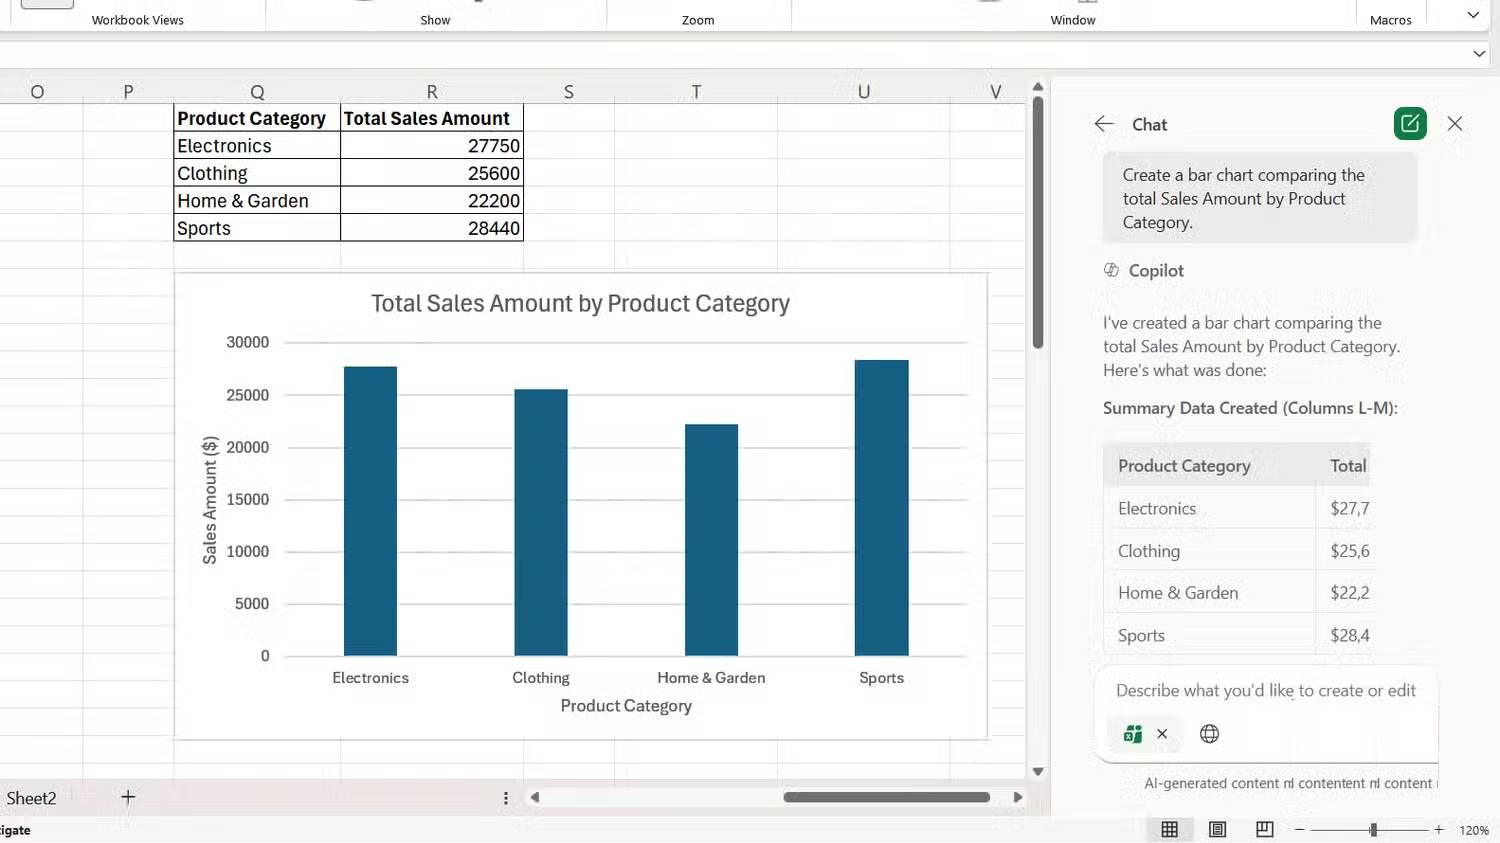
Copilot condenses everything into a single command. Enter the following command and it will generate a chart with the Electronics, Clothing, Home & Garden, and Sports categories drawn side-by-side.
Create a bar chart comparing the total Sales Amount by Product Category.=> Create a bar chart comparing total revenue by product category.
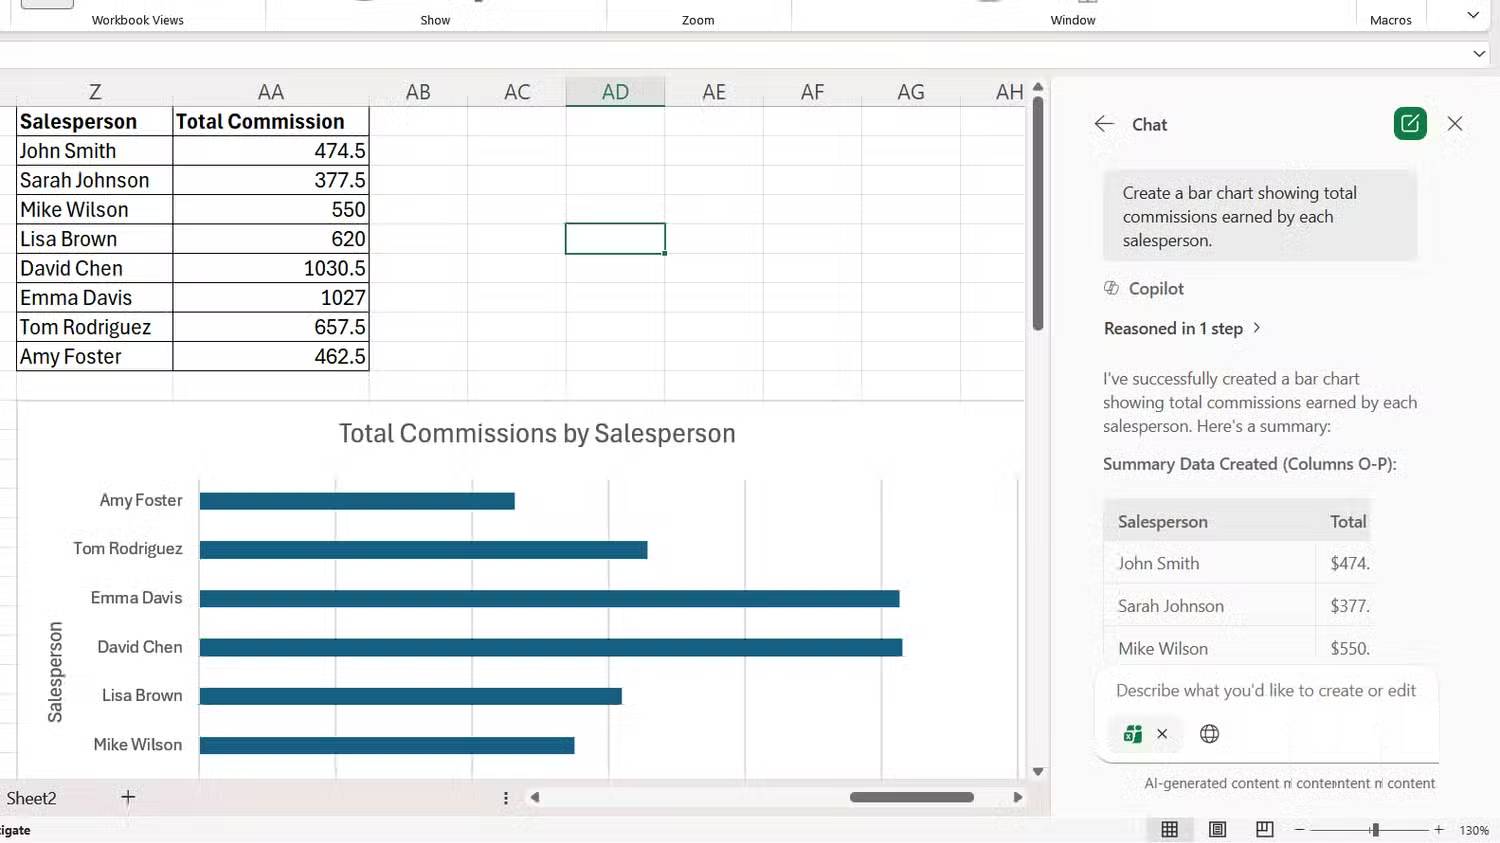
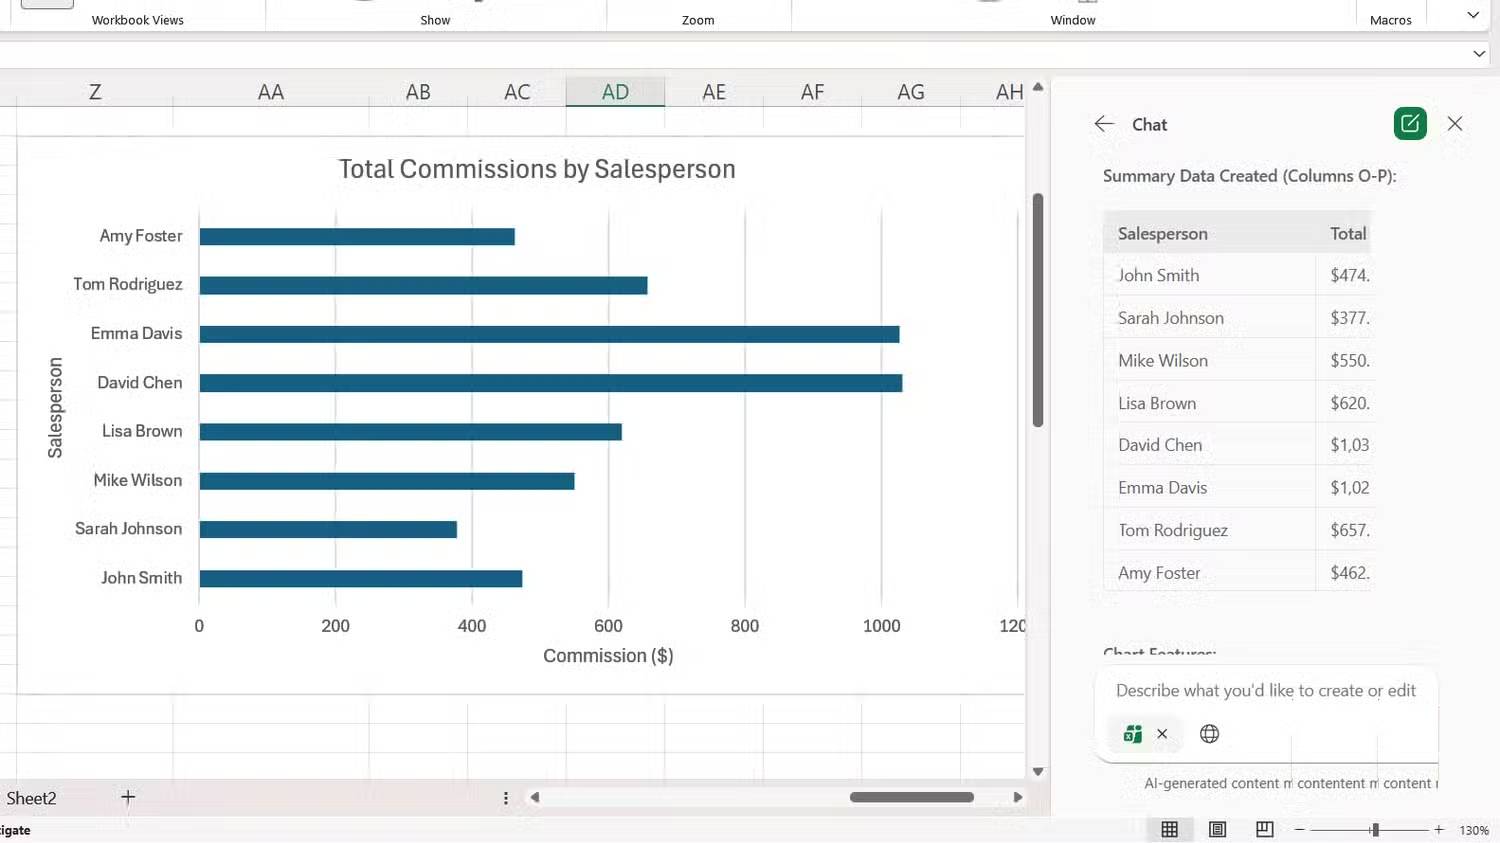
The labels are pre-set and there's no need to select a range or edit them in the Charts section of Insert. You can also be more specific. Using the following command, Copilot retrieved commission data for all eight people in the spreadsheet and created a chart without pointing to specific cells. Copilot automatically inferred the relevant columns.
Create a bar chart showing total commissions earned by each salesperson.=> Create a bar chart showing the total commission earned by each salesperson.
This is where significant time savings occur. A single chart isn't a big deal. But if you're creating a quick report and need three or four visual representations from different angles of the same dataset, the traditional method quickly becomes time-consuming. With Copilot, each chart is just another suggestion. Microsoft is also actively developing how Copilot works within Excel, with Agent Mode offering deeper analytical options beyond the basic chat prompts.
Copilot isn't perfect, and PivotTables still have their own place
Copilot requires a Microsoft 365 Copilot license, and it sometimes struggles when your data has merged cells, empty rows, or inconsistent headers. For live dashboards with filters or calculated fields that you'll review weekly, PivotTables is still a better fit. But for quick questions, such as which item sold best last quarter, who earned the most commission, and how does the East compare to the West, entering a statement is more efficient than configuring a table. Try both on the same dataset and see which one works first.
Final Thoughts
Use this guide as a practical checklist for how to use copilot in excel. Work through the steps in order, verify each result, and adjust the options to match your needs.
FAQ
What do you need before following this How to Use Copilot in Excel guide?
Review the required tools, accounts, settings, or materials mentioned in the article. Learn how to use copilot in excel with clear steps.
What are the main steps for how to use copilot in excel?
Follow the sections in order, especially How to use Copilot in Excel, Step 1, Step 2. Complete each step before continuing and verify the result as you go.
What should you do if the process does not work as expected?
Recheck the prerequisites, update the relevant app or service, review the settings, and repeat the step that caused the issue. Use any troubleshooting notes included in the guide.
Related Articles
 How Is Copilot Pro Different from Copilot? Should I Upgrade Explained7 minutes read
 Copilot Button Missing in Word or Excel? 10 Fixes11 minutes read
 7 Reasons Copilot Is Worth Using7 minutes read
 How to Add Copilot to Microsoft Office 365: Practical Guide4 minutes read
 How to Turn Off Copilot in Word, Excel, and PowerPoint3 minutes read
 Overview of Copilot Studio11 minutes read
Reader Comments 0
Sign in with email or Google to join the discussion.