How to connect a wireless mouse on Windows 11
The following article will show you how to connect both types of wireless mice to your Windows 11 computer.
Connecting a USB-RF mouse
The USB-RF mouse connects to your Windows 11 PC via a dongle. To connect to a USB-RF mouse, your PC will have to have an available USB-A port (if not, you can consider using a USB hub). The good news is that Windows will handle most of the setup automatically, without you having to do too much.

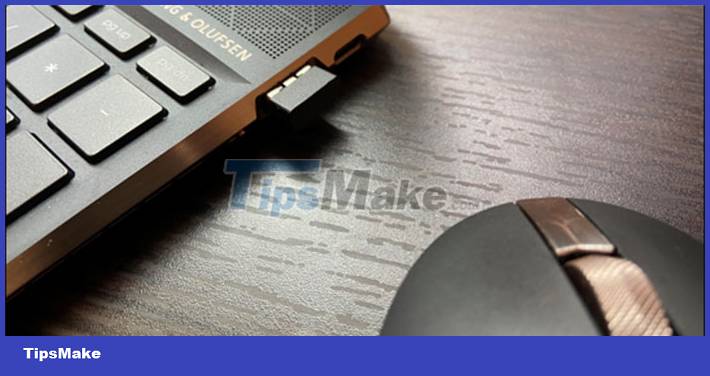
To get started, flip the switch on your mouse. Each product is different, but there will usually be a small switch on the bottom that allows you to turn the mouse on and off as needed. Then, plug the mouse's dongle into the PC's USB-A port.
Immediately you will see a small message appear in the lower right corner of the screen, indicating that Windows 11 is establishing a connection with the device.

After a few seconds, you will get another message that the setup is complete. Your mouse is now ready to use.
Bluetooth mouse connection
Bluetooth mouse does not come with dongle. The only requirement is that your Windows PC must have Bluetooth connectivity.
Insert the battery into your Bluetooth mouse first and then turn the switch to the On position. Every product is different, so refer to the user manual for the type of battery required and where the power switch is located on the mouse. However, usually, the battery used will be AA type, and the power switch is usually located on the bottom of the mouse.
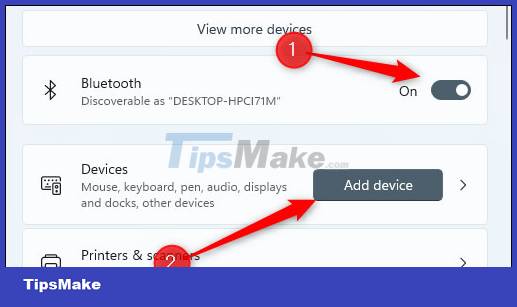
Next, you need to enable Bluetooth on your Windows 11 PC. Do this by navigating to Settings > Bluetooth & Devices, then tapping the slider next to 'Bluetooth' to toggle it to the On position.
After enabling Bluetooth, click 'Add Device'.

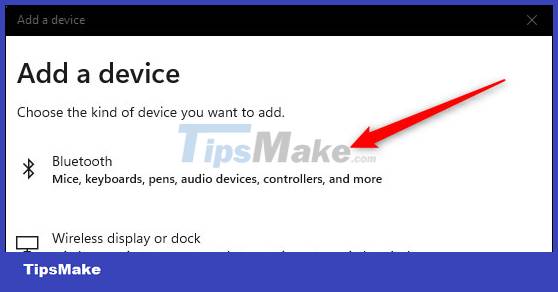
The Add Device window will appear. Click 'Bluetooth' from the list of options.

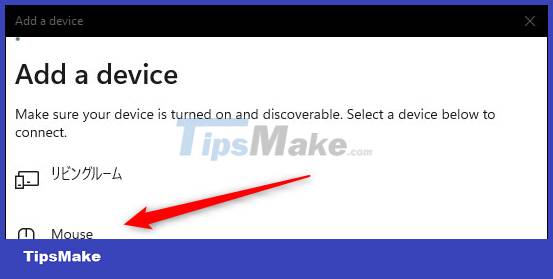
Windows 11 will start searching for nearby available devices. Click your mouse from the list that pops up.

It will take a few seconds to establish a connection before your mouse is ready to use.