How to fix mouse lag in Windows 11/10
If you find your mouse laggy, here's how to fix it in Windows 11 and 10.
1. Check for hardware problems

Try changing the USB port on the device. Sometimes, USB peripherals may not work if you have connected them via a USB hub. So connect your mouse directly to another USB port on your PC to see if it works.
If the problem persists, connect the mouse to another PC and see if it works properly. Also, be aware that low batteries on wireless devices can also cause problems.
2. Restart File Explorer

File Explorer errors can cause mouse lag when using apps or playing games in full screen mode. Fortunately, you can restart the File Explorer process to fix this in Windows 11.
Your screen may flicker momentarily when File Explorer restarts. After reboot, check if the mouse lag problem is resolved.
3. Check for conflicts with third-party software
Incompatible third-party applications can cause hardware devices connected to your PC to malfunction. One way to identify conflicts with third-party software is to perform a Clean Boot in Windows 11.
In Clean Boot mode, Windows will start with a set of basic drivers and programs needed to run the system. Perform a 'clean' boot and continue using the system to see if the mouse continues to lag.
If you identify a third-party app that's causing the problem, find and uninstall the program to fix the problem.
You can start by disabling third-party startup apps, like desktop customization tools, taskbar mods, and game overlays. Disable the apps one by one to find the problematic program and uninstall it to see if that helps fix the mouse problem.
4. Disable Mouse Pointer Trails

Mouse Pointer Trails is an accessibility feature in Windows 11. When enabled, it makes it easy to follow as you move the pointer around the screen. However, this also adds an extra effect to the pointer, making it appear to be having problems.
If you don't plan to use this feature, you can disable the movement paths to make the 'glitch' effect go away.
Step 1: Press Win + R to open Run.
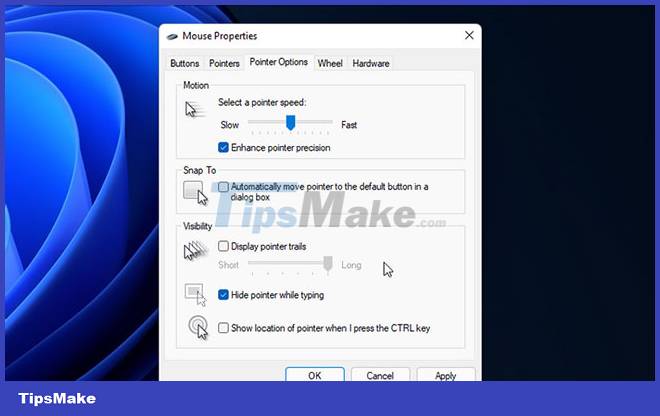
Step 2: Enter main.cpl and click OK to open Mouse Properties.
Step 3: In the properties window, open the Pointer Options tab.
Step 4: In the Visibility section, uncheck Display pointer trails.
Step 5: Click Apply > OK to save the changes. If the option cannot be unchecked, go to the next fix below.
5. Disable Transparency Effects

Faulty Nvidia graphics drivers can affect the visual effects of Windows 11, causing mouse problems. You can disable Transparency Effects in Settings to temporarily stop mouse pointer lag.
To disable Transparency Effects:
Step 1: Press Win + I to open Settings.
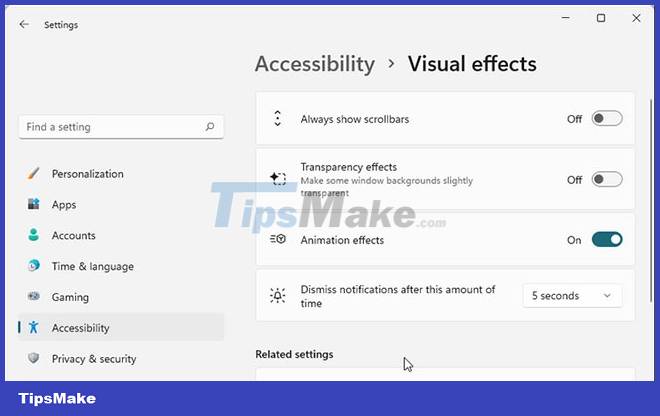
Step 2: On the left, click on the Accessibility tab.
Step 3: Next, click on Visual Effects on the right.
Step 4: Turn the toggle switch for Transparency Effects to the Off position.
Step 5: Close the Settings page and continue to use the mouse to see if the delay is reduced or not.
6. Update display driver Nvidia

If disabling Transparency Effects helps reduce lag, try updating the NVIDIA graphics driver. Newer driver versions often come with bug fixes and other improvements. Refer: How to update drivers for NVIDIA video cards for more details.
7. Uninstall NVIDIA Graphics Driver

If updating the graphics driver doesn't help, try reinstalling it. Reinstalling the graphics driver will help you remove corrupted files and perform a clean install.
To uninstall the Nvidia graphics driver:
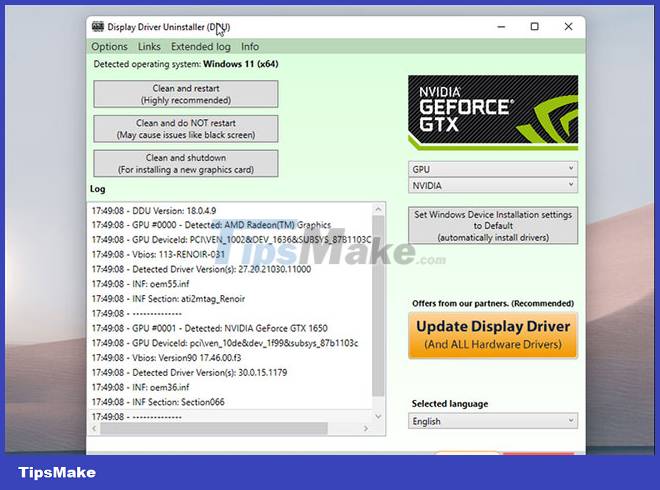
Step 1: Visit the Display Driver Uninstaller page and download the latest version of the uninstaller. This is a third-party display driver uninstaller for AMD and Nvidia graphics devices.
Step 2: Run the executable and extract the archive.
Step 3: Next, open the DDU folder and double-click Display Driver Uninstaller.exe.
Step 4: Click the drop-down menu for Select Device type and select GPU.
Step 5: Click the drop-down menu again under Select Device and select Nvidia.
Step 6: Make sure you save all work and close open applications. Then, click Clean and restart.
DDU will start to uninstall all Nvidia drivers, including GeForce Experience tools, and clean the folder entries. Meanwhile, your secondary monitor may turn white because Windows reverts to the Microsoft Basic Display Adapter driver.
After the reboot, re-enable Transparency Effects in Settings and check if the mouse lag has lessened. If that doesn't work, reinstall the GeForce Experience companion application and the necessary graphics driver Nvidia uses this tool.
8. Check Windows Updates

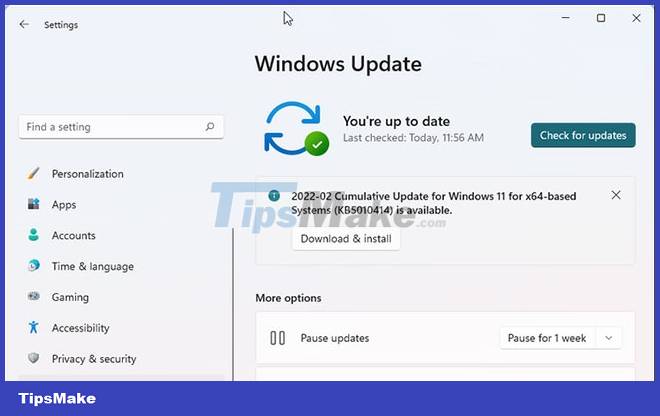
Existing Windows 11 bugs can also cause lag while moving the mouse. If it is a widespread problem, Microsoft will release a hotfix that fixes the problem. In any case, check for any Windows updates and install them to see if this helps.
Mouse lag in Windows 11 is always annoying and affects your work. While many factors can cause this problem, third-party application conflicts, system errors, and display drivers are the most common causes.
In addition, computer peripherals gradually begin to malfunction over time. So, if you just bought a mouse recently, use the included repair and warranty if you can't solve the problem yourself.