How to Connect a Wireless Mouse
This wikiHow teaches you how to connect a wireless mouse to your computer. There are two types of wireless mouse: Bluetooth, which connects directly to your computer's Bluetooth receiver, and RF wireless, which connects to a receiver that...
Table of Contents
Method 1 of 5:
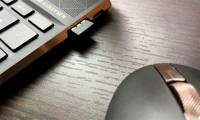
Connecting a Mouse with a Wireless Receiver
-
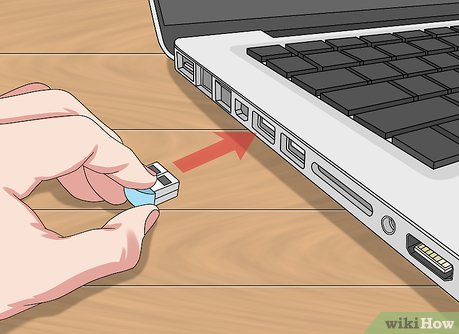 Plug in your mouse's receiver. The receiver should fit into one of your computer's USB ports. You can typically find USB ports, which are thin, rectangular slots, on the sides of laptops and on the front of desktops' CPU boxes.
- Plugging in the receiver before turning on the mouse will allow your computer to install any drivers or software needed to use the mouse.
-
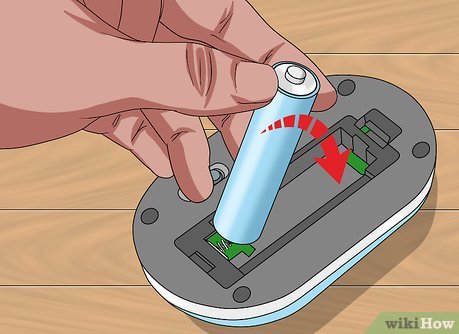 Make sure that your mouse has batteries or is charged. To do so, you'll typically flip the mouse over and remove a tray on the bottom, though some mice instead have their batteries in a compartment in the back of the mouse.
- If you haven't used the mouse in several months, consider replacing the batteries even if they were new when you inserted them.
- Some mice, such as the Apple Magic Mouse 2, require charging instead of new batteries.
-
 Turn on your mouse. This typically involves manipulating a button on the bottom of the mouse, though you may need to look for the On/Off switch on the side of the mouse.
- If you can't find the On/Off button, consult your mouse's manual.
-
 Press your mouse's "Connect" button. This button's location will vary based on your mouse's developer, but you'll usually be able to find this button either between the two mouse buttons or on the mouse's side.
- Some mice come listed as "plug and play", meaning that you don't need to manually connect them or download any software.
-
 Move your mouse around to test the connection. Once you see the cursor begin to move on-screen, your mouse is connected.
- If your mouse doesn't start moving, try turning it off and then back on. If applicable, you may also want to change the USB port into which the receiver is plugged.
Method 2 of 5:
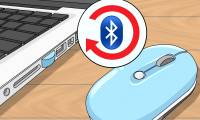
Connecting a Bluetooth Mouse on Windows 10
-
 Turn on your mouse. To do so, you'll need to locate the "On/Off" switch, which is typically found on the underside of the mouse, and slide it to the "On" position.
- If your mouse uses batteries, you should also make sure it has a fresh set. The battery compartment is also usually on the underside of the mouse.
-
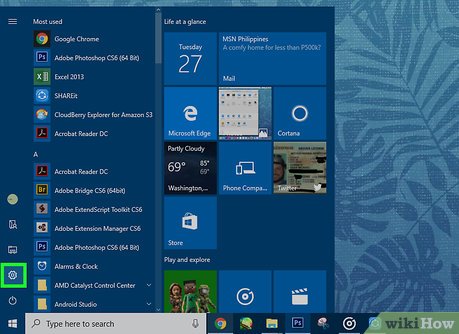
 Open the Startmenu on your computer. You can do so either by clicking the Windows icon in the bottom-left corner of the screen, or by pressing the ⊞ Win key on your computer's keyboard.
-
 Click the Settings icon. It's the icon that resembles a gear. It's near the bottom-left corner of the Start window.
-
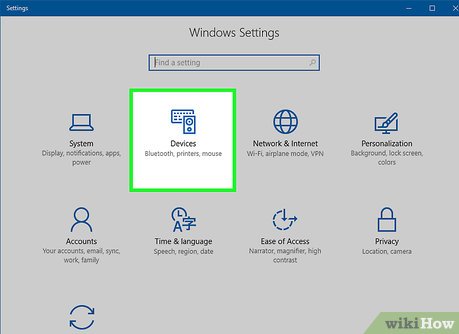 Click Devices. It's next to an icon that resembles a keyboard and an iPod. It's the second option in the Windows Settings menu.
 -
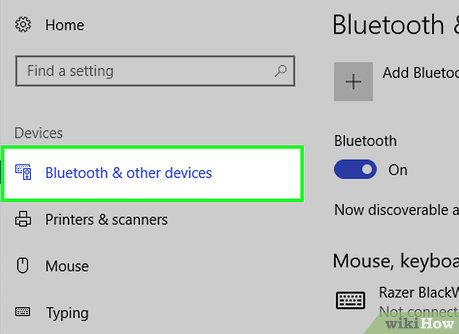 Click Bluetooth & other devices. It's the first option in the left sidebar on the page.EXPERT TIP
"Your computer will begin searching for a broadcast signal from the mouse, which allows you to pair the two devices."
Spike Baron is the Owner of Spike's Computer Repair based in Los Angeles, California. With over 25 years of working experience in the tech industry, Spike specializes in PC and Mac computer repair, used computer sales, virus removal, data recovery, and hardware and software upgrades. He has his CompTIA A+ certification for computer service technicians and is a Microsoft Certified Solutions Expert.
Spike Baron
Network Engineer & Desktop Support Spike Baron
Network Engineer & Desktop Support -
 Click the switchbeneath the "Bluetooth" heading. Doing so will enable Bluetooth on your Windows 10 computer.
- If the switch is blue, Bluetooth is already on.
-
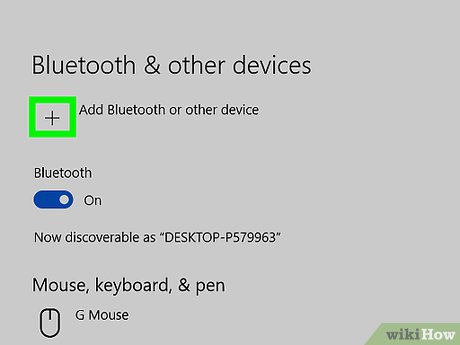 Click + Add Bluetooth or other device. It's the first button at the top of the "Bluetooth & Other Devices" menu. This displays the "Add a device" window.
 -
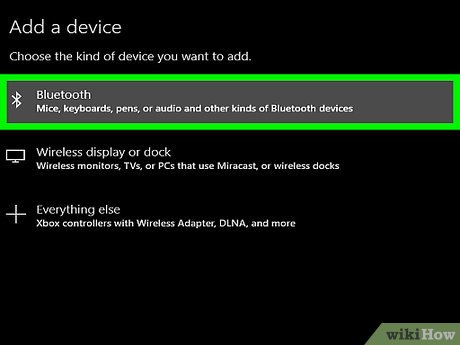 Click Bluetooth. It's the first option at the top of the "Add a device" menu. This starts scanning for nearby Bluetooth devices.
-
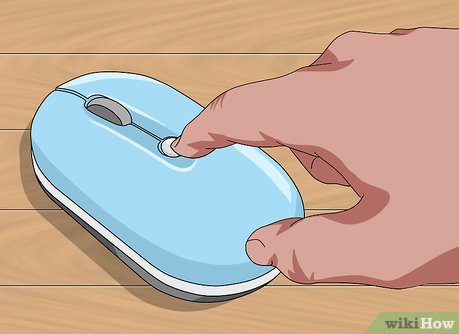 Press and hold the 'Pairing' button on your mouse. Most Bluetooth mouses have a pairing button that you must press and hold for a second to make the mouse discoverable via Bluetooth. Typically, a light will flash when the mouse is in pairing mode.
- Consult the user manual to find out if your mouse has a pairing button and where it is located.
-
 Look for the mouse's name. When Windows detects the Bluetooth mouse, it appears in the list of devices in the "Add a device" window.
- If the mouse doesn't appear, press and hold the pairing button on your mouse again. Then turn your computer's Bluetooth off and then on again.
-
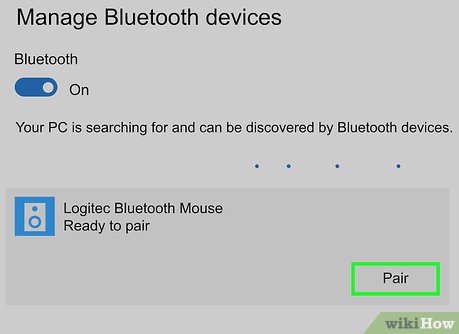 Click the mouse's name. Doing so will add your mouse to your computer's Devices list, and you'll be able to use it without re-pairing it from then on.[1]
Method 3 of 5:
Connecting a Bluetooth Mouse on Mac
-
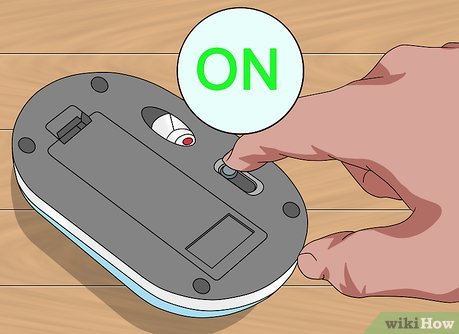
 Turn on your mouse. To do so, you'll need to locate the "On/Off" switch, which is typically found on the underside of the mouse, and slide it to the "On" position.
- If your mouse uses batteries, you should also make sure it has a fresh set. The battery compartment is also usually on the underside of the mouse.
-
 Click the Apple icon. It's the apple-shaped icon in the top-left corner of the screen. This displays the Apple menu.
- If you see the Bluetooth icon in the top-right side of the menu bar, click it instead.
-
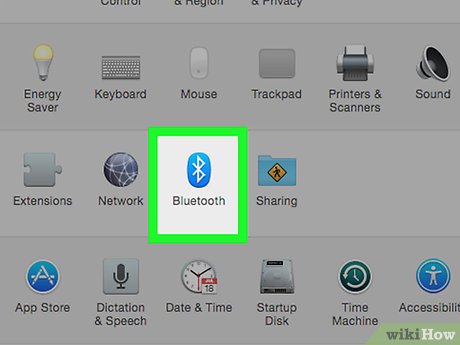
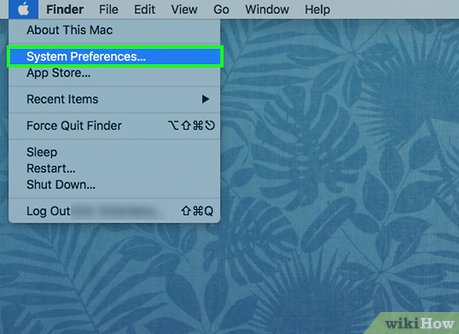 Click System Preferences. This option is toward the top of the drop-down menu.
 -
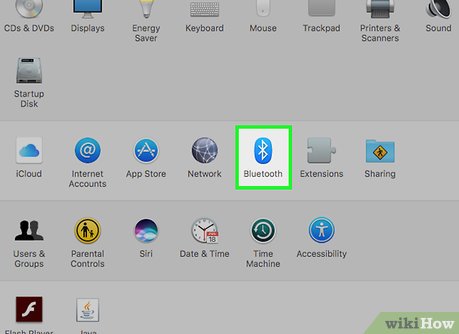 Click Bluetooth. It's a blue icon with the white Bluetooth symbol on it.
-
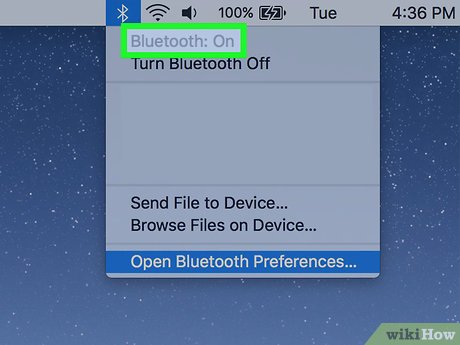
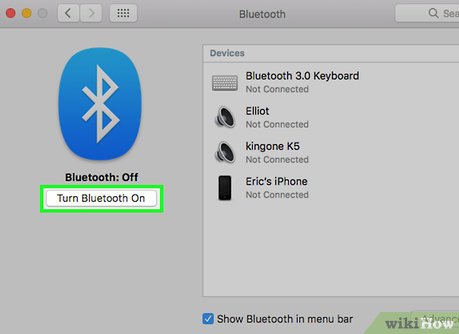 Click Turn Bluetooth On. It's on the left side of the window. Doing so will enable your Mac's Bluetooth.
- Alternatively, you can click the Bluetooth icon in the menu bar in the top-right corner. Then click Turn Bluetooth On in the Bluetooth menu.
-
 Press and hold the 'Pairing' button on your mouse. Most Bluetooth mouses have a pairing button that you must press and hold for a second to make the mouse discoverable via Bluetooth. Typically, a light will flash when the mouse is in pairing mode.
- Consult the user manual to find out if your mouse has a pairing button and where it is located.
-
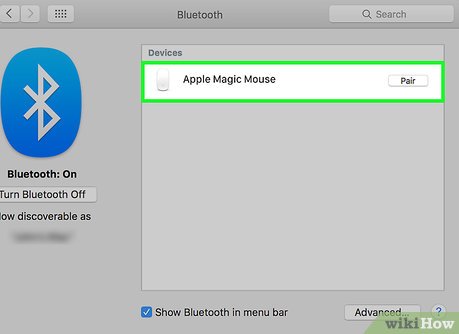 Wait for the mouse's name to appear. Your Mac constantly scans for nearby Bluetooth devices. When one is detected, it appears in the list of devices in the Bluetooth window [2]
- The Magic Mouse 2 must be turned on and then plugged into your Mac via its USB Lightning charger cable to pair.
-
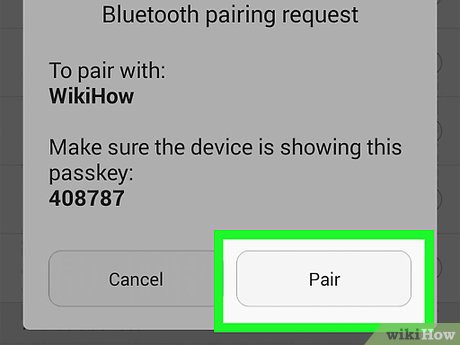
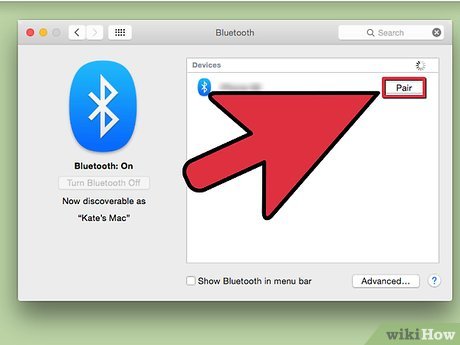 Click Connect next to the mouse's name. When you see the mouse appear in the list of Bluetooth devices, click Connect next to the devices name to pair your mouse. Once a connection is established, your mouse is ready to use.
Method 4 of 5:
Connecting a Bluetooth Mouse on Chromebook
-
 Turn on your mouse. To do so, you'll need to locate the "On/Off" switch, which is typically found on the underside of the mouse, and slide it to the "On" position.
- If your mouse uses batteries, you should also make sure it has a fresh set. The battery compartment is also usually on the underside of the mouse.
-
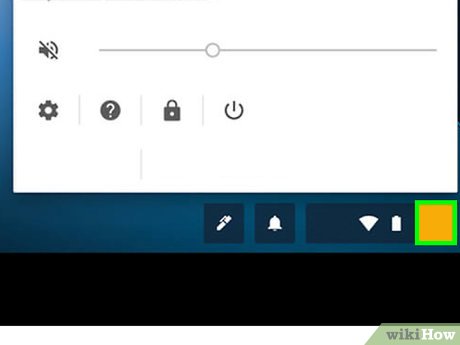 Click the time on your Chromebook. It's in the lower-right corner of the screen.
 -
 Click the Bluetoothicon. It's in the menu that appears when you click on the time in the lower-right corner of the screen. [3]
-
 Click Enable Bluetooth. If Bluetooth is not already turned on, click Enable Bluetooth at the top of the menu. This turns Bluetooth on and starts scanning for nearby Bluetooth devices.
 -
 Press and hold the 'Pairing' button on your mouse. Most Bluetooth mouses have a pairing button that you must press and hold for a second to make the mouse discoverable via Bluetooth. Typically, a light will flash when the mouse is in pairing mode.
- Consult the user manual to find out if your mouse has a pairing button and where it is located.
-
 Click the mouse's name in the Bluetooth menu. This pairs your Chromebook with the mouse. Once a connection is made, your Bluetooth mouse is ready to use. [4]
Method 5 of 5:
Connecting a Bluetooth Mouse on Windows 7
-
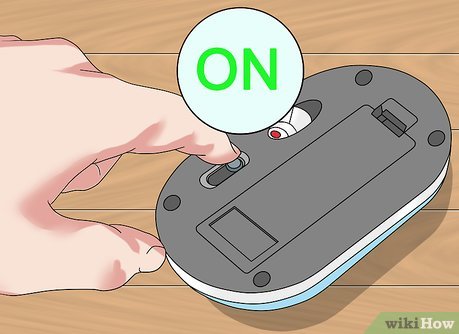 Turn on your mouse. To do so, you'll need to locate the "On/Off" switch, which is typically found on the underside of the mouse, and slide it to the "On" position.
- If your mouse uses batteries, you should also make sure it has a fresh set. The battery compartment is also usually on the underside of the mouse.
-
 Open the Start menu. You can do so either by clicking the Windows icon in the bottom-left corner of the screen, or you can press the ⊞ Win key on your computer's keyboard.
 -
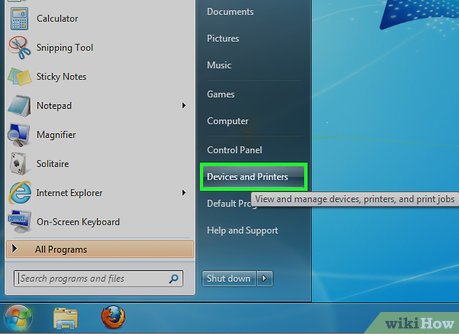 Click Devices and Printers. This option should be on the right side of the Start window, just below the Control Panel option.
- If you don't see this option, type devices and printers into the "Search" field at the bottom of the Start window, then click Devices and Printers when it appears.
-
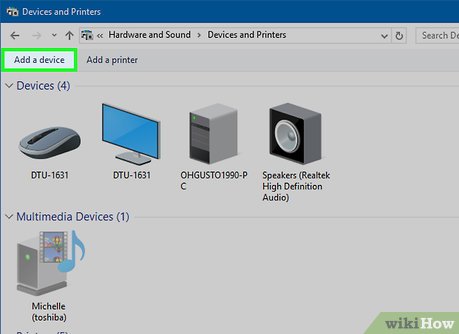 Click Add a device. It's in the top-left side of the Devices and Printers window.
 -
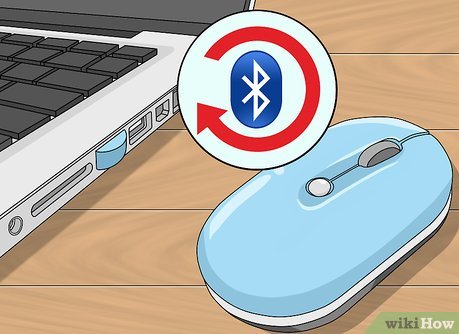
 Press and hold the 'Pairing' button on your mouse. Most Bluetooth mouses have a pairing button that you must press and hold for a second to make the mouse discoverable via Bluetooth. Typically, a light will flash when the mouse is in pairing mode.
- Consult the user manual to find out if your mouse has a pairing button and where it is located.
-
 Click your mouse's name. It should appear in the window here.
- If you don't see your mouse's name, your Windows 7 computer might not support Bluetooth. You can fix this by purchasing a Bluetooth adapter.
-
 Click Next. This option is in the lower-right corner of the window.
 -
 Wait for your mouse to finish connecting. This process may take a few minutes. Once it completes, you should be able to move the on-screen cursor with your mouse.
Was this article helpful?
Your feedback helps us improve.
Related Articles
 2 ways to connect wireless mouse to Windows or Mac laptop3 minutes read
 Top best wireless mouse 20248 minutes read
 How to connect a wireless mouse to a computer3 minutes read
 How to Connect a Wireless Mouse11 minutes read
 How to connect a wireless mouse on Windows 113 minutes read
 Can a wireless mouse without a USB head be used?10 minutes read
Reader Comments 0
Sign in with email or Google to join the discussion.