How to Connect a Wii Remote
To use the Wii Remote (also known as Wiimote) and play on the Wii or Wii U, you need to sync the controller with the console first. This is useful if someone comes to your house and brings their Wii Remote. You can also sync the Wii Remote with your computer for use on the Dolphin emulator.
Table of Contents
Sync with Wii
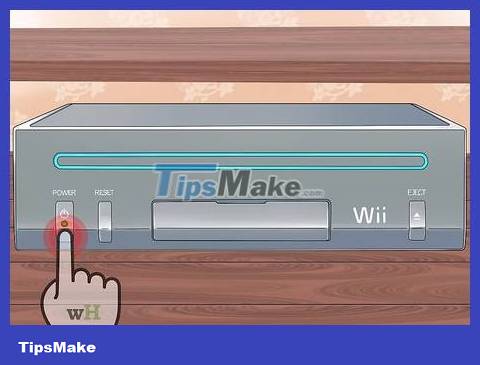
Turn on the Wii and check to make sure it's not running any programs.
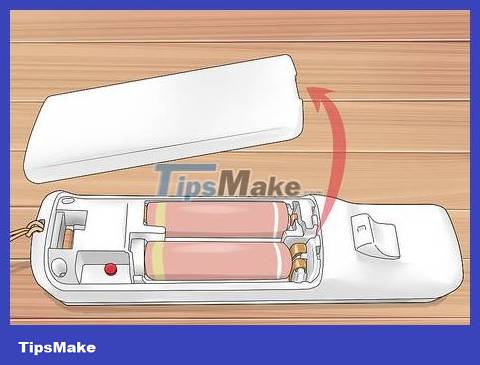
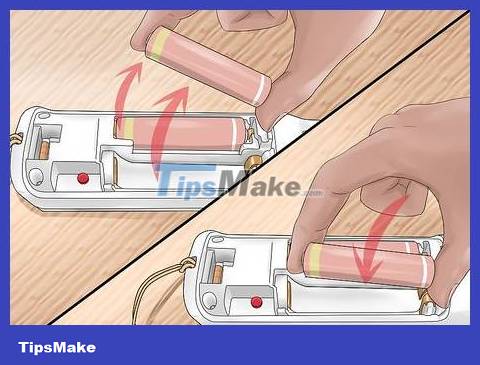
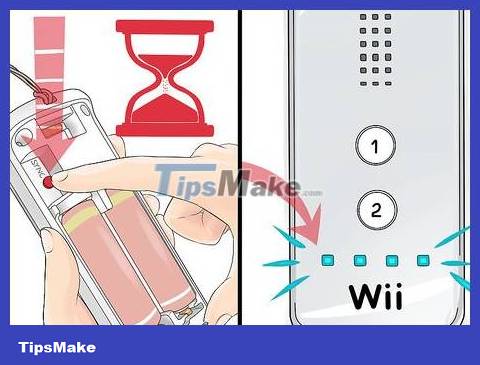
Remove the back cover from the back of the Wii Remote.
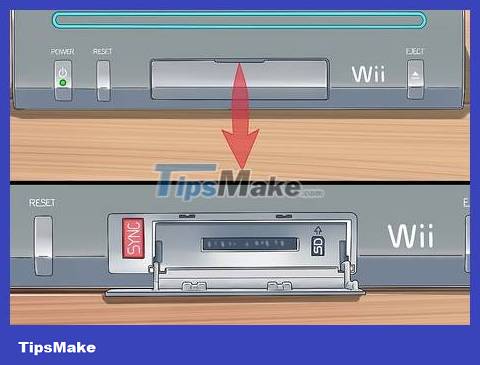
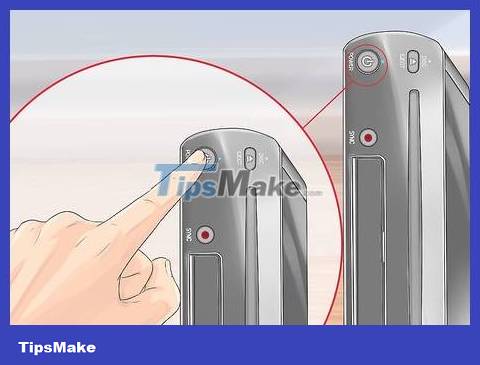
Open the SD card cover on the front of the Wii. If you use a Wii Mini, the Sync button can be found on the left side of the console, near the battery compartment.
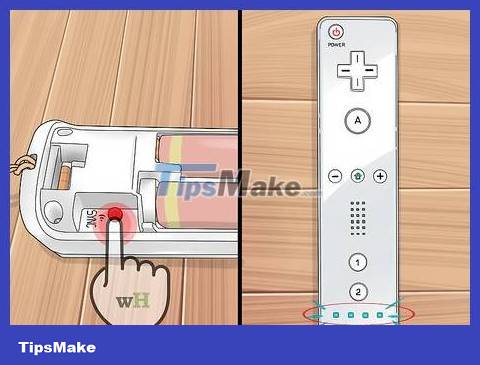
Press and release the Sync button on the back of the Wii Remote. This button is located below the battery compartment. The LED located on the Wii Remote will begin to flash.

Quickly press and release the Sync button on the Wii while the light on the Wii Remote flashes.

Wait for the light to stop flashing. Once the light on the Wii Remote stops flashing, it means the device has been successfully synchronized.
Troubleshoot
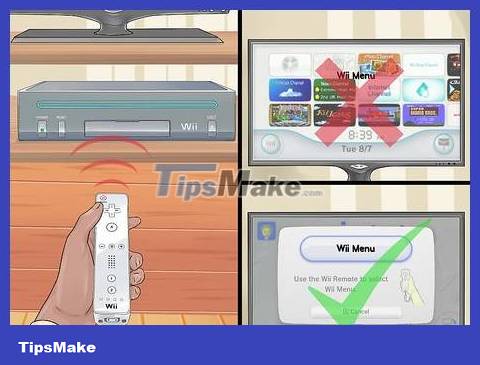
Make sure there are no programs running. The Wii may not be able to sync if a certain game is using the channel. You need to make sure you have the Wii's main menu open when syncing.
Remove the game disc (if any) from the system if you still cannot sync.
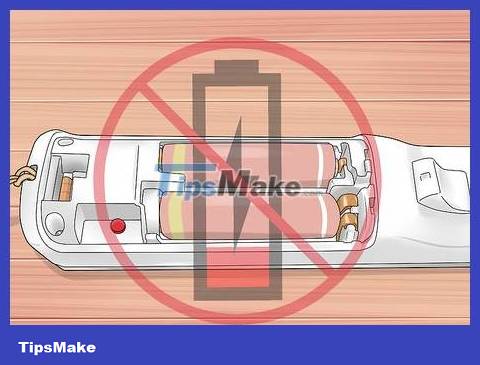
You need to make sure that the Wii Remote has enough battery. The Wii Remote uses AA batteries, so the device cannot sync without enough power. Try changing another battery to see if the problem is fixed.
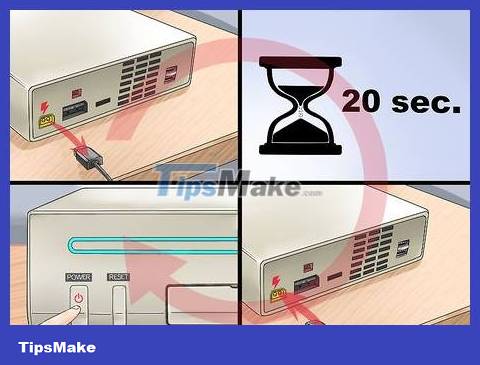
Unplug the power cable from the port on the back of the Wii and wait about 20 seconds. Then, plug the cable back in and turn on the device. This process will reset the Wii and may fix the problem.
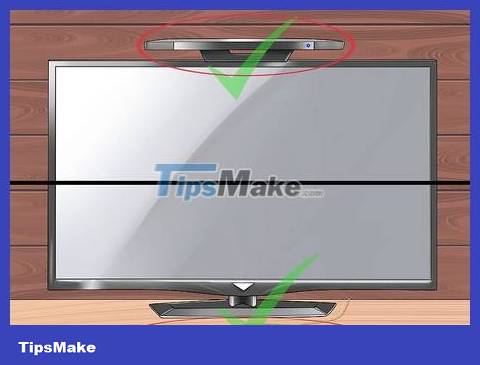
The sensor bar must be placed above or below the TV. The Sensor Bar is the means by which the Wii Remote points to content on the screen. This device works best when placed above or below the TV.
Reinstall the Wii Remote by taking out the battery, waiting a minute, then inserting the battery and resynchronizing.
Sync with Wii U
Turn on the Wii U and check to see if the main menu is showing.
If you try to launch Wii Mode without syncing with the Wii Remote, the system will prompt you to sync.
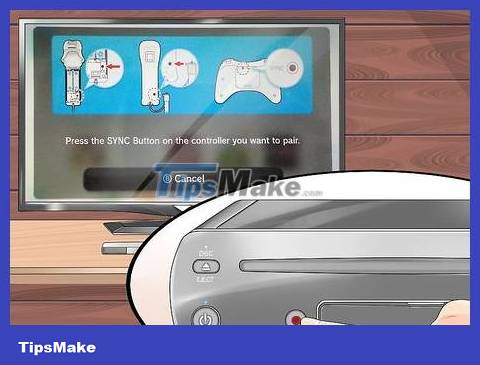
Press and hold the Sync button on the front of the Wii U until the Sync screen appears.
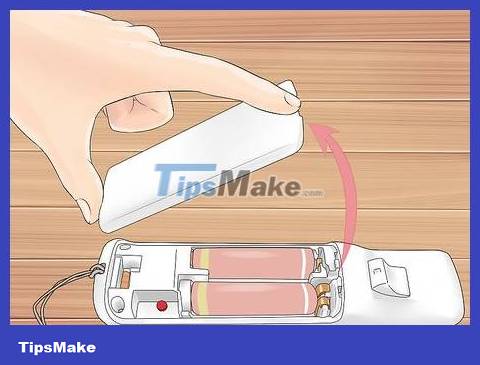
Remove the Wii Remote back cover.
Press the Sync button on the back of the Wii Remote. This button is located below the battery compartment. The LED light on the Wii Remote will start flashing and then turn solid, the connection has now been established.
Troubleshoot
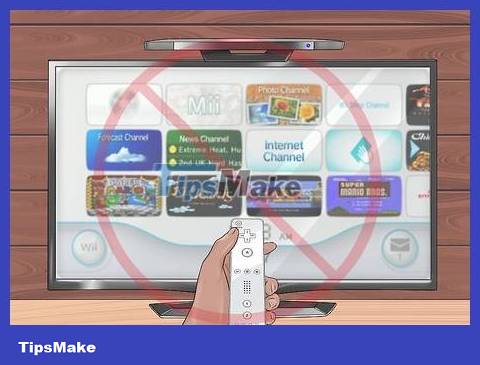
You need to make sure there are no programs running. Wii U will not be able to sync if there is a game playing on the channel. The Wii U main menu must be visible if you want to proceed with synchronization.
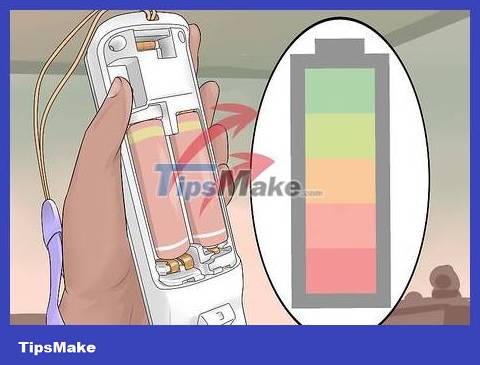
You need to make sure that the Wii Remote has enough battery. The Wii Remote uses AA batteries, so the device cannot sync without enough power. Try changing another battery to see if the problem is fixed.
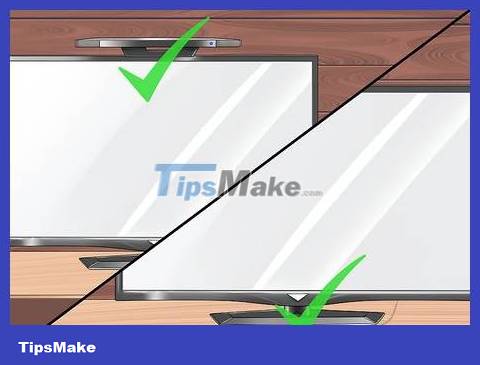
The sensor bar must be placed above or below the TV. The Sensor Bar is the means by which the Wii Remote points to content on the screen. This device works best when placed above or below the TV.
Sync with Windows PC
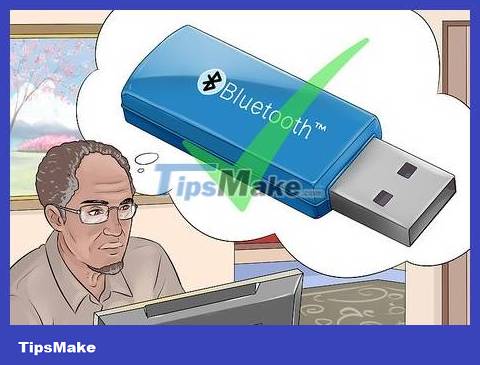
Use USB Bluetooth (or Bluetooth dongle) if your computer does not have a built-in Bluetooth adapter. The Wii Remote can be connected to a computer via Bluetooth and used on the Dolphin emulator (or other program).
You will need to re-pair the Wii Remote each time your computer restarts.
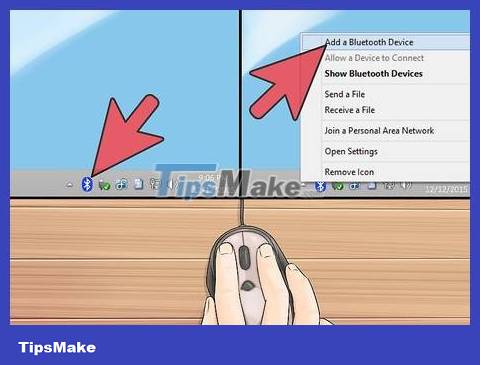
Right-click the Bluetooth icon in the system tray and select "Add a device".
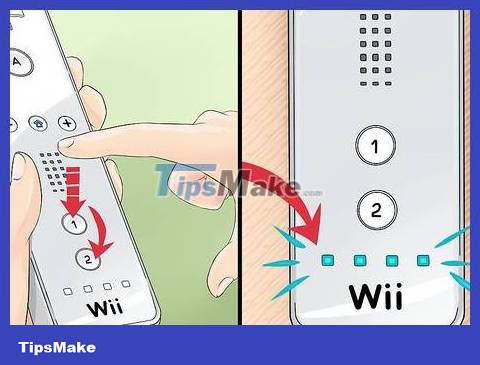
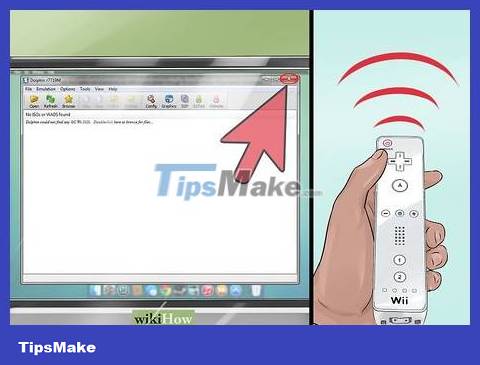
Press the "1" and "2" buttons on the Wii Remote one at a time so the lights start flashing.
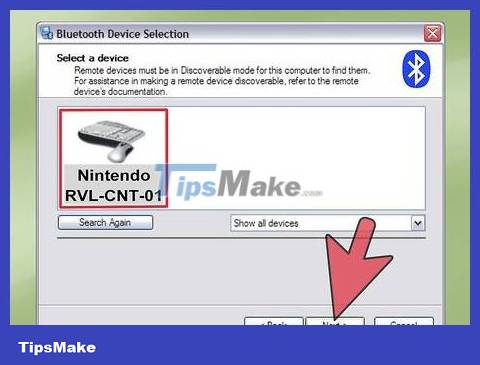
Select "Nintendo RVL-CNT-01" from the list of devices and click . Next .
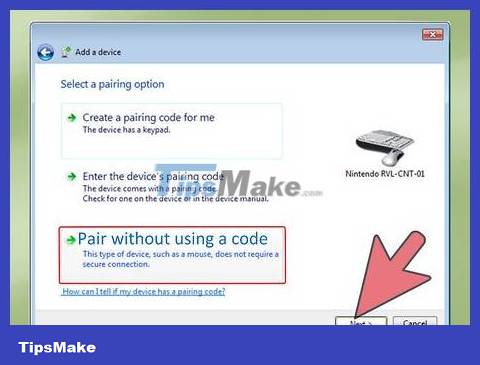
Select "Pair without using a code" and click . Next .
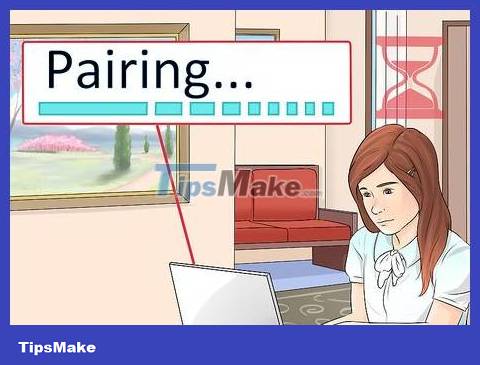
Wait for the Wii Remote to pair with the computer.
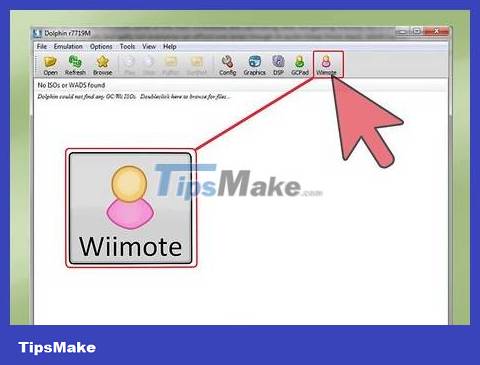
Open Dolphin and click the "Wiimote" button.
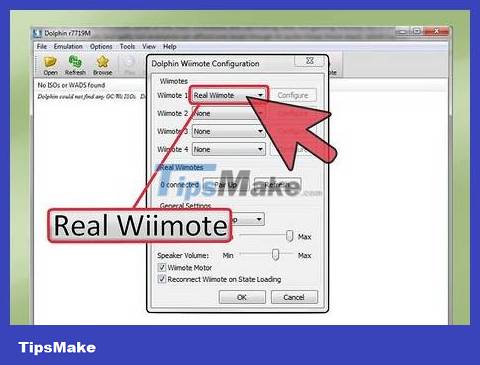
Select "Real Wiimote" from the "Input Source" menu. Thus, you will be able to use the Wii Remote when playing games on the emulator.

Install the sensor bar to the computer. Use a battery-powered sensor bar or look online to make your own device.
Troubleshoot
Close Dolphin before attempting to sync with the Wii Remote. When you sync a controller with an open Dolphin, it may not appear in the controller selection menu. Close Dolphin, unpair the Wii Remote by right-clicking the Bluetooth menu and selecting "Remove device," then try pairing again.
Was this article helpful?
Your feedback helps us improve.
Related Articles
 How to Connect New Remote to Firestick4 minutes read
 Configuration steps for multiple Users to remotely connect to Windows Server 2016 using Remote Desktop4 minutes read
 How to Use Remote Desktop on Windows 86 minutes read
 Manual Samsung TV remote most detailed10 minutes read
 How to connect Remote Desktop without password in Windows 117 minutes read
 Instructions for activating and using Remote Desktop on Windows 10 computers4 minutes read
Reader Comments 0
Sign in with email or Google to join the discussion.