How to Enable Remote Access on Windows
This wikiHow teaches you how to turn on Remote Desktop in Windows 10, a service that allows you or other people to connect to your PC remotely. You'll also learn how to enable Remote Assistance, a service that helps technical support....
Method 1 of 2:
Enabling Remote Desktop
-
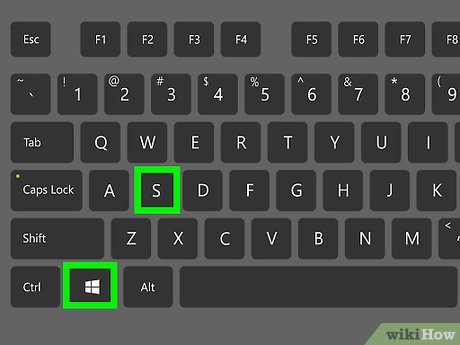 Press ⊞ Win+S. This opens the search bar. Use this method to set up your computer to allow remote connections from other Windows devices, as well as supported Androids, iPhones, and iPads.[1]
 -
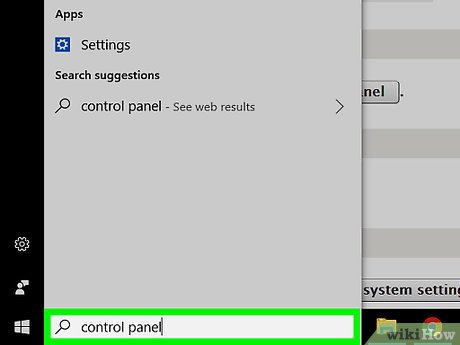 Type control panel. A list of suggested results will appear.
 -
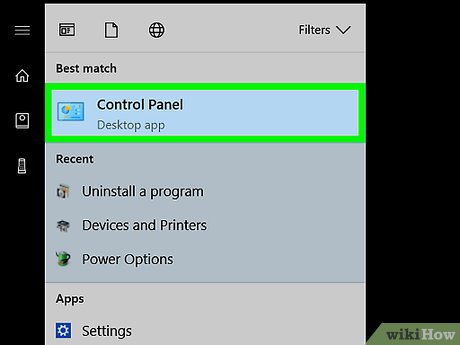 Click Control Panel.
 -
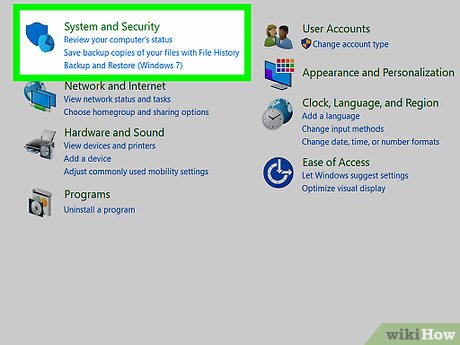 Click System.
 -
 Click Advanced system settings. It's in the left column.
 -
 Click the Remote tab. It's the final tab at the top of the window.
 -
 Select Allow remote connections to this computer.
 -
 Click OK. Remote connections are now enabled, but there are still a few additional steps to take to ensure it works correctly.[2]
 -
 Click themenu. It's at the bottom-left corner of the screen.
-
 ClickSettings.
-
 Click System.
 -
 Click Power & Sleep. It's in the left column.
 -
 Select Never from both 'Sleep' drop-down menus. This ensures that you won't lose your remote connection once connected. Now that you've disabled Sleep, other people with accounts on your PC can now connect using Remote Desktop.
Method 2 of 2:
Allowing Remote Assistance for Technical Support
-
 Press ⊞ Win+S. This opens the search bar.
 -
 Type remote access. A list of suggestions will appear.
 -
 Click Allow remote access to your computer. This opens the System Properties control panel.
 -
 Check the box under 'Remote Assistance.' As long as this box is checked, qualified support professionals can connect to your PC (with your permission) to help you solve problems.[3]
- If your PC is set to hibernate, you may have to click OK.
-
 Click Apply.
 -
 Click OK. Remote Assistance is now enabled on your computer. Your support representative will give you any additional instructions necessary to complete the process.