Table of Contents
The process for change iPhone audio editing interface is straightforward once you know where to find the right controls. The steps below explain what to do and what to check.
Clicking on the volume up and down keys on the iPhone will display the audio editing interface right in the middle of the screen. This interface will hide part of the screen content and users can collapse it with FlashyHUD tweak. This tweak supports changing the default interface to adjust the volume of iPhone installed iOS 11 and above has been jailbroken. When the sound bar is changed the display position and more compacted, the color of the tuning interface is also changed depending on users. The customizable section provides a full range of options for changing position and color for the audio editing interface. The steps below explain how to adjust the volume bar on iPhone with FlashyHUD tweak.
- Common iPhone audio errors and remedies
- This is a bug fix that cannot increase the ringtone volume on iPhone
- How to change iPhone screen lock sound
- How to set the default volume level for each application
Instructions for installing FlashyHUD tweaks
Step 1:
Users access Cydia and then access the Nepeta source to search for FlashyHUD tweaks, or click the link below to install now.
- Https://repo. nepeta. me/depiction/me. nepeta. flashyhud


Step 2:
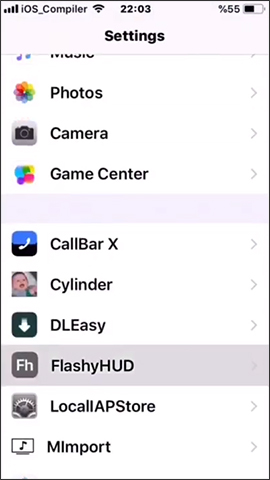
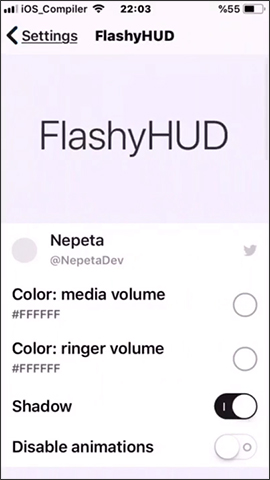
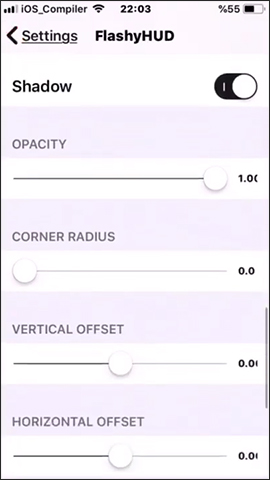
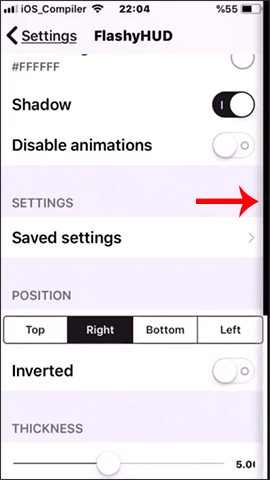
After installation is complete, you go to Settings and then click FlashyHUD to change settings. First we can then adjust some content including:
- Color: media volume: music volume color mode.
- Color: ringer volume: color ring tone mode.
- Shadow: shadow mode.
- Disable animations: capture / disable animations.
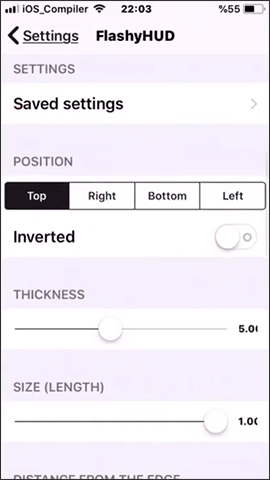
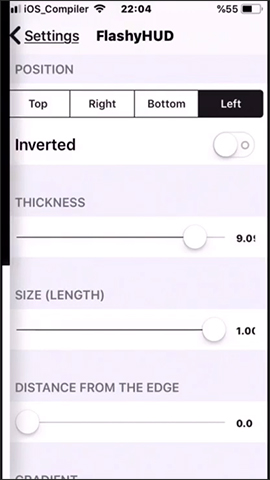
- Position: Select the position of the volume control bar at the top, right, bottom or left.
- Inverted: color changing mode.
- Thickness: adjust the thickness of the volume control bar.
- Size: resize the length of the volume adjustment bar.
Next, there will be some other options.
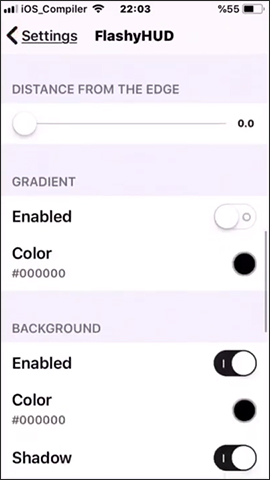
- Distance from the edge: adjust the distance of the volume bar with the edge of the screen.
- Gradient: adjust the gradient color.
- Background: set the background color.
- Shadow: shadow mode for the background.
- Opacity: adjust the volume bar opacity.
- Radius corner: adjust volume bar volume.
- Vertical offset: adjust the vertical volume bar.
- Horizontal offset: adjust the volume bar horizontally.
Step 3:
Users adjust items for the volume bar. For example, selecting the location for the volume bar on the right will display the bar on the right, adjusting the thickness for the volume bar or the distance to the edge of the screen.
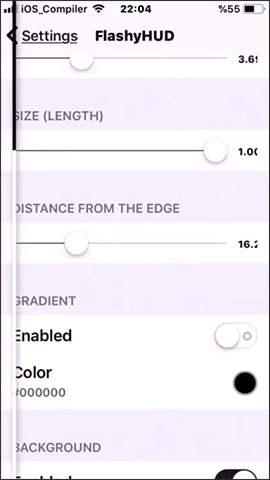
The color palette for the volume bar is also rich. When selecting a color, the volume bar also changes color according to the selected color.
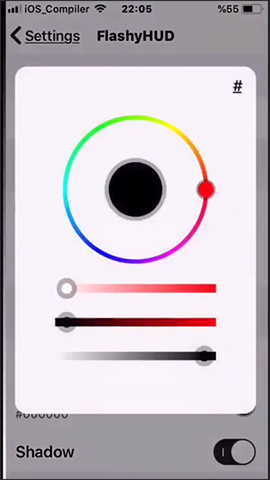
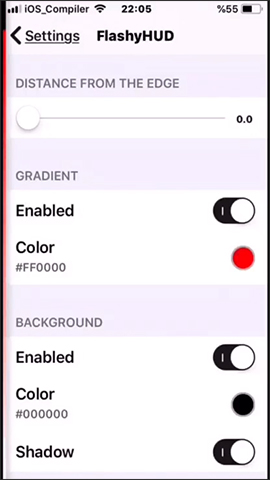
Tweaking FlashyHUD brings a much neater volume adjustment interface when switching from the center of the screen to the sides of the screen. Besides, users are also provided with many other editing options for the audio editing interface on the iPhone / iPad screen.
I wish you all success!
FAQ
What should I prepare before I change iPhone audio editing interface?
Review the requirements in the guide, confirm that your device or software is compatible, and save important work before changing settings related to change iPhone audio editing interface.
Why might change iPhone audio editing interface not work as expected?
The most common causes are incompatible versions, missing permissions, incorrect settings, or an interrupted internet connection. Recheck each step and restart the app or device when appropriate.
Can beginners follow these change iPhone audio editing interface steps?
Yes. Follow the steps in order, avoid skipping confirmation screens, and compare your interface with the screenshots because labels may differ slightly between versions.
Related Articles
 What Is Audio Interface: 9 Best USB Audio Interface8 minutes read
 Turn Every iPhone Interface into iOS 6 Without Jailbreak5 minutes read
 How to Customize the Volume Control on iPhone5 minutes read
 How to Change iOS Interface Without Jailbreak5 minutes read
 How to Change the Call Management Interface on iPhone7 minutes read
 5 Free Audio Editing Software: Complete Guide6 minutes read
Reader Comments 0
Sign in with email or Google to join the discussion.